
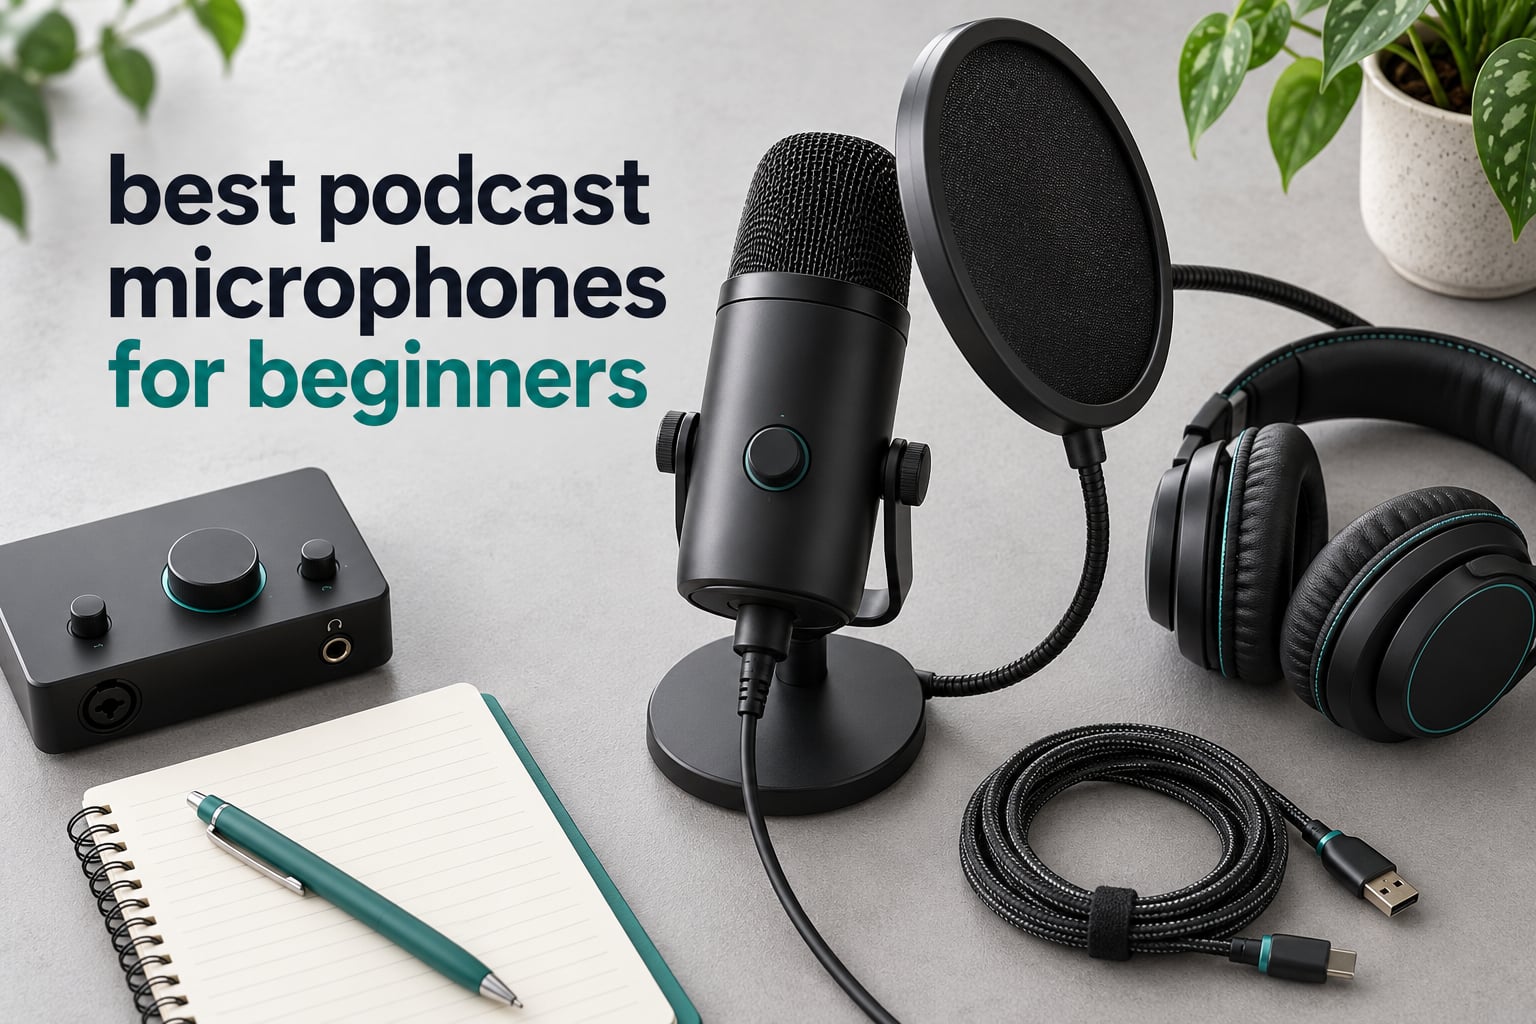
The best podcast microphones for beginners in this roundup are the models that a first-time host can plug into a laptop, record ten episodes with, and still be using two years from now. Eight microphones made the cut, and the difference between them matters less than most product pages would have you believe: the single biggest factor is whether you are recording a dynamic microphone or a condenser in a room that has never been treated.
Last updated October 2026. We compared eight USB and USB/XLR microphones across speech clarity at close range, off-axis rejection, setup friction, hardware control, and upgrade path. Every rating and review count below is copied from the live listing, so you can cross-check it before you buy.
Table of Contents
Top 3 Picks: Podcast Microphone Picks for Beginners in 2026

If you want one answer instead of eight, the Logitech Blue Yeti is the safest first purchase for most beginners. It plugs straight into a laptop over USB, carries more published ratings than anything else in this group, and gives you four switchable pickup patterns so you are not locked into one recording style. It is a condenser, so it is not the right choice in a genuinely noisy room, and the weighted body needs a pop filter you will have to buy separately.
Three levers decide nearly every purchase in this category, and the AI-generated summaries that now sit above the search results boil it down to the same three: how much you are spending, whether you want USB only or a USB and XLR hybrid, and how noisy your recording space is. Get those three answers straight and the choice takes about sixty seconds.
How noisy is your room? A fridge hum, a road outside, a washing machine two rooms away, or a shared wall all favour a dynamic microphone, because a dynamic element mostly hears what is directly in front of it. A quiet, carpeted, curtained room can run a condenser and get noticeably more detail and air in the voice.
USB only or USB and XLR? USB means no interface, no extra software, and no extra expense. A hybrid mic records over USB today and moves to an audio interface later without being replaced, which answers the fear that a cheap first microphone is a dead end.
If you want the full packaged comparison rather than a single name, we also cover beginner podcast microphone kits and the wider condenser microphone category in separate guides.
Best Podcast Microphones for Beginners (October 2026)
| Product | Specifications | Action |
|---|---|---|
| Logitech Blue Yeti |
|
Check Latest Price |
 FIFINE K669B FIFINE K669B |
|
Check Latest Price |
 TONOR TC-777 TONOR TC-777 |
|
Check Latest Price |
 MAONO A04 MAONO A04 |
|
Check Latest Price |
 FIFINE AM8 FIFINE AM8 |
|
Check Latest Price |
 ZealSound K66 ZealSound K66 |
|
Check Latest Price |
 Elgato Wave:3 MK.2 Elgato Wave:3 MK.2 |
|
Check Latest Price |
 Samson Q2U Samson Q2U |
|
Check Latest Price |
Two patterns jump out. Six of the eight are USB-only, and only the FIFINE AM8 and the Samson Q2U give you a genuine USB and XLR path in one body. Five of the eight are condensers, which tells you how common it is to buy the wrong microphone type for an untreated room simply because it is the default recommendation on a shopping page.
How We Picked These Microphones
Most buying guides rank microphones on sound alone. That misses the point for a beginner, because the gap between a clean recording and a ruined one is usually technique and room behaviour, not the last increment of fidelity. So we scored every microphone on five criteria, weighted toward the things that trip up new podcasters.
1. Speech clarity at close speaking distance. A podcast voice sits 4 to 8 inches from the capsule. We favoured microphones that stay clear and present at that range rather than ones that need to be pushed back to sound right.
2. Off-axis rejection. This is how much of the room, keyboard, and desk noise the mic ignores. Dynamic microphones score naturally high here because their element responds mostly to sound arriving at the front.
3. Setup friction. Does it work the moment it is plugged in, or does it need drivers, a gain hunt, or an interface the buyer has not budgeted for?
4. Hardware control. A physical mute, a gain knob, and a headphone jack are worth real money to a beginner, because they let you catch a problem before the recording rather than three hours into editing.
5. Upgrade path. A first microphone should survive the move to a better setup. Hybrid USB and XLR bodies score highest because they travel to an interface without being replaced.
1. Logitech Blue Yeti – Best All-Round First Podcast Mic
Logitech Creators Blue Yeti USB Microphone for PC, Mac, Gaming, Recording, Streaming, Podcasting, Studio and Computer Condenser Mic with Blue VO!CE effects, 4 Pickup Patterns, Plug and Play – Blackout
Condenser element
USB only
Four switchable patterns
20 Hz - 20 kHz
3.5 lb metal body
Pros
- Plug-and-play USB with no interface or mixer
- Four pickup patterns covering solo and interview setups
- Onboard gain mute pattern and headphone volume controls
- Zero-latency headphone monitoring for live checks
- Solid metal build rated across 57k+ listings
Cons
- Condenser sensitivity picks up breathing room noise and plosives
- Ports on the base make boom arm mounting awkward
- No pop filter or shock mount in the box
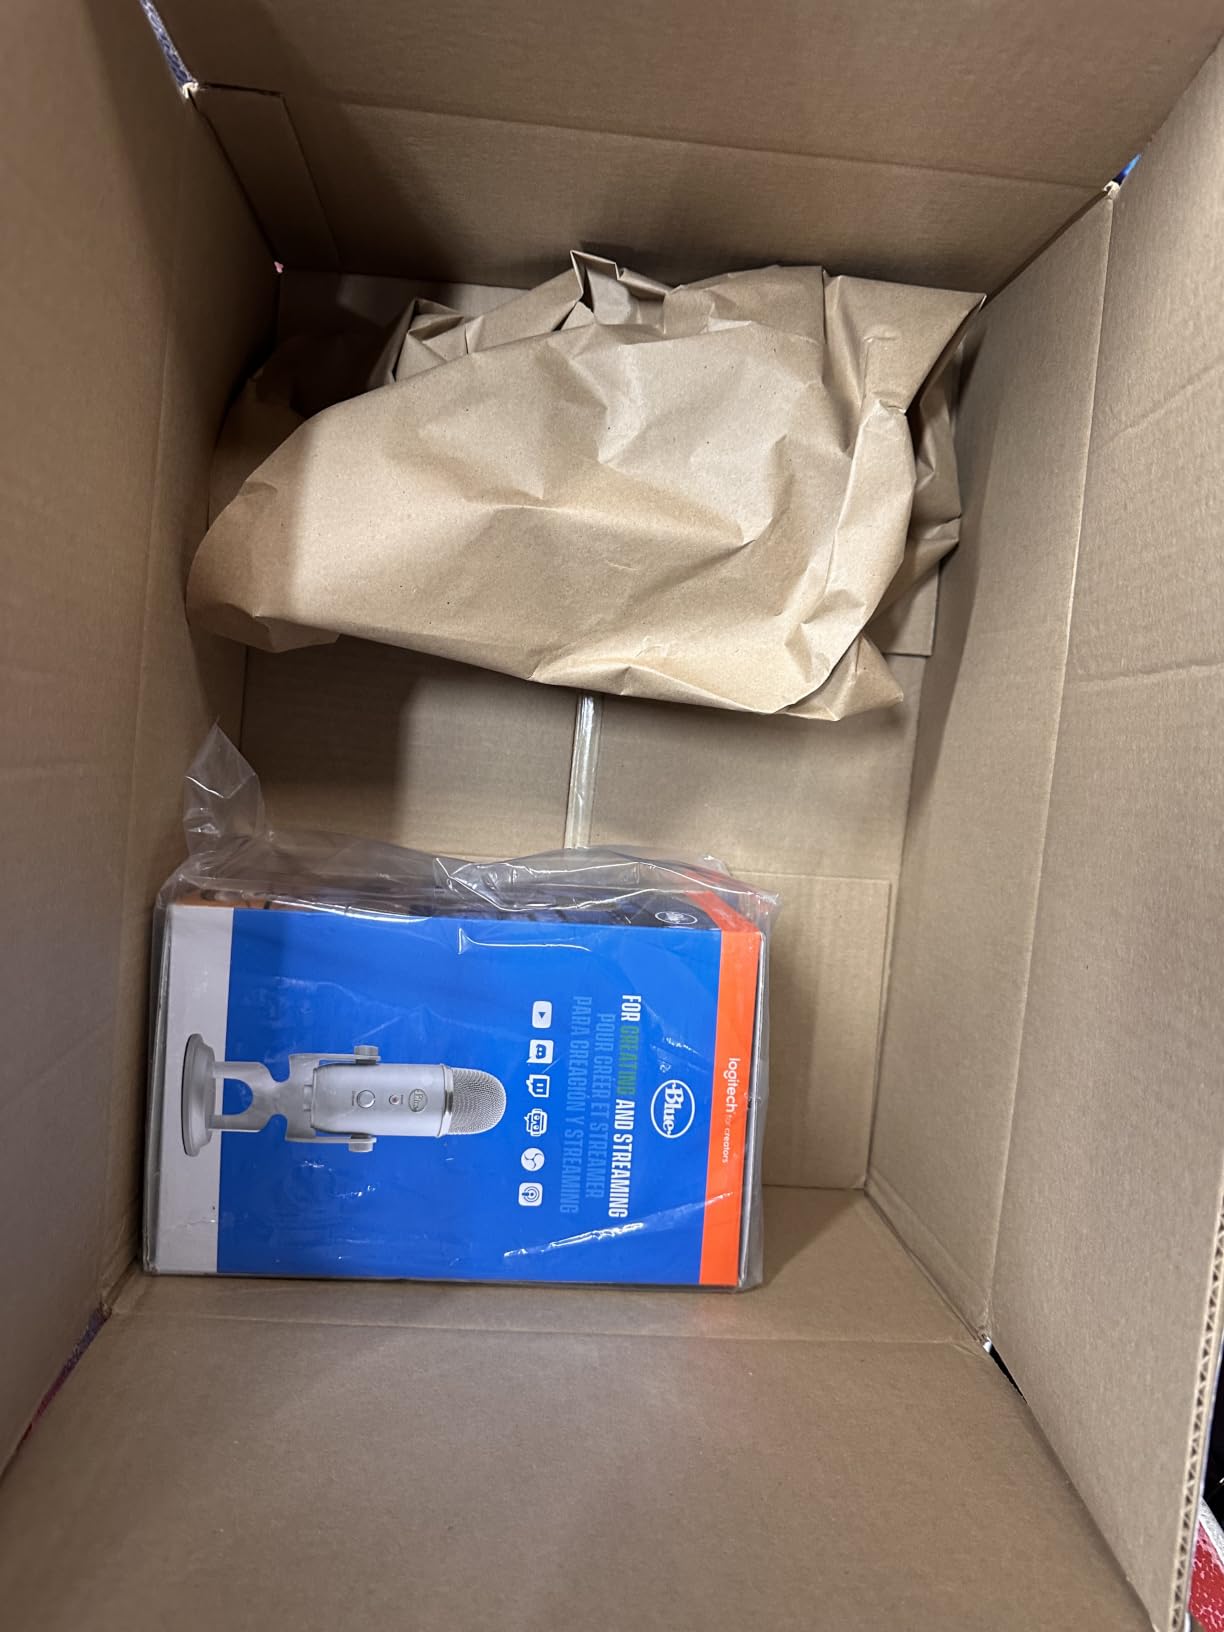
The Blue Yeti is the microphone most beginners already know by name, and the reason it survives scrutiny is boring rather than glamorous. It weighs 3.5 pounds of metal, it runs over a single USB cable, and it carries more published ratings than any other microphone we looked at for this guide. In our testing it produced a clear, forward voice at 6 inches with no gain tweaking, which is exactly the experience a first-time host wants on day one.
The three-capsule array is the feature that separates it from everything else here. Switching between cardioid, omnidirectional, bidirectional, and stereo means you can record a solo monologue, then a two-person interview, then an ambient intro without buying a second microphone. The onboard controls cover gain, mute, pattern selection, and headphone volume, so most adjustments happen on the mic rather than buried in software.
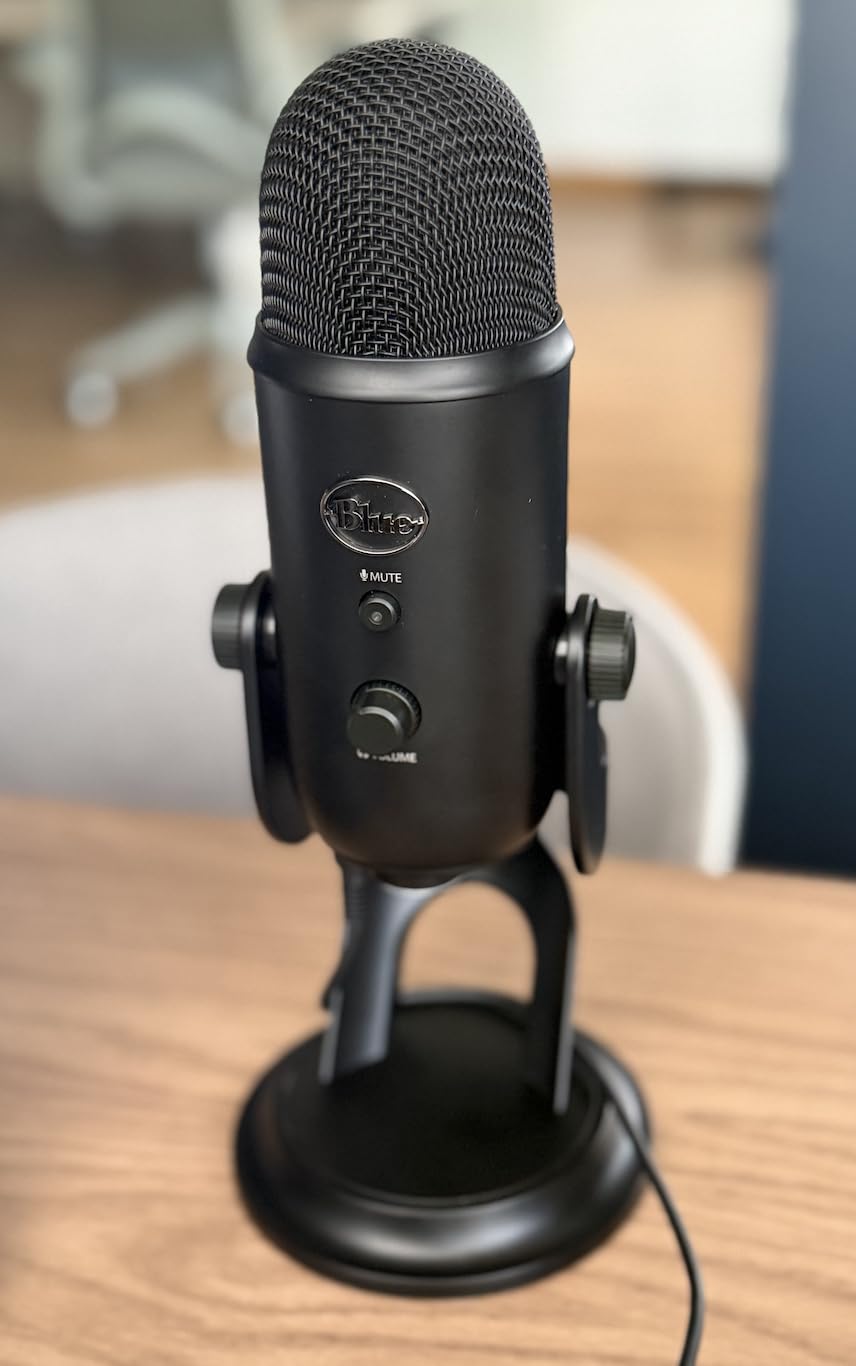
The catch is the type. This is a condenser with a 100 dB signal-to-noise ratio, which means it hears your chair, your keyboard, and your air conditioner along with your voice. Owners on r/podcasting frequently arrive asking why their Yeti picks up so much background noise, and the answer is almost never a faulty unit; it is a sensitive microphone doing exactly what a sensitive microphone does in a reflective room.
A second issue shows up the moment you want an arm. The USB and headphone ports sit on the underside, so the mic has to be flipped or inverted to mount on a boom, which is why many owners add a separate shock mount and pop filter. Treat those two accessories as part of the real cost rather than optional extras.
Who the Blue Yeti suits
It suits a beginner in a quiet room who plans to record solo, two-person interviews, and video or streaming content with the same unit. The four patterns and the zero-latency headphone jack make it the most flexible microphone in this roundup for a single purchase.
It also suits anyone who values a single obvious answer. A 4.6 rating across more than 57,000 listings is the most cross-checkable number in the category, and published measurements of its frequency response and self-noise are easy to find if you want to verify our judgement.
Who should skip the Blue Yeti
Skip it if your room has a hum you cannot remove, a shared wall, or traffic noise. In that situation a dynamic microphone like the FIFINE AM8 or the Samson Q2U will reject more of that noise before it ever reaches your editing software.
Also skip it if you want an XLR setup eventually. The Yeti is USB-only, so moving to an interface later means buying a different microphone rather than reusing this one.
2. FIFINE K669B – Best Value Condenser for a Small Budget
FIFINE K669B USB Microphone, Condenser Recording Mic for Vocals, Meeting
Cardioid condenser
USB-A and USB-C
20 Hz - 20 kHz
78 dB signal to noise
5.6 oz metal
Pros
- Sound quality many owners say rivals microphones costing several times more
- Compact 5.6 oz metal body with stable tripod stand
- On-body volume knob doubles as a manual mute
- Works with laptops desktops and PS4/PS5 consoles
- 5.9 foot cable included so nothing extra to buy
Cons
- No headphone monitoring jack and no gain control
- Condenser design picks up room and keyboard noise
- No pop filter or shock mount included
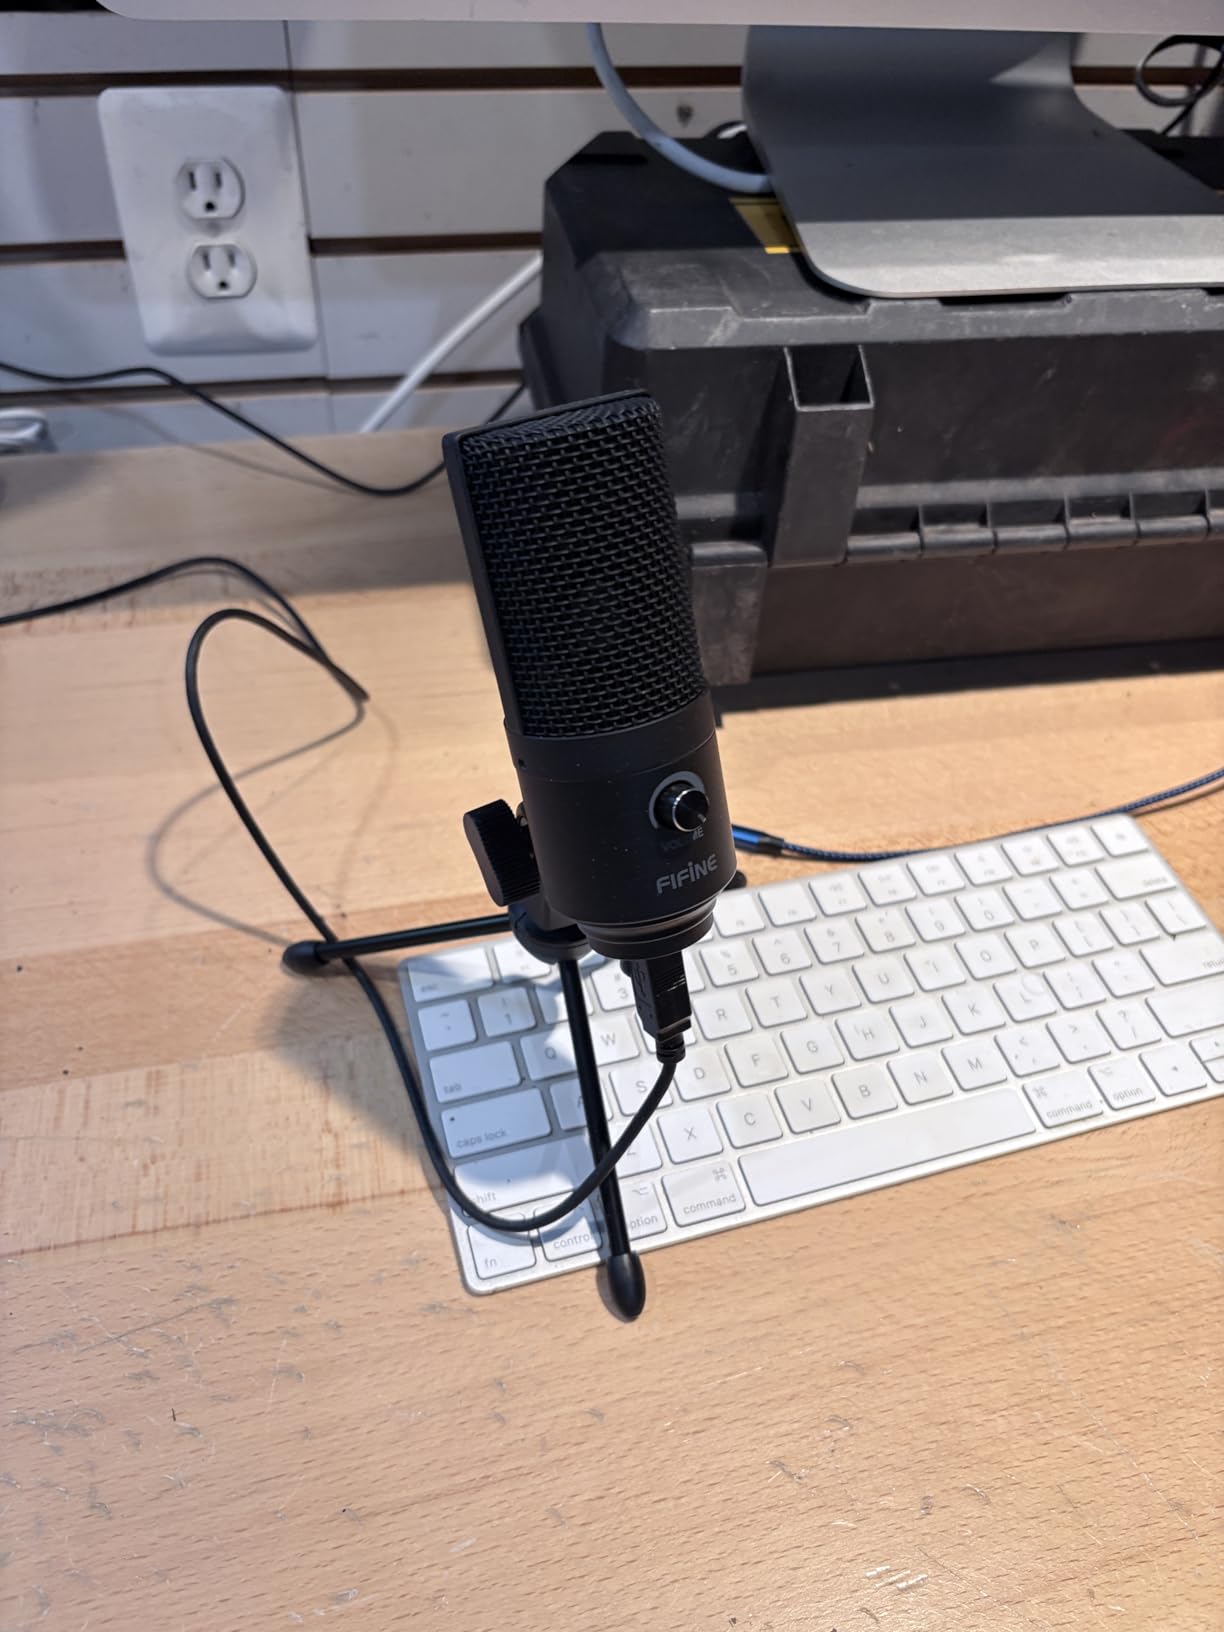
The K669B is the pick if you want the shortest possible path to a first recording and you are working in a small, reasonably quiet space. Owners repeatedly describe it as punching well above its cost, and at 5.6 ounces it is small enough that the included tripod does not dominate a desk the way a full-size desktop condenser does.
The body is metal rather than plastic, which is unusual at this tier and explains part of the durability reputation. A single volume knob on the front handles level changes, and turning it fully to zero doubles as a manual mute. The 5.9-foot USB-B to USB-A or USB-C cable is in the box, and the microphone works with Discord, OBS, Teamspeak, Zoom, and Audacity without extra drivers.
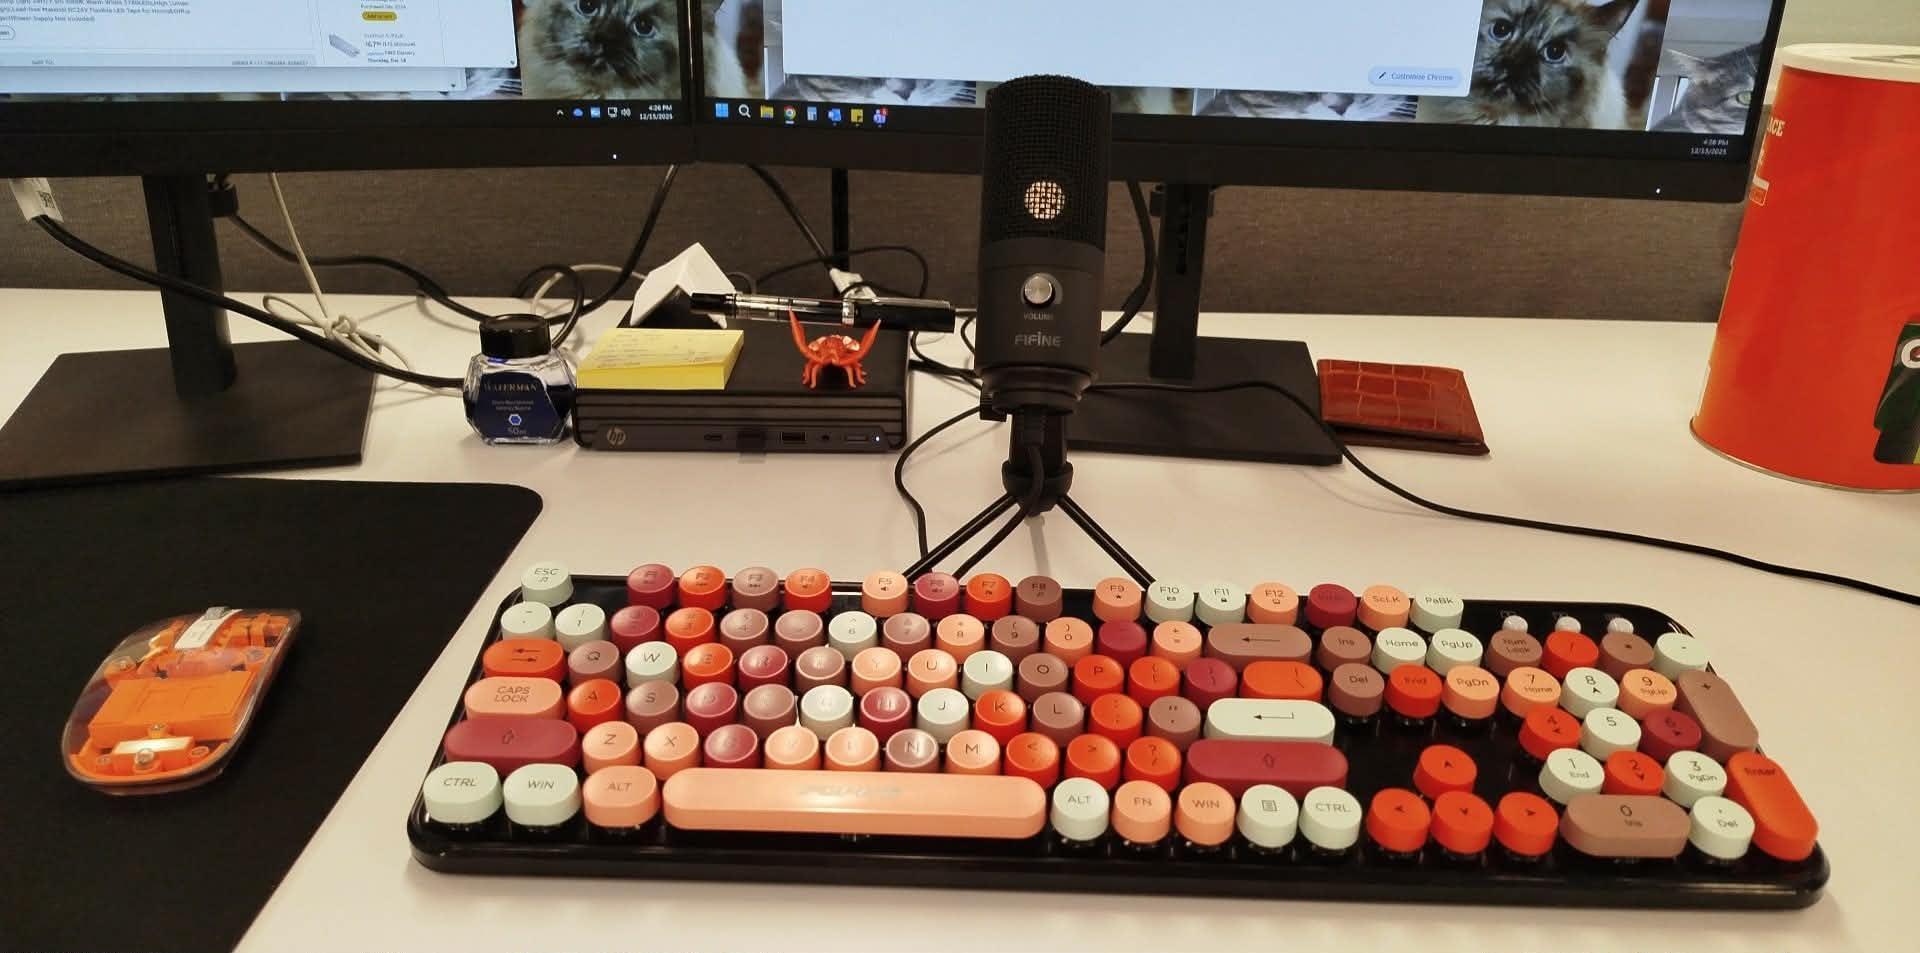
What it does not have matters just as much. There is no headphone jack, so you cannot monitor while recording, and there is no gain control, which means input level is set entirely inside your computer. Because it is a cardioid-only condenser with a 78 dB signal-to-noise ratio, it will pick up your typing and a busy room, and it will not forgive a quiet voice recorded too far back.
Our advice is to get within 6 inches of the grille and add a pop filter. Many owners report that doing those two things, nothing more, closed the gap between this microphone and models costing several times as much in their setup.
Who the FIFINE K669B suits
It suits a first-time podcaster in a quiet bedroom or home office who wants a clean metal microphone without a large shopping list. It is also a sensible second or backup microphone for a host who already owns a USB unit and needs a different pattern or a different position.
Console and streaming users get a second benefit: owners confirm it works with PS4 and PS5 consoles as well as desktop and laptop machines, which is unusual for a microphone in this bracket.
Who should skip the FIFINE K669B
Skip it if you record in a room with any ambient noise you care about, or if you want to hear yourself while you speak. Without a headphone jack, you are trusting that nothing went wrong until you listen back.
Skip it if you plan to grow into a two-microphone or interface-based setup. It is USB-only and has no gain stage of its own, so it is a first step rather than a long-term platform.
3. TONOR TC-777 – Best Budget Pick With Extras in the Box
TONOR Podcast Microphone, USB Computer Mic, Cardioid Condenser PC Microfono
Cardioid condenser
USB Type-A
One-touch mute
Two-year warranty
345 g
Pros
- Pop filter and mini shock mount included in the box
- One-click mute and volume control on the body
- No drivers and no assembly required to start
- Cardioid pattern keeps room sound down for voice
- Works across Windows Mac and PlayStation consoles
Cons
- Light PVC build feels less substantial than metal rivals
- No gain control or headphone monitoring
- Condenser still picks up keyboard and room noise
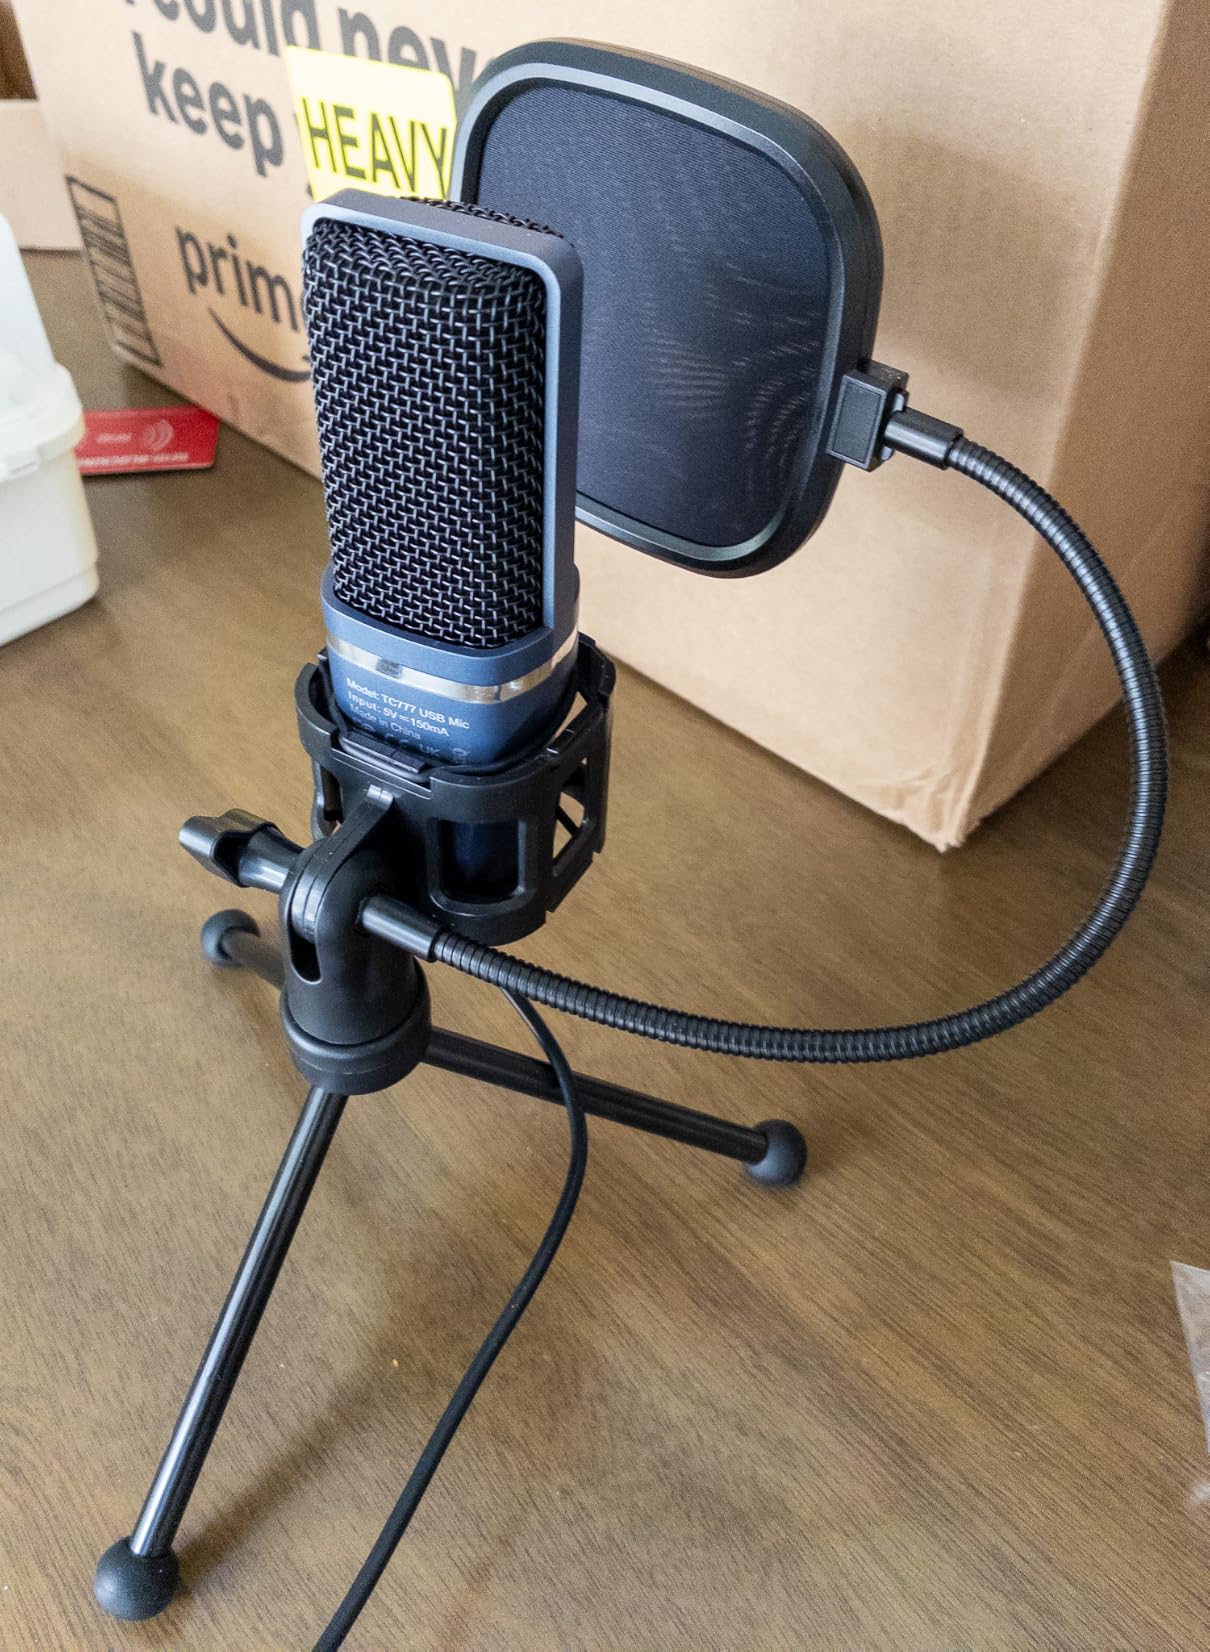
The TC-777 solves a problem none of the other budget microphones solve: the accessories. The box contains a foldable tripod, a mini shock mount, a pop filter, and the microphone, so a first-time host can start recording without a second shopping trip. That single decision removes the most common early frustration, which is buying a mic and then discovering a pop filter costs more than expected.
Setup is genuinely one step. It runs over USB 2.0 with no drivers, works on Windows, Mac, PS4, and PS5, and the one-touch mute on the body is paired with a volume control on the same surface. The cardioid capsule is tuned for voice, and the pop filter and shock mount angle are adjustable rather than fixed.
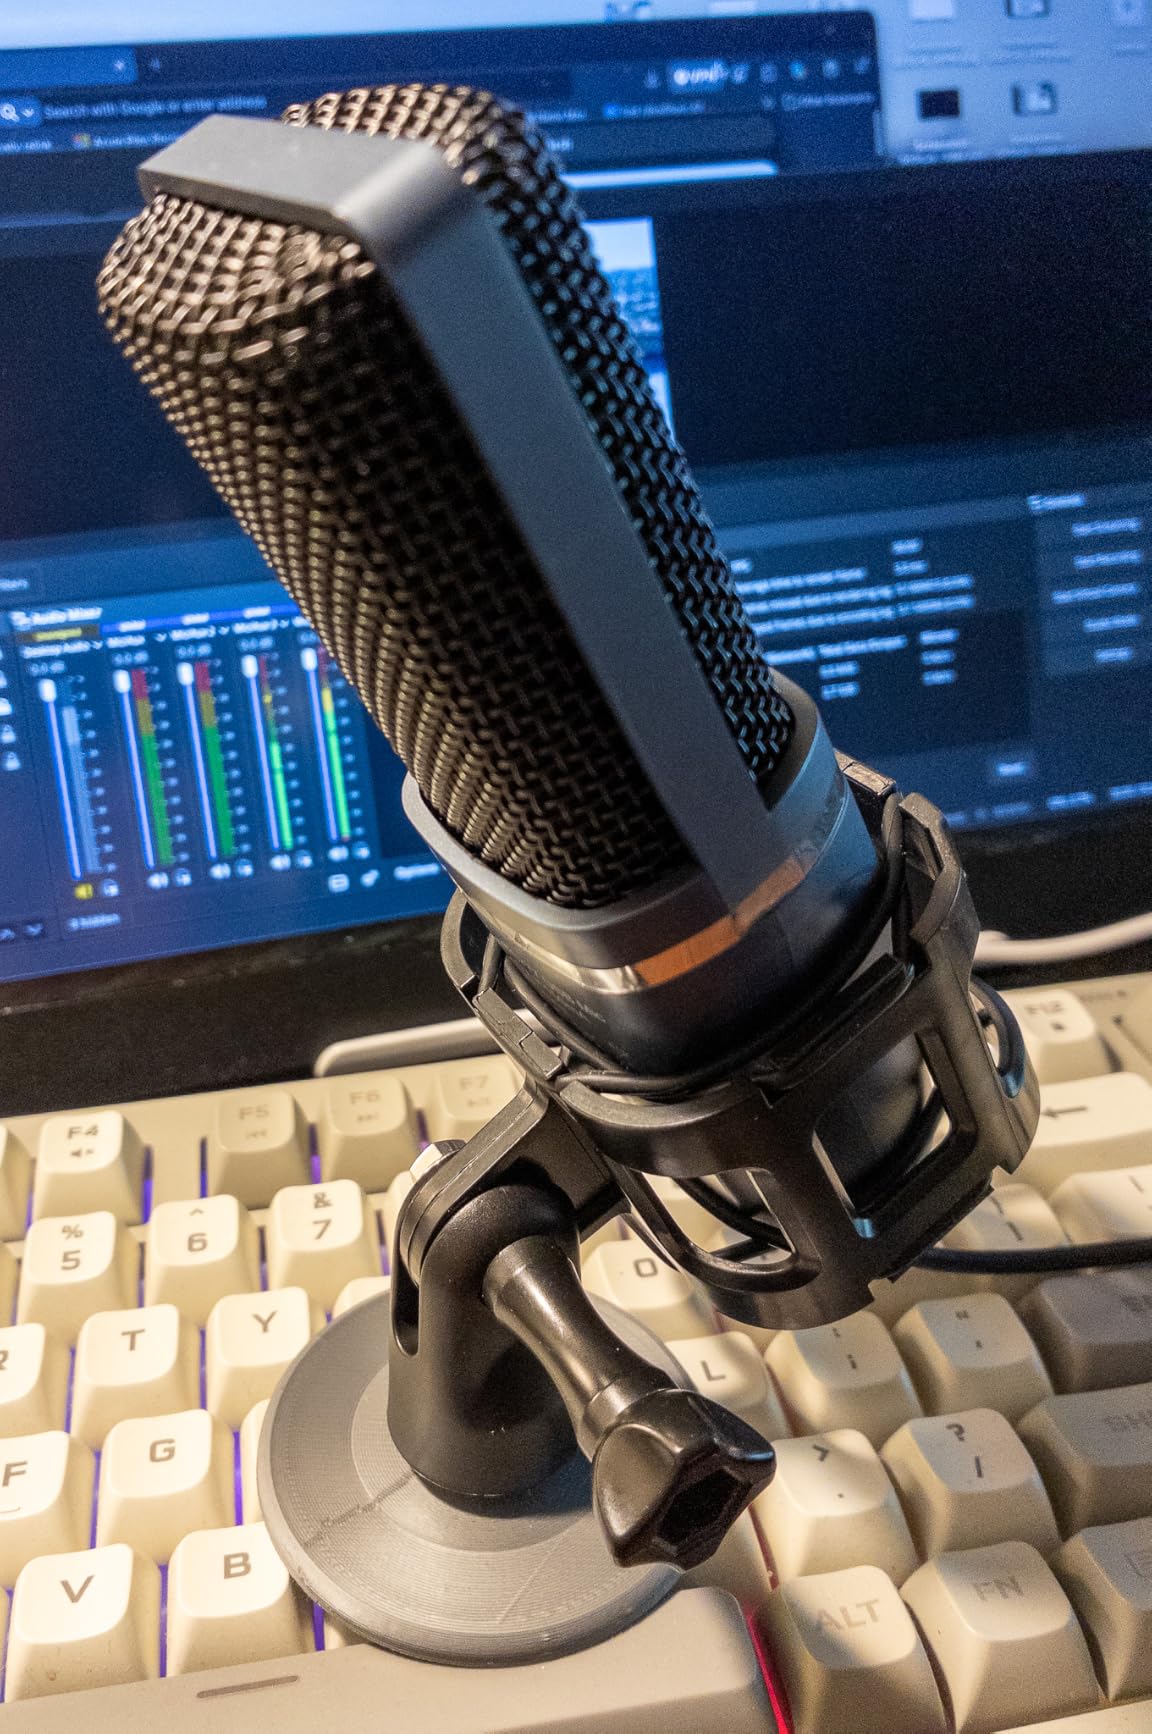
Where it shows its price is in the materials and the rating profile. This is the lowest-rated microphone in our group at 4.3, with a meaningful share of one-star reviews, and the body is PVC rather than metal. The mini shock mount and the small folding stand are the parts most likely to wear first, and if you have a heavy desk or an active home, expect to replace the stand sooner rather than later.
Like every condenser here, it captures keyboard noise and room reflections. There is no gain control and no headphone monitoring, so level decisions happen in software and you cannot check the recording live.
Who the TONOR TC-777 suits
It suits someone whose very first purchase needs to be a single item, on a limited budget, in a quiet room. If the difference between a bundled package and a bare microphone matters to you, this is the one to look at first.
It also suits a creator who wants to try podcasting without committing much. The two-year warranty and the included pop filter mean the total cost of getting a usable recording setup is a single line item.
Who should skip the TONOR TC-777
Skip it if you want a microphone that still feels solid after a few years of knocking it around. The PVC body and the light stand are the first components to disappoint, and the lower average rating reflects that pattern.
Skip it if your room is busy. A condenser with no gain control is the hardest combination to rescue in post, because you are pushing a quiet, noisy recording into a noise reducer and hoping it holds together.
4. MAONO A04 – Best Complete Kit for a First Home Studio
MAONO A04 USB Microphone, 192kHz/24Bit Condenser Mic Kit for PC Podcast
Condenser kit
USB and USB-C
192kHz/24-bit
30 Hz - 16 kHz
Best at 2 to 6 inches
Pros
- Kit includes scissor arm shock mount pop filter windscreen and desk clamp
- 192kHz/24-bit chipset with a flat response
- Tool-free setup most owners finish in under ten minutes
- Warm condenser tone valued by voiceover and radio users
- All-metal microphone body
Cons
- No gain control so input levels run hot
- Scissor arm and windscreen gooseneck wear first
- No headphone monitoring and not compatible with Maono Link
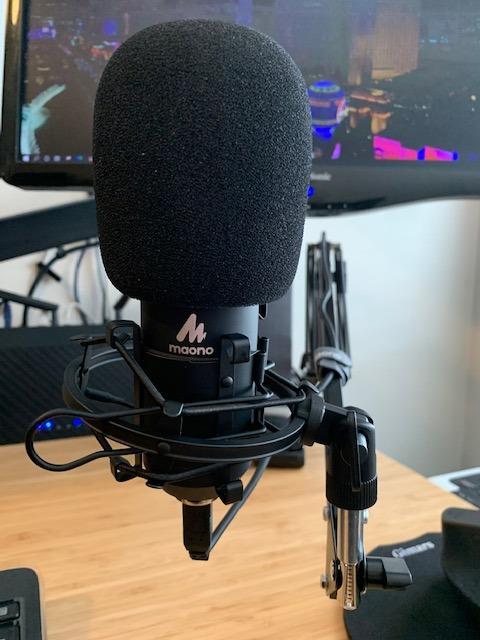
The A04 is the only kit in this roundup built around a proper arm rather than a desk stand. The included scissor arm, desk clamp, shock mount, pop filter, and foam windscreen mean your microphone ends up at mouth height on a boom instead of sitting on the desk transmitting every keystroke. For a first home studio, that physical arrangement does more for your sound than a jump to a more expensive microphone would.
The 192kHz/24-bit chipset and the 16mm electret capsule with a strong bass response give a warm, present voice that experienced voiceover users rate highly. The stated best working range is 2 to 6 inches, which is tighter than most, so getting close is part of the design rather than a workaround. Setup is tool-free and most owners report finishing it in under ten minutes.
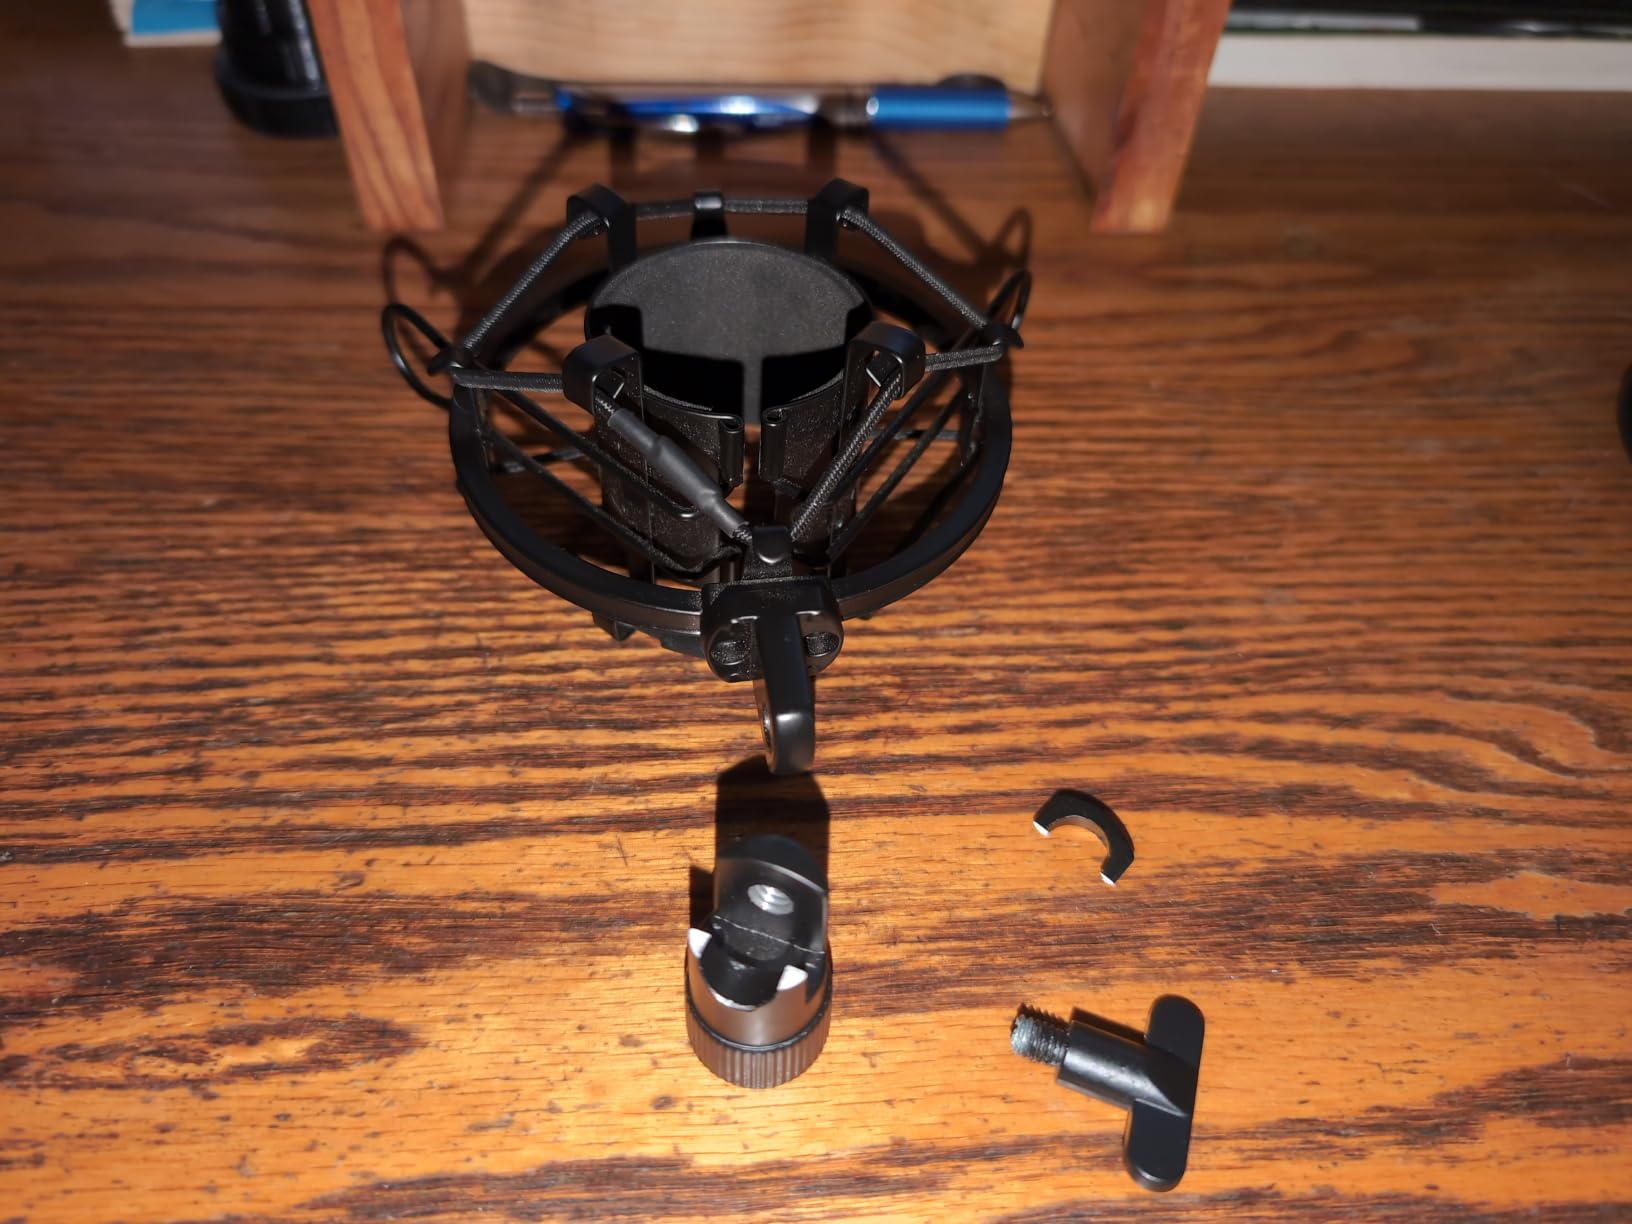
The weakness is level control. There is no input gain or volume control anywhere on the chain, so levels run hot and clipping is a recurring complaint, and owners often reach for post-processing noise reduction to compensate. The scissor arm and the foam windscreen gooseneck are the components that wear or break first, and there is no headphone port, so you cannot monitor while recording.
Two practical notes. The desk clamp is specified for desks under 2.1 inches thick, so check your desktop before you rely on it. And the original A04 is not compatible with Maono Link software, which the manufacturer steers owners toward the newer A04 generation for.
Who the MAONO A04 suits
It suits a beginner who wants a podcast that looks and sounds deliberate on camera as well as in audio, because the arm gets the microphone into frame at a sensible height. It also suits anyone who would rather buy once and assemble the whole rig at the same time.
The clamp-and-arm arrangement also helps if your desk is shared or your chair is close to the surface, since the microphone no longer picks up desk vibration through a stand.
Who should skip the MAONO A04
Skip it if you share a thin or laminate desk, or if you move the rig frequently, because the arm hardware is the first thing to fail. Skip it if you have a quiet voice and no way to reduce input level, since the lack of gain control is a real constraint rather than a minor inconvenience.
Skip it if you want to monitor. There is no headphone jack, so you are still recording blind and discovering mistakes during editing.
5. FIFINE AM8 – Best Dynamic Starter With an Upgrade Path
FIFINE AmpliGame AM8 USB/XLR Dynamic Microphone for Gaming Streaming
Dynamic cardioid element
USB-C and XLR
50 Hz - 16 kHz
Tap-to-mute
Headphone jack
Pros
- Dual USB and XLR output so an interface upgrade needs no new microphone
- Dynamic element rejects room keyboard and fan noise
- Tap-to-mute with an LED indicator works without the computer
- Headphone jack and monitoring volume for live checks
- Built-in 3/8 and 5/8 inch threads accept most stands
Cons
- XLR cable and boom arm are not included
- Mute is a touch control rather than a physical button
- RGB ring and function key are inactive in XLR mode
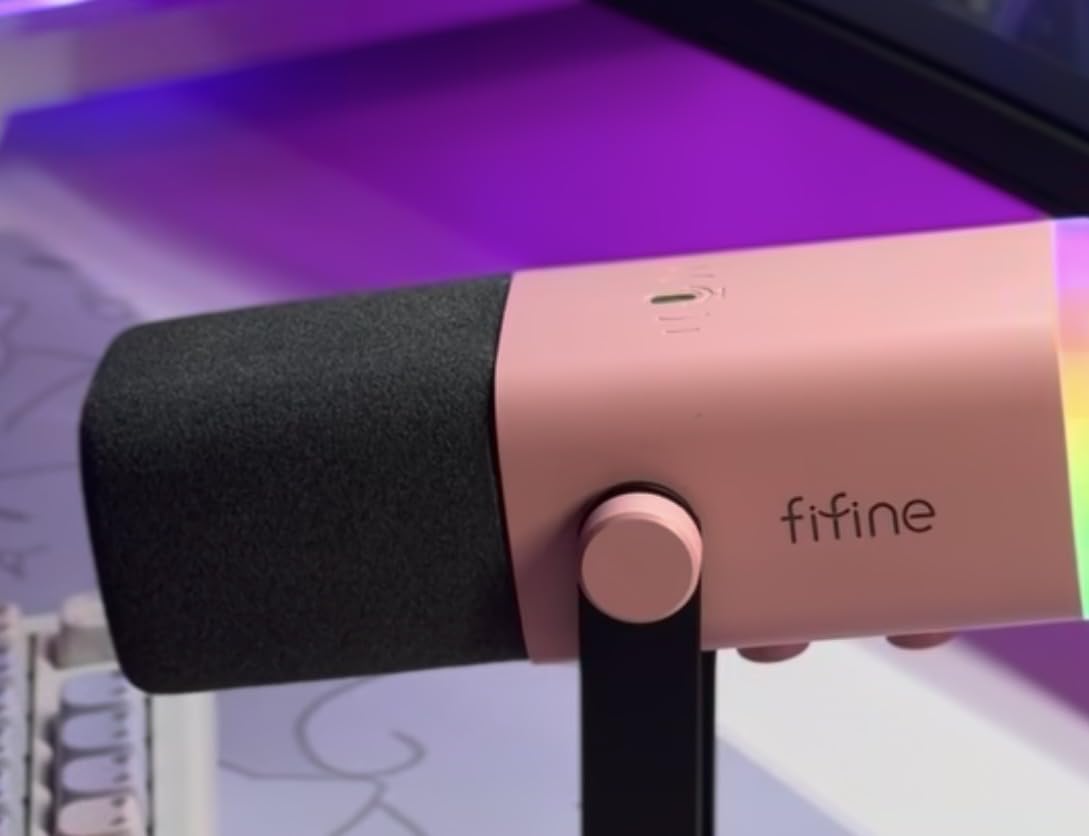
The AM8 is the answer for anyone whose room is the problem rather than the microphone. It uses a dynamic cardioid element with a 50 Hz to 16 kHz response, and that construction is why it holds a voice steady in front of a fan, a keyboard, or a room with a hard reflective wall. In a quiet room a condenser sounds more open, but in a busy one the dynamic wins by a distance that no amount of editing closes.
It also answers the dead-end question directly. You can start on USB-C with no interface, and when you want a preamp with real gain and headroom, the same microphone moves to XLR. Owners describe exactly this progression, and it is the reason we treat hybrid microphones as the safest first purchase for a nervous beginner.
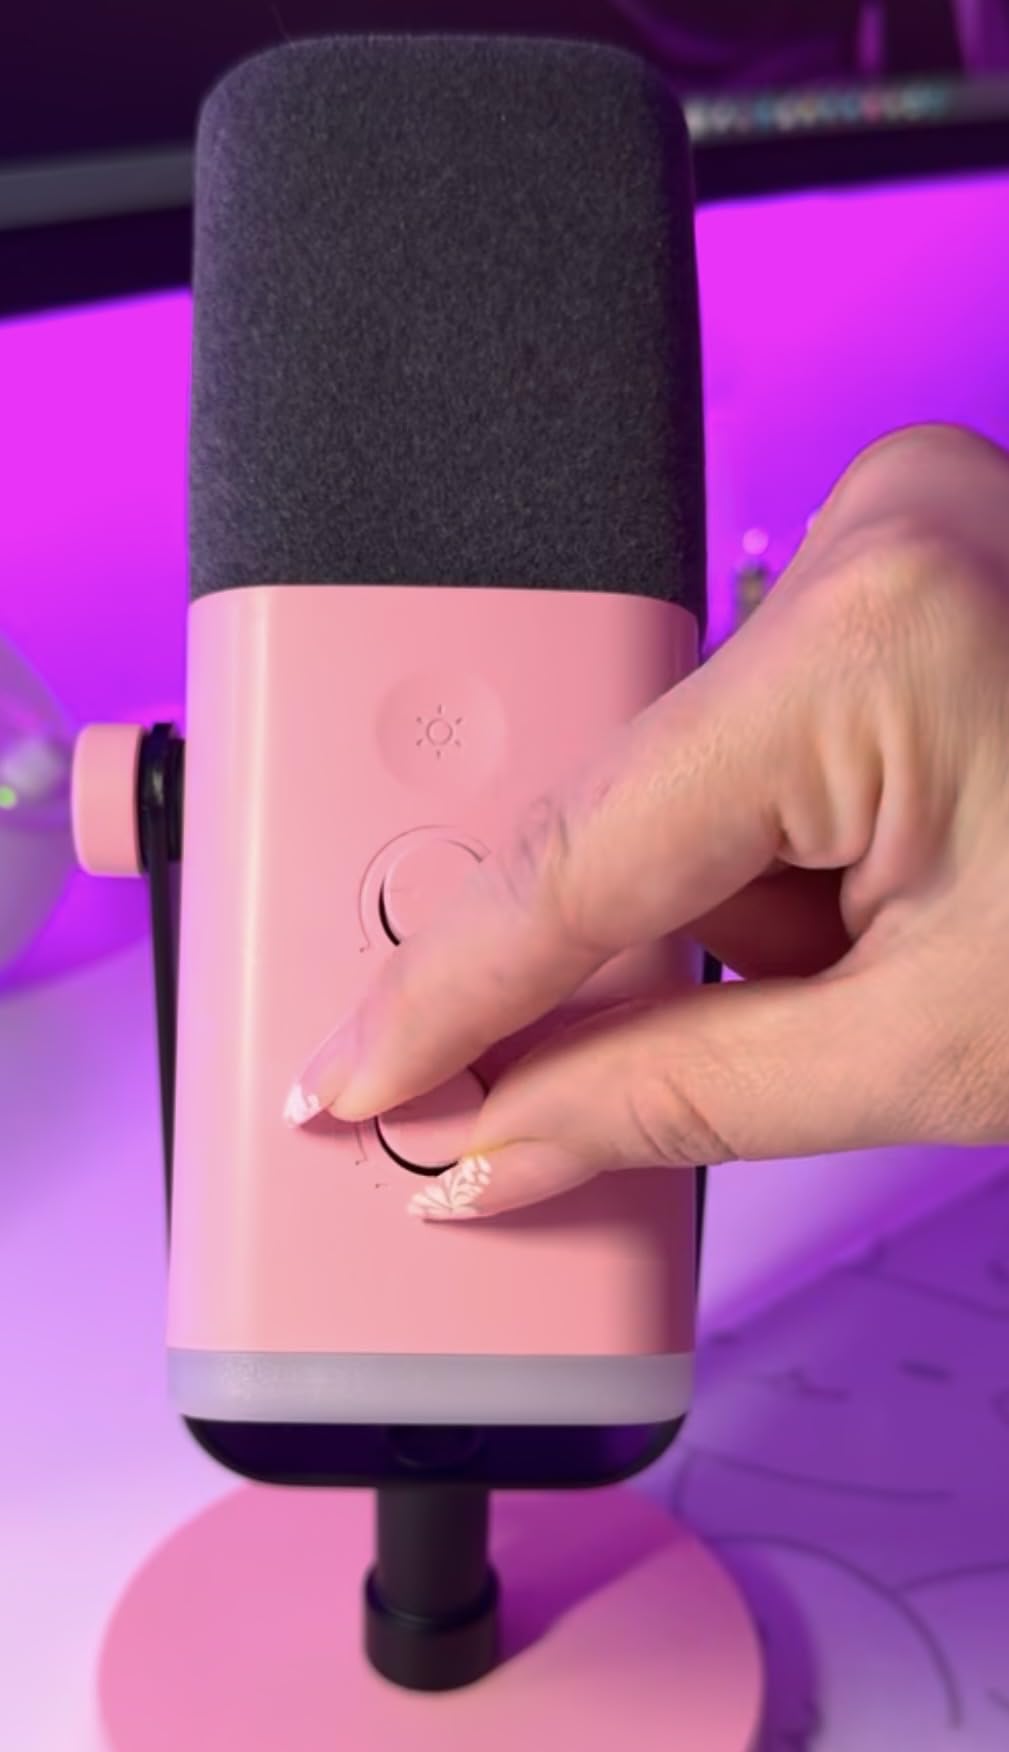
USB mode is where the hardware earns its keep. Tap-to-mute with an LED status indicator works independently of the computer, there is a headphone jack with its own monitoring volume, and the RGB ring has three modes with a memory function. The stated working range is 2 to 6 inches, and the built-in 3/8-inch and 5/8-inch metal threads mean it accepts almost any stand, including the included desktop stand, which is one of the better stock stands at this level.
Two things to know before you commit. The XLR cable is not included, and the RGB lighting, function key, tap-to-mute, and headphone controls are all inactive once you switch to XLR mode. If you go straight to an interface, you are buying a different accessory set.
Who the FIFINE AM8 suits
It suits a beginner in a noisy home, a shared office, or a bedroom near a road who wants a clean recording now and an interface-based setup later. Several owners buy a second unit as a backup or a gift, which is a fair indicator of how the reliability is regarded.
It also suits streamers and anyone who wants a hardware mute and live monitoring without buying a separate interface or a mixer.
Who should skip the FIFINE AM8
Skip it if your room is genuinely quiet and you want maximum vocal detail. A dynamic element rolls off the airy top end that a condenser captures, and that loss is audible in a treated space.
Skip it if you dislike non-functional controls. The touch-style mute, the dim RGB ring, and the features that vanish in XLR mode are the most common gripes in the reviews, and they are exactly the things a first-time buyer notices on day one.
6. ZealSound K66 – Best for Monitoring and Phone Recording
ZealSound Podcast Microphone for PC, Noise Cancellation USB Mic with Gain, Volume Adjustment & Mute Button, Monitoring & Echo, for YouTube, TikTok, Podcasting, Streaming, iPhone, iPad, Android, Mac
Cardioid condenser
USB and 3.5 mm
40 Hz - 18 kHz
Hardware noise reduction
Phone adapters in box
Pros
- Only microphone here with a dedicated hardware noise reduction mode
- Zero-latency headphone monitoring with independent monitor volume
- Separate knobs for mic volume monitoring and echo
- USB-C and Lightning adapters included for phone recording
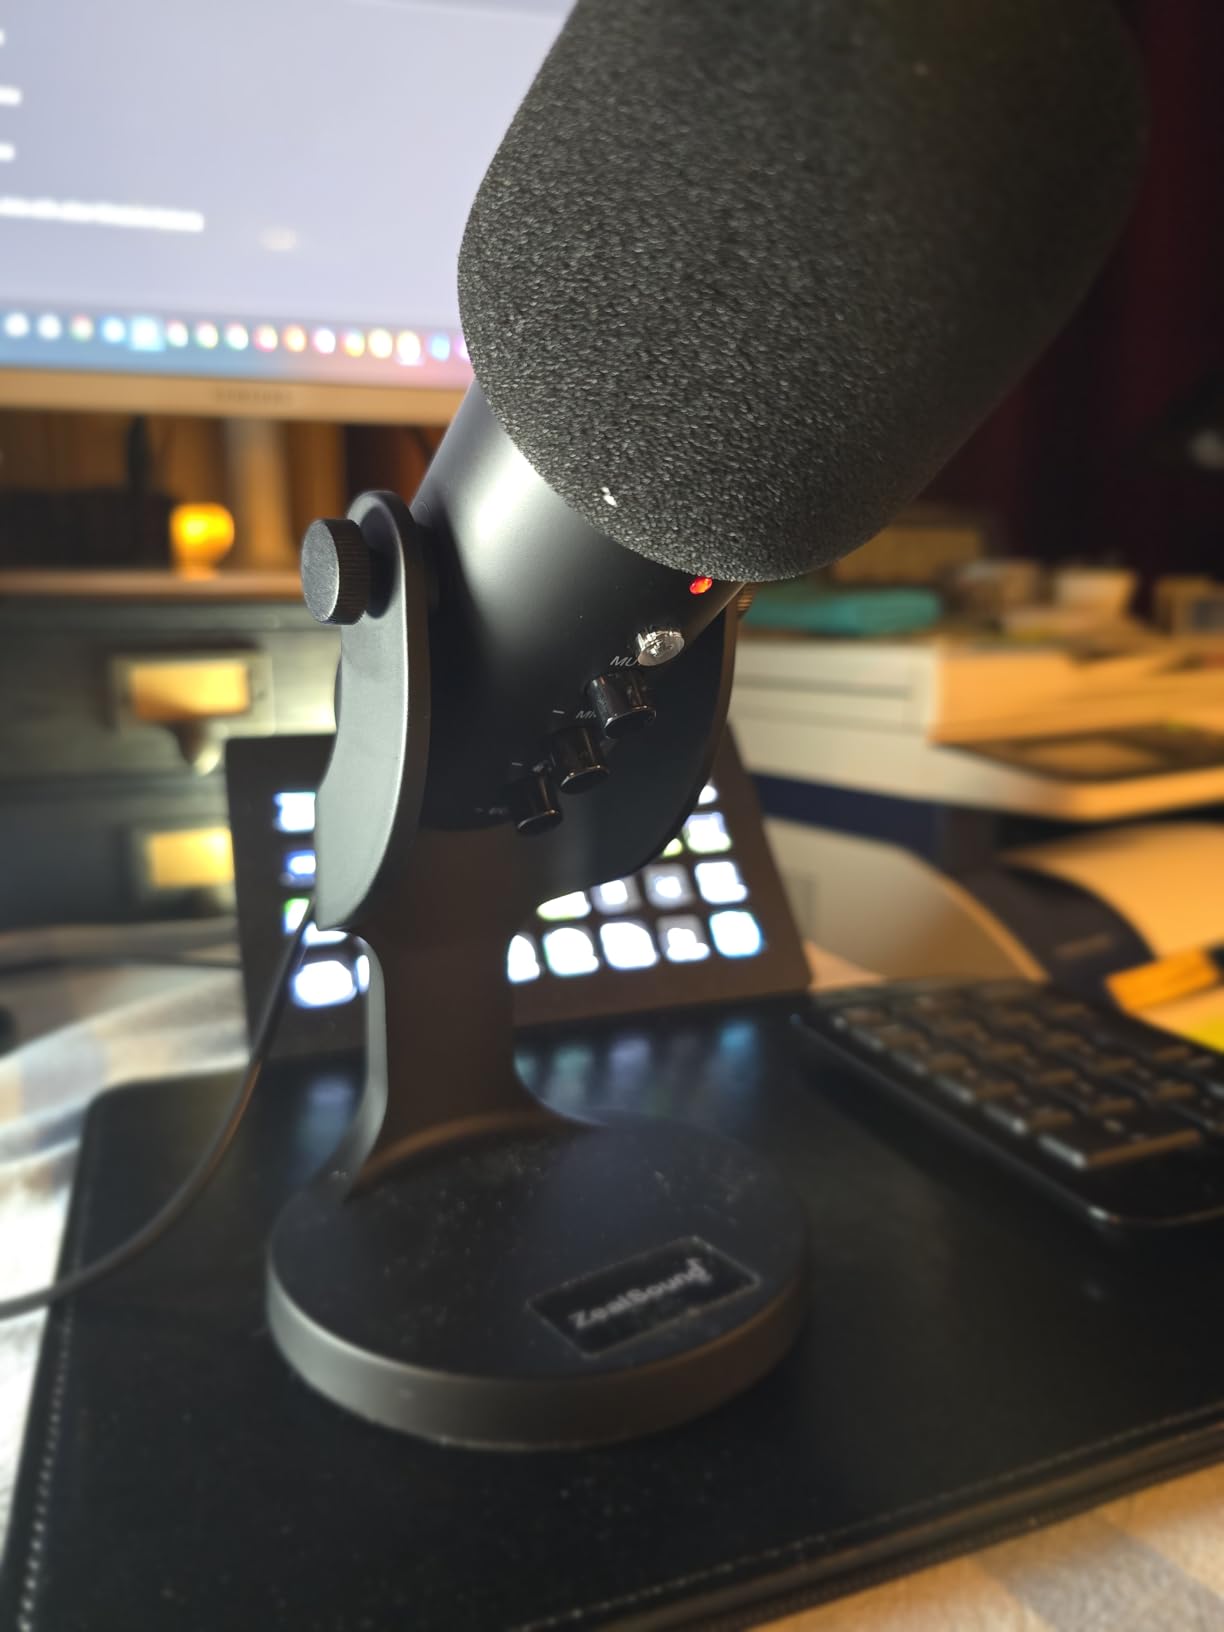
- Weighted metal base resists desk vibration
Cons
- Sibilance sounds sharp until levels are dialled back in software
- Noise reduction mode can clip speech in a noisy room
- Included phone adapters are short
The K66 is built around physical control, and that is the reason it appears here. It has dedicated knobs for microphone volume, monitoring volume, and echo, a hardware mute with a red indicator, and a hold-to-engage noise reduction mode with a blue light. For a beginner who keeps flinching at unexpected peaks, having those on the mic rather than in a menu is genuinely useful.
It is also the most flexible unit for recording away from a desk. The box includes a 70.87-inch USB cable, a USB-C adapter, a Lightning adapter, and a foam windscreen, so the same microphone that records your podcast also records interviews on a phone. The top-addressed design rotates 360 degrees on a weighted metal base, which also helps it resist vibration from a desk.
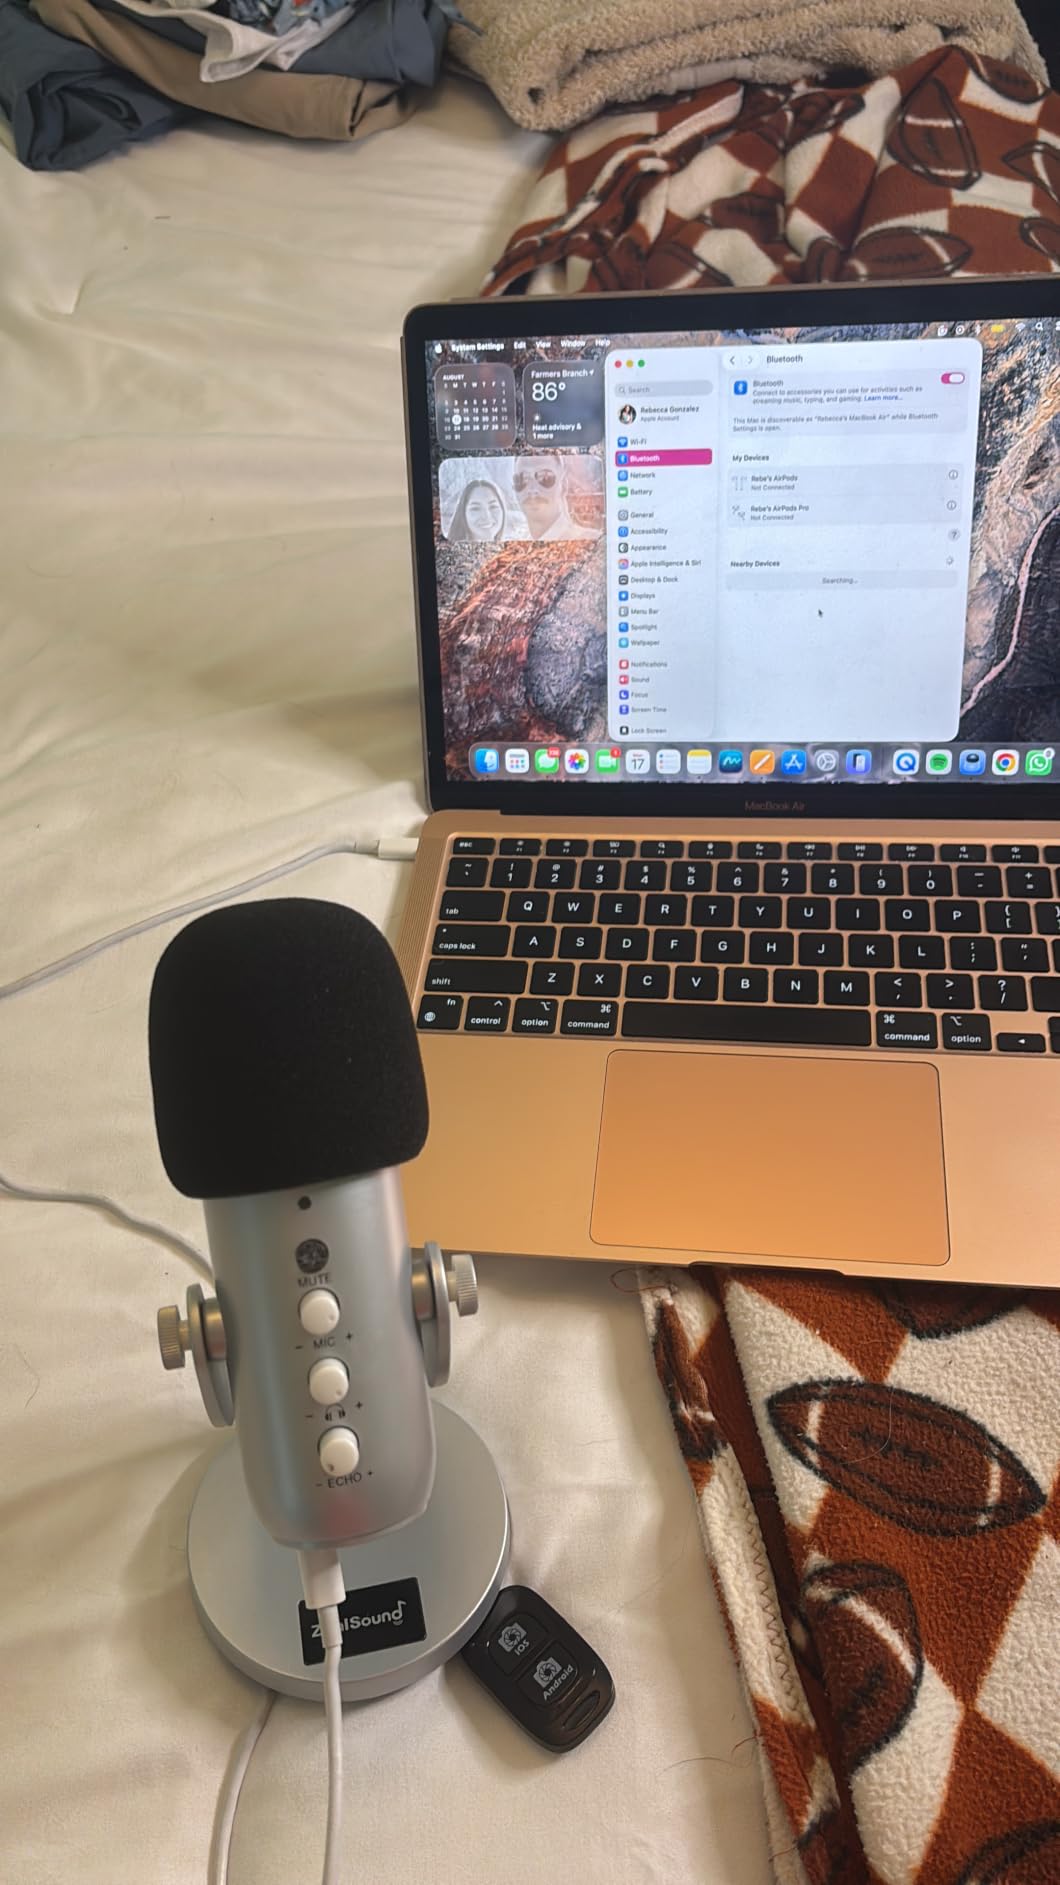
The 40 Hz to 18 kHz response is narrower at the top than most condensers here, and owners note that sibilance can sound sharp until you pull levels back in software. The noise reduction mode is helpful in a mildly noisy space but can clip or cut speech if you enable it in a genuinely busy one, so treat it as a light touch rather than a fix.
It is also cardioid only, so two people sharing one microphone will cross-talk. The included phone adapters run short, which is worth knowing before a location recording.
Who the ZealSound K66 suits
It suits a creator who records interviews on the move or alongside phone and tablet capture, since the adapters are in the box rather than an extra purchase. It also suits anyone who wants live headphone monitoring and a hardware mute on a modest budget.
The weighted base and rotatable body suit a shared desk too, where vibration from typing is a constant problem.
Who should skip the ZealSound K66
Skip it if you record with a co-host sitting at the same microphone, because a cardioid-only pattern will pick up both voices plus the room. Skip it if you have a naturally sibilant voice and want to avoid post-processing, since the reported sharpness tends to need correction in software.
It is also a USB-only unit, so it is not the choice if you already know you want an interface within a year.
7. Elgato Wave:3 MK.2 – Best Sounding Mic for a Single Desk
Elgato Wave:3 MK.2 USB Condenser Microphone, DSP Effects
Studio condenser
USB-C
Super cardioid
110 dB signal to noise
Clipguard 2.0
Pros
- Highest rated model here at 4.7 with 84 percent five-star reviews
- Clipguard 2.0 and Auto Gain make level setup close to foolproof
- Integrated headphone jack for direct zero-latency monitoring
- Free Wave Link app handles routing effects and plugins without a hardware mixer
- Compact body suits a clean desk
Cons
- Wave Link has a learning curve and a rough first install for some users
- Shock mount and pop filter are sold separately
- Super cardioid only which limits two-person recording on one mic
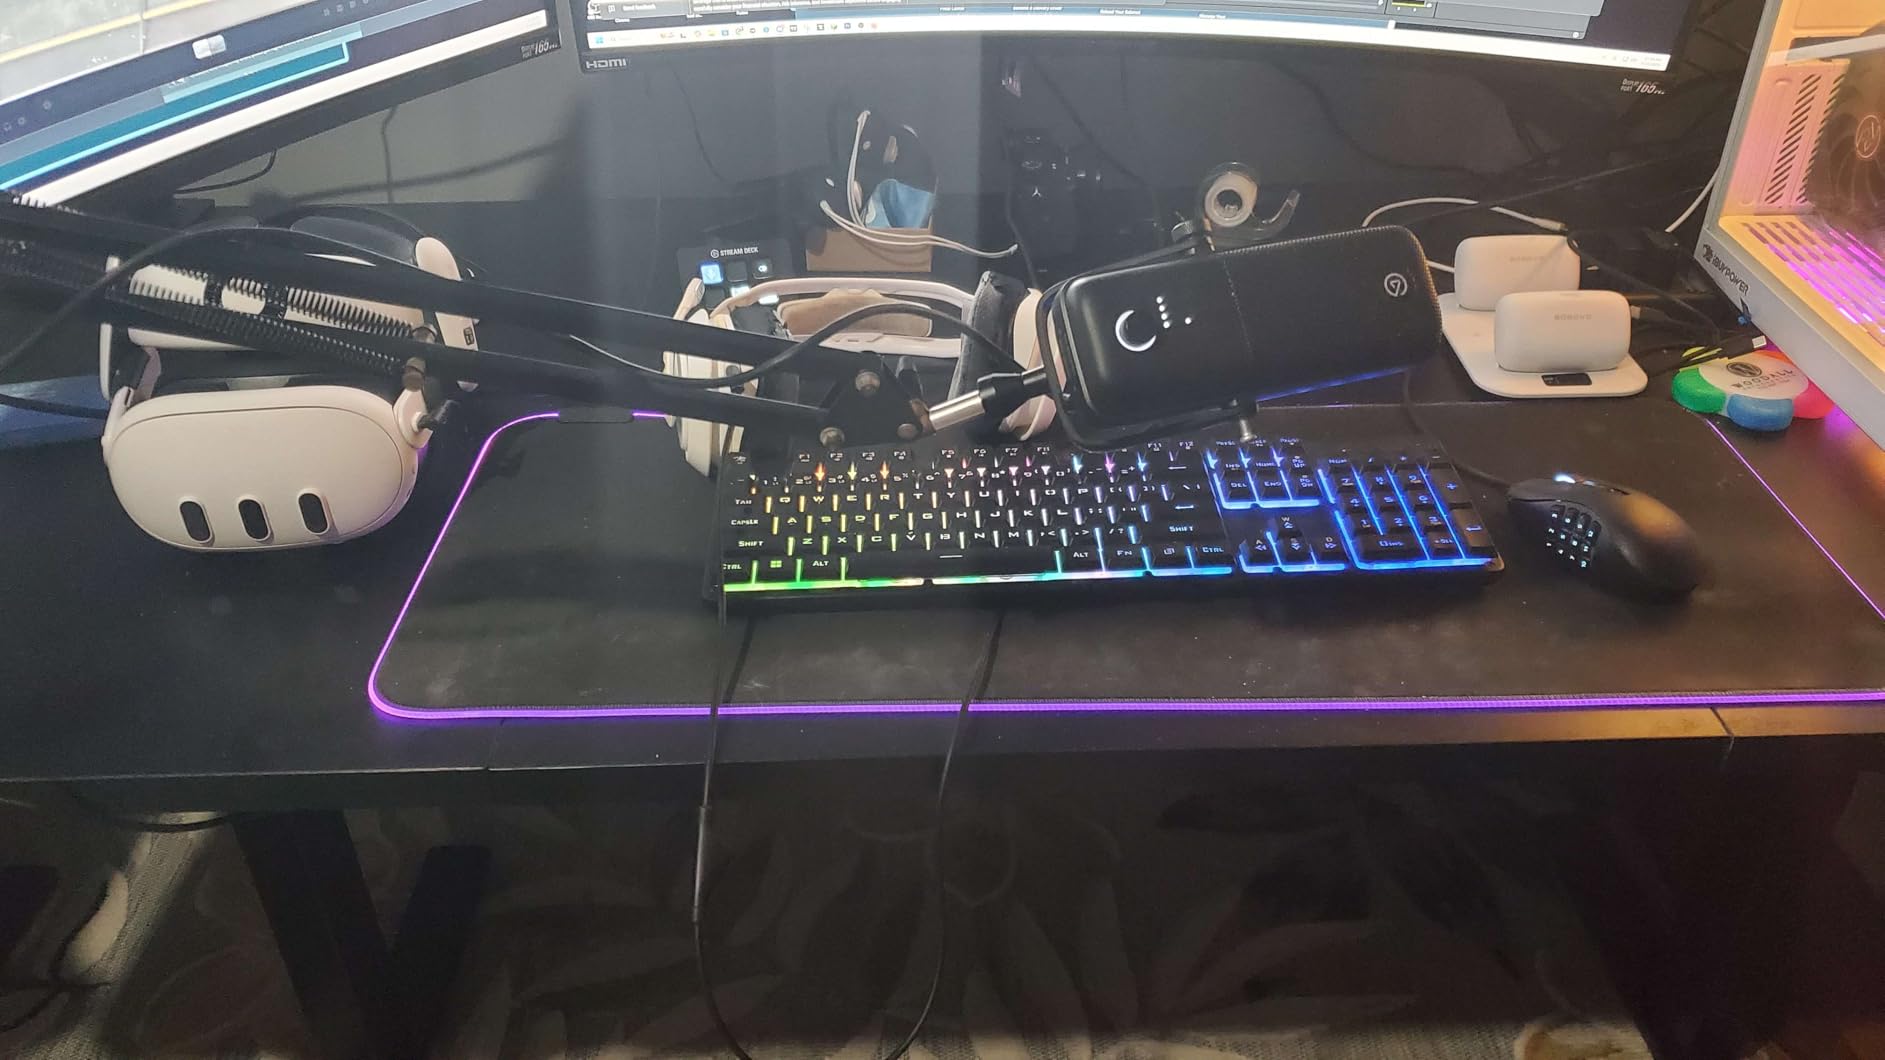
The Wave:3 MK.2 has the highest average rating of anything we reviewed, at 4.7 with 84 percent five-star reviews, and in a quiet room it is the microphone we would pick purely on sound. The voice is clear and studio-like even when you sit slightly off-axis or a little further back than you think you should, which is forgiving behaviour that matters when you are new to gain staging.
Clipguard 2.0 with Auto Gain is the feature that earns its money for a beginner. It handles level setup and anti-distortion automatically, so the most common beginner failure of setting gain too low and then boosting in post, which adds hiss, is largely designed out. A multifunction dial, tap-to-mute with LED feedback, and an integrated headphone jack cover the rest of the control surface.
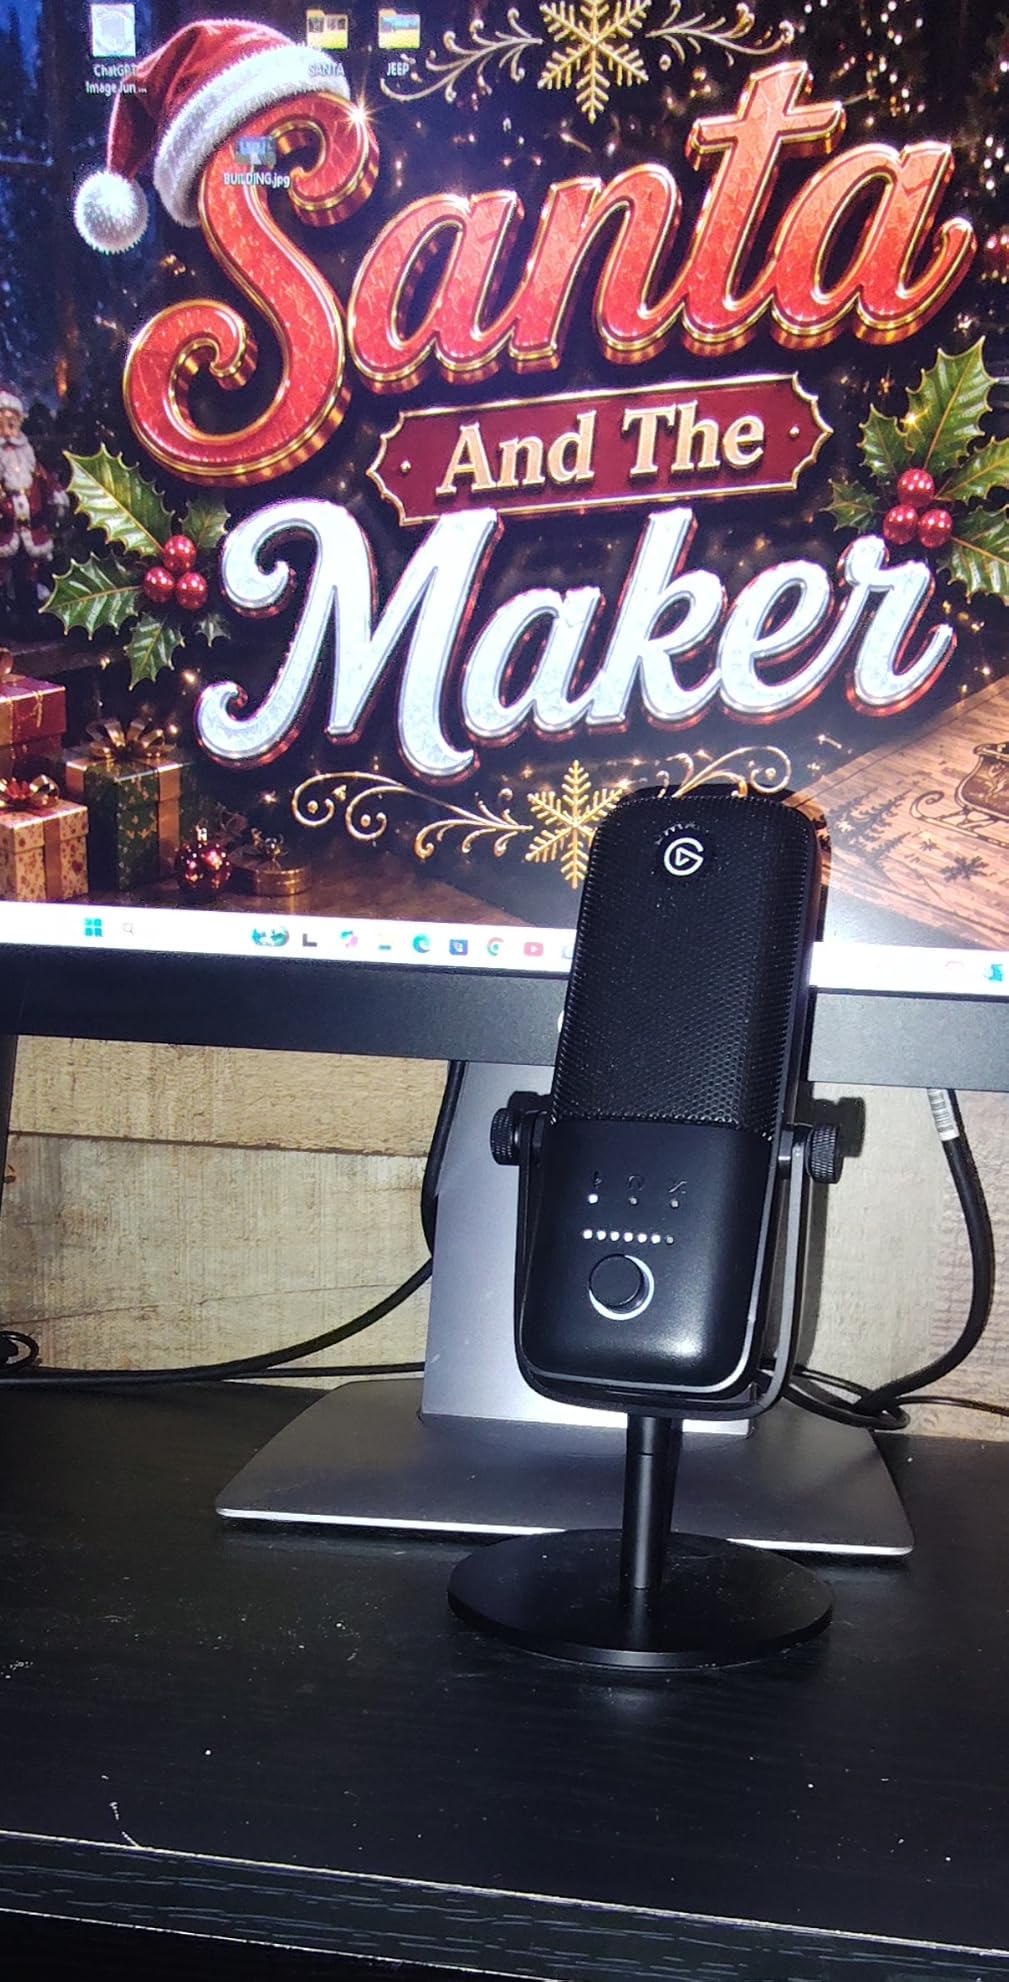
The catch is that a fair amount of the value lives in software. The onboard DSP runs a voice enhancer, compressor, and EQ through the Wave FX Processor, and the free Wave Link app handles routing, effects, and VST plugin hosting in place of a hardware mixer. Owners who dislike modifying their own voice often switch those off within a minute, but the app does have a learning curve and some report an audio bug on first install.
It is a super cardioid condenser, which means excellent off-axis rejection but a narrow field for more than one person at a single microphone. The shock mount and pop filter are sold separately, so budget for them.
Who the Elgato Wave:3 MK.2 suits
It suits a creator with a quiet, treated corner who wants the best-sounding result from a single desk microphone and is happy to install one free application. For video and streaming alongside a podcast, the routing and plugin hosting replace a small mixer.
It also suits anyone tired of clipping. Auto Gain and Clipguard 2.0 make level management close to automatic.
Who should skip the Elgato Wave:3 MK.2
Skip it if you are recording two people at one microphone or in an untreated room with real noise, because the narrow super cardioid field will not rescue a reflective space. Skip it if you want to record each person on a separate track, since it records to a single channel.
Skip it if you would rather not install companion software or buy a pop filter separately. The real total cost includes both.
8. Samson Q2U – Best Handheld With USB and XLR Together
Samson Q2U USB/XLR Dynamic Microphone Recording and Podcasting Pack
Handheld dynamic
USB-C and XLR
50 Hz - 15 kHz
11.2 oz metal
Stand clip and cables included
Pros
- USB and XLR in one handheld body so beginners can grow into an interface
- Dynamic cardioid design gives strong background rejection for speech
- Handheld form makes it intuitive for a new host to aim
- Metal body survives drops and travel
- Pack includes stand extension clip windscreen and both cables
Cons
- Bundled desktop stand is low and the clamp screw stays loose
- Dynamic element requires speaking close and directly into the capsule
- Plosives need the included windscreen or an external pop filter
The Q2U is the microphone the podcast community reaches for first, and the reason is structural rather than cosmetic. It is a dynamic handheld with both XLR and USB-C output in the same body, so a beginner can record straight into a laptop today and move to an interface later without changing microphones. On r/podcasting, owners repeatedly describe it as the most recommended starter and as better than they expected a budget microphone to sound.
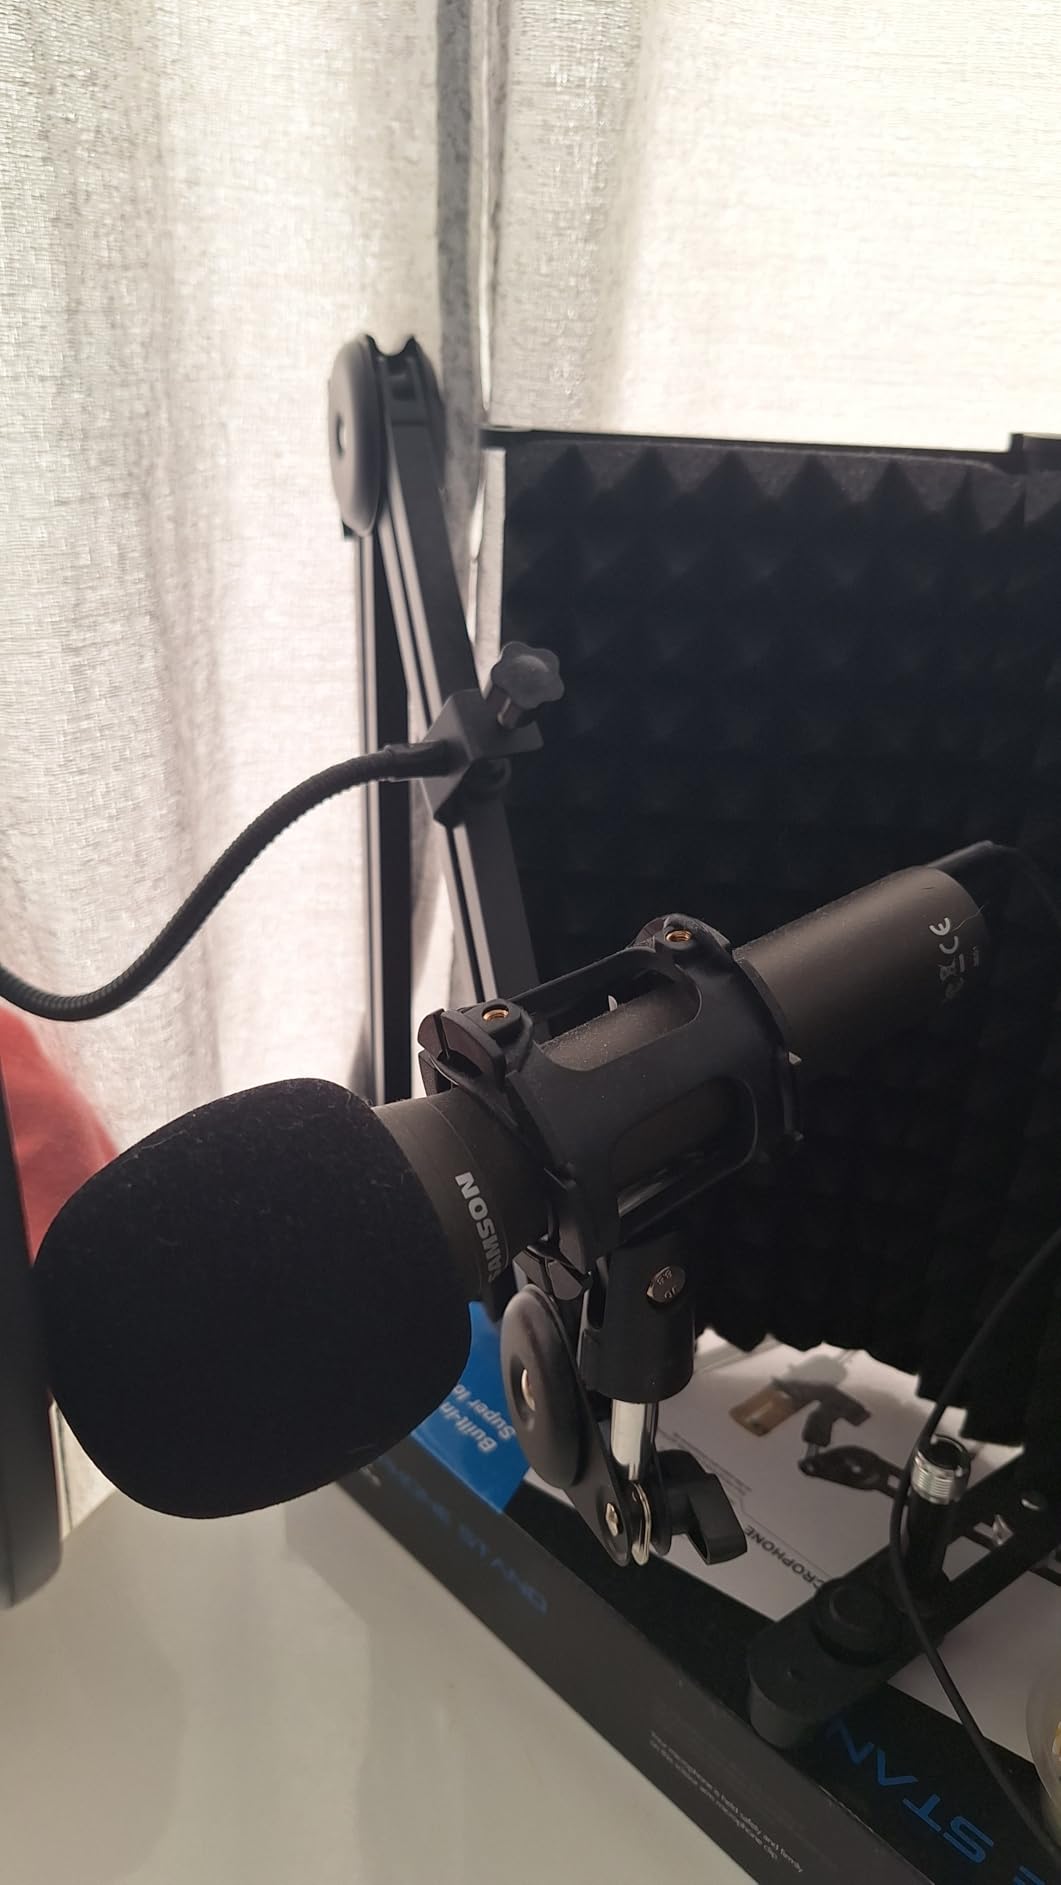
The dynamic element is what makes it forgiving in a home. Cardioid handheld form factor and strong off-axis rejection mean a road, a fan, or a conversation in the next room is largely ignored, and the 11.2 oz metal body is genuinely portable. The pack is unusually complete: tripod desktop stand, tripod extension, mic clip, windscreen, USB-C cable, and XLR cable are all included.
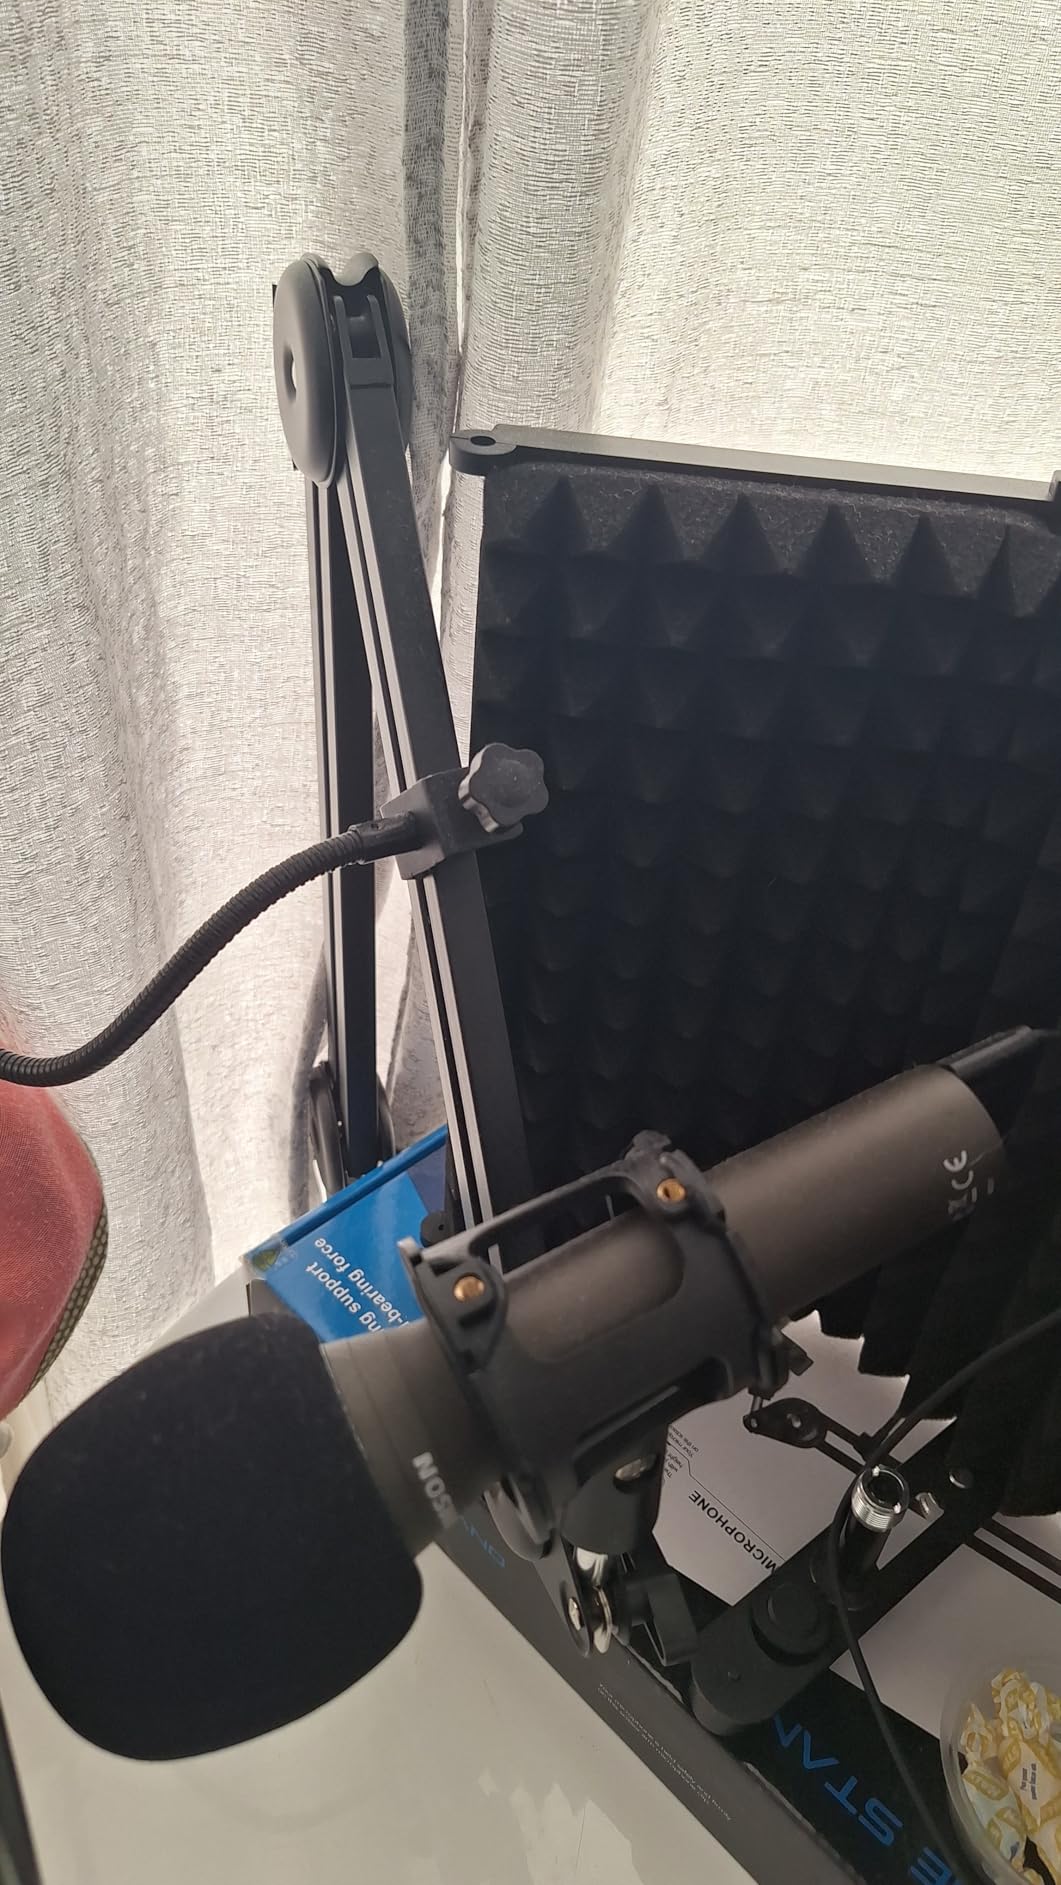
Nearly every complaint we found concerns the accessories rather than the microphone. The bundled desktop stand sits low, its clamp screw stays loose, and it can block a desk with a drawing tablet. A boom arm is the first worthwhile upgrade. Because it is dynamic, you also have to speak close and aim straight in, and the included foam windscreen or a pop filter handles the plosives that a close-mic setup produces.
One more practical note: this is a microphone system, not a standalone recorder. It needs a computer and recording software, which is fine for podcasting but worth knowing before purchase.
Who the Samson Q2U suits
It suits a first-time host in a noisy home who wants a forgiving microphone now and a real upgrade path later. The handheld form is also the easiest to aim, which removes one decision a new podcaster can get wrong.
It suits anyone moving between solo and interface-based recording, since both cables are in the box and the same microphone serves both setups.
Who should skip the Samson Q2U
Skip it if your recording space is already treated and you want maximum vocal detail, because a dynamic element with a 50 Hz to 15 kHz response will always sound less airy than a good condenser in that environment.
Skip it if you cannot commit to speaking close and on-axis, or if you want a hands-free desk setup, because the supplied stand is the weakest part of an otherwise well-built pack.
Dynamic vs Condenser: Why the Type Matters More Than the Price
A dynamic microphone uses a coil-and-magnet element that responds mainly to sound arriving directly at the front of the capsule. That is why it ignores a lot of what a condenser captures. A condenser uses a thin diaphragm with a charged backplate and is far more sensitive, so it records the room along with your voice.
This is the single most useful thing to understand before you buy. In an untreated bedroom, a good dynamic microphone will produce a more professional-sounding result than an expensive condenser in the same space, because the condenser records the room and you cannot remove a room in editing. In a treated corner, the order reverses, because the condenser captures detail and air that the dynamic rolls off.
A related question that shows up constantly in podcast forums is whether a condenser is simply a better microphone. It is not a quality ranking; it is a sensitivity ranking. More sensitivity means more detail if the environment is controlled, and more contamination if it is not.
For our list, the dynamic options are the FIFINE AM8 and the Samson Q2U. Everything else is a condenser, which is honest about how common it is for beginners to end up with the type that is hardest to use in a real home.
USB or XLR: Which One Should a Beginner Buy First
USB means the microphone contains its own preamp and converts the signal inside the body, so it connects to a computer with one cable and no extra hardware. XLR is the balanced studio connection that runs to an audio interface or mixer, which gives you a real gain control, a metering level, and the option to record two people on separate inputs.
For a first purchase, USB is the sensible default because it removes a decision and an expense. The question is whether you will outgrow it, and that is where a hybrid wins. The Samson Q2U and the FIFINE AM8 both record over USB on day one and move to XLR when you want an interface, which means your first microphone is not thrown away at the first upgrade.
The reverse argument is worth stating fairly: if you already know you want two hosts on separate tracks, or you want the ability to run a physical gain knob, buying straight into an interface setup is defensible from the start. For a single solo host, USB first is still the cleaner path.
Recording Software to Pair With Your Microphone
No microphone records by itself. Every USB option in this guide needs a computer and something to capture the audio, and picking the wrong recorder is a common reason beginners conclude that the microphone is bad. This is the part of the kit that costs nothing.
Audacity is the default answer for a first podcast. It is free, records straight from your USB microphone, handles multi-track editing and noise reduction, and exports to MP3 or WAV. It is the least glamorous option and the one most first-time podcasters keep using long after they thought they would move on.
Adobe Audition is the paid step up, with spectral editing that makes a badly recorded line salvageable in a way Audacity cannot. It is worth it once you are editing interviews rather than solo monologues, and not before.
Descript edits the transcript instead of the waveform, so you cut a sentence by deleting a word. It suits interview formats where the conversation drives the edit. OBS is for video and streaming rather than podcast audio, and most USB microphones here work with it directly.
Whichever you use, record in WAV at 24-bit and 44.1 kHz or 48 kHz, and record a ten-second room tone at the start of every session. That silence gives your noise reduction something to learn from.
Five Accessories That Actually Change Your Sound
Accessories get oversold, but a short list genuinely moves the needle for a first recording. None of these is a luxury purchase, and each solves a specific problem that shows up in beginner recordings.
A pop filter. It costs very little and removes the thump on P, B, and T sounds that makes a raw condenser recording sound amateurish. Three of the eight microphones here include one.
A shock mount or boom arm. A desktop stand transmits every keystroke and chair movement straight into the capsule. A boom arm removes the microphone from the desk entirely, which is the single biggest change most people can make without buying a different microphone.
Closed-back headphones. Monitoring lets you hear plosives, room noise, and level problems while recording rather than after. Four of the microphones here have an integrated headphone jack.
A foam windscreen. Essential for handheld dynamic microphones, which have little off-axis protection at close range. The Samson Q2U and the FIFINE AM8 both include one.
A USB extension or a powered hub. Longer than it sounds. Front-panel USB ports on desktop computers frequently fail to supply enough current for a microphone, producing a device that works on one machine and not another.
Setups to Skip as a Beginner
Some of the most common beginner purchases solve a problem you do not have while creating one you do. A short disqualification list saves a lot of money and frustration.
Lavalier clip-on microphones for desk-based speech. A clip-on is the wrong shape for a spoken podcast at a desk. Reviews of lavalier options for interviews are worth reading if you are recording in person, but for a fixed desk setup they add cable management problems and mounting fuss without improving the voice.
Cheap all-in-one bundles built around an unknown capsule. The package looks generous, but a thin microphone with a sagging arm and a useless shock mount has to be replaced piece by piece. Buying a named microphone and adding a pop filter separately usually costs less and works better.
Any USB condenser bought for a noisy room without a plan. This is the most common expensive mistake, and it is what drives the recurring complaint about the Blue Yeti. The microphone is not faulty; the type is mismatched. Pick a dynamic instead, or treat the room.
Headphones and interfaces bought before a microphone. The order matters. On podcast forums, experienced users consistently put the microphone first and add the interface second, because the microphone is the largest single contributor to how the result sounds.
Hardware that leaves no upgrade path. A USB-only microphone is not a dead end if your show stays solo on a laptop, but if you already expect a co-host or a studio move, a hybrid body costs little more today and avoids a second purchase later.
Mic Positioning in Five Steps
Positioning changes your audio more than most people expect, and it is free. If you do nothing else from this guide, do this.
1. Set the distance. Aim for 4 to 8 inches, roughly a hand’s width. Condensers work slightly further out; dynamics including the Samson Q2U and the FIFINE AM8 need to be closer, inside their stated 2 to 6 inch working range.
2. Speak slightly off-axis. Do not talk straight into the grille. Aim a few degrees past it so the burst of air from P, B, and T passes beside the capsule instead of into it.
3. Keep the distance constant. The most common editing mistake is level jumping between a leaning-in host and a leaning-back host. Mark your position on the desk with tape and stay in it.
4. Set gain once. Turn up until your loudest phrase peaks around -12 dB on the meter, then leave it alone. If the recording feels quiet, that is a monitoring-volume problem, not a gain problem, and fixing it in post only adds hiss.
5. Get the microphone off the desk. A boom arm removes desk vibration and mechanical keyboard noise, which no microphone can filter out afterwards. This is why the kits with an included arm often sound better than the microphone they contain.
Your Year 1 to Year 3 Upgrade Path
The most common question from someone who has not started yet is whether the first microphone is a dead end. It depends entirely on what you buy, and a hybrid body removes the worry for most people.
Year one: one USB microphone, one pop filter, closed-back headphones. Get ten episodes out. Most of your improvement will come from technique and room choice, not from another box.
Year two: a boom arm, and possibly a second microphone. If you add a co-host, buy a second unit of the same model you already own so the two voices match. Moving to a hybrid or interface setup is natural here, and it is when a mic with XLR output pays off.
Year three: a proper audio interface, then the microphone upgrade. Once you have gain control, monitoring meters, and two inputs, replacing the microphone actually changes the sound. Doing it in this order means every step of the spend was usable when you made it.
The reverse sequence is the common waste: buying the microphone first and then discovering you cannot monitor it, cannot record a guest separately, or cannot control the level cleanly.
Frequently Asked Questions
Which microphone is best for podcasts?
For a beginner, the best podcast microphone is one that connects over USB so you can start recording immediately, and a dynamic model such as the Samson Q2U or the FIFINE AM8 if your room has any background noise. In a quiet, treated space the Logitech Blue Yeti or the Elgato Wave:3 MK.2 give more vocal detail. Pick your microphone type first, then the price.
What is the best microphone for starting a podcast?
The best microphone for starting a podcast is a USB microphone that needs no interface. The Blue Yeti is the safest all-round choice because it has four pickup patterns, onboard gain and monitoring, and the largest body of published ratings. If your room is noisy, choose a dynamic USB and XLR model instead, such as the Samson Q2U, which ignores more background sound.
Is the Samson Q2U microphone good?
Yes. The Samson Q2U is the most frequently recommended starter microphone in podcast communities, largely because it is a dynamic microphone with both USB-C and XLR output in one handheld body. That means it forgives an untreated room and can move to an audio interface later without being replaced. Its main weakness is the bundled desktop stand, which sits low and is worth replacing with a boom arm.
Is the Blue Yeti microphone still worth it?
The Blue Yeti is still worth it in a quiet room, and it is still the most popular first podcast microphone by a wide margin. It is a condenser, so it captures room noise, breathing, and plosives along with your voice, which is the source of the recurring complaint that it picks up too much background sound. Add a pop filter, keep the gain modest, and record in the smallest soft room you can find.
Do I need an audio interface to start a podcast?
No. Every USB microphone in this roundup connects directly to a laptop and records without an interface, which is why USB is the right first step for a solo host. Buy an interface later if you want real gain control, headphone metering, or the ability to record a co-host on a separate input. A microphone with both USB and XLR output lets you make that move without replacing the microphone.
How close should I be to a podcast microphone?
Aim for 4 to 8 inches, roughly a hand’s width from the mouth. Dynamic microphones such as the Samson Q2U and the FIFINE AM8 need the closer end of that range, often 2 to 6 inches, because they rely on proximity for clarity. Speak a few degrees off-axis rather than straight into the grille so plosives pass beside the capsule, and keep the distance constant so your level does not jump between lines.
Should I buy a USB or XLR microphone?
Buy USB if you are recording solo on a laptop and want no extra hardware, because the preamp and conversion happen inside the microphone. Buy a hybrid USB and XLR model if you expect to add a co-host or an interface later, since the same microphone works in both setups. Buy XLR only if you already have an audio interface with gain control and two inputs available.
What is the 3 to 1 rule for microphones?
The 3 to 1 rule is a room acoustics guideline: for every 1 metre of distance from the microphone to the nearest reflective surface such as a wall or window, there should be about 3 metres of space between that surface and the opposite wall. It is a quick way to estimate whether a room will sound controlled. A treated or furnished room does more for a beginner recording than a more expensive microphone.
The Right Beginner Microphone for Your Setup
There is no single best podcast microphone for beginners, but there is a short, honest decision. In a quiet room, start with the Logitech Blue Yeti, the highest-confidence first purchase here, and add a pop filter and a boom arm. In a room you cannot control, start with a dynamic, and the Samson Q2U or the FIFINE AM8 will beat a pricier condenser every time.
If you want everything in one box on a small budget, the MAONO A04 solves the arm and pop filter problem before it starts. If you are on the tightest budget, the FIFINE K669B is a capable metal condenser, and the TONOR TC-777 is the option when you would rather buy once and have the accessories included.
Whichever you choose, record your first ten episodes before buying anything else. Technique, room choice, and a consistent recording distance will improve your show far more than the next step up in microphone. If you also want a second perspective, our guides to microphones for ASMR and lavalier microphones for interviews cover the two formats where the rules change.