
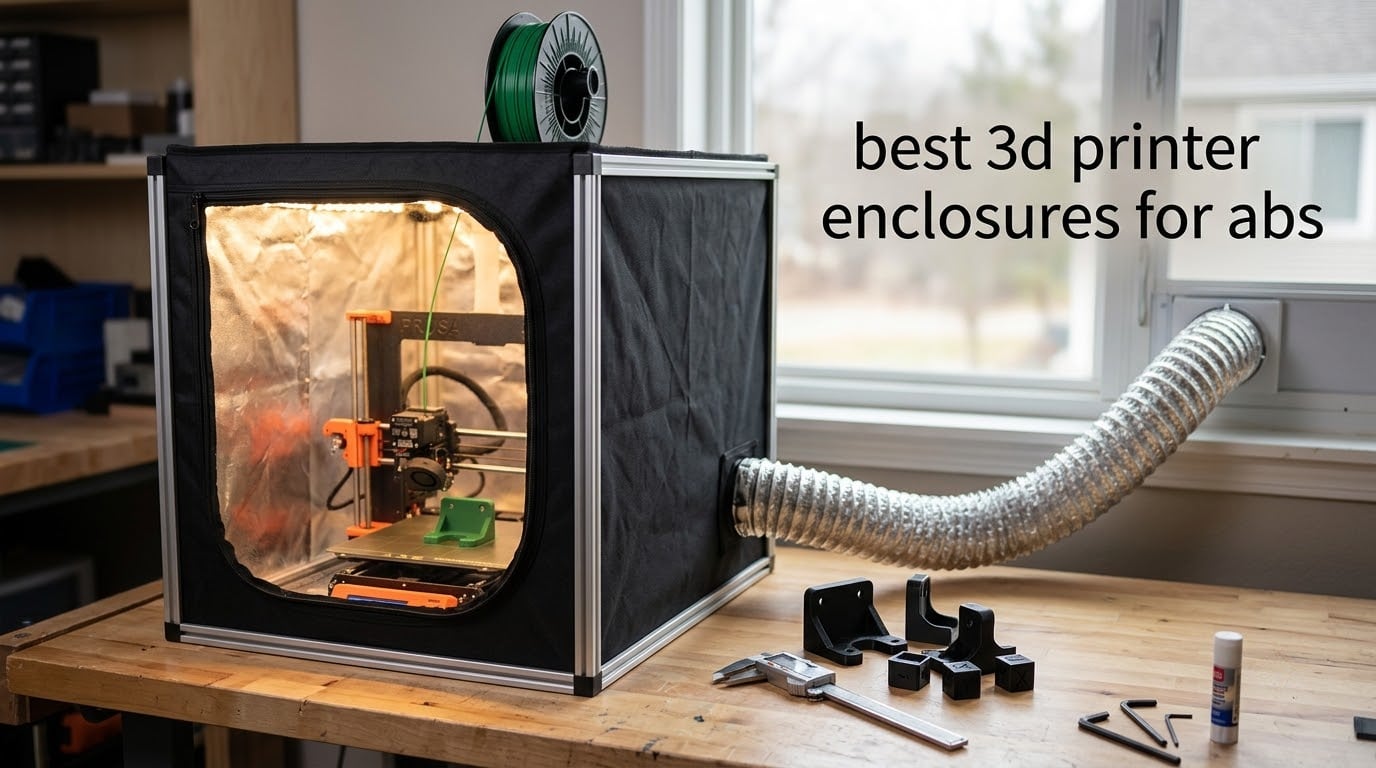
Does ABS printing require an enclosure? Yes, and the short answer is that a good ABS 3D printer enclosure must do six things: hold a steady chamber ambient of 45-60C, block draughts, exclude ambient humidity, keep the door sealed during long prints, filter or exhaust the styrene vapour ABS gives off, and give you a way to confirm the temperature is actually being held rather than assumed.
That matters because ABS behaves differently from PLA in a way that punishes inconsistency. When ABS extrudes it is roughly 230-250C and when a layer lands it is already cooling toward room temperature. The next layer has to fuse with a surface that has shrunk. Cool the room, the part shrinks faster, the corners lift, the bottom layers peel away from the bed, and tall prints split along the layer line once the stress releases. An enclosure removes the thermal gradient by keeping the whole chamber warm, so every layer fuses against a neighbour that is at a similar temperature.
We spent weeks comparing ten of the most reviewed 3D printer enclosures for ABS work, reading the customer photo reviews closely, and checking the temperature and filtration claims against what the technical sheets actually say. Ten of the ten have two customer images posted, so you can see real setups rather than studio renders. We also leaned on the recurring questions from the 3D printing forums, where the failure points are consistent: leaky door seals, filters mounted in the wrong place, and enclosures that never actually reach 60C on a cold night.
Quick note before we start: every enclosure below needs a printer that can reach a 90-110C bed. If you have not chosen a machine yet, our guide to the best 3D printers for beginners covers the enclosed models that pair with these. For smaller decorative work rather than functional parts, the best 3D printers for miniatures roundup goes into detail on the other end of the size range.
Table of Contents
Top 3 Picks for ABS Printing in 2026

Skouphy Creality Ender Tent
- Aluminum film interior
- Flame-retardant shell
- 480x600x720mm
- Folds flat

DORUNDEA Ventilated Tent
- Three-layer filter
- 12V fan with speed control
- Stainless steel frame
- UV window

FUNGDO Ventilation Kit Enclosure
- 180 CFM exhaust fan
- Airtight zippers and gaskets
- 5-15C temperature lift
- LED bar included
Best 3D Printer Enclosures for ABS in October
All ten enclosures below are in the same conversation, but they solve different parts of the ABS problem. The quick table gives you the type, the key spec, and what each one is genuinely good at so you can narrow the field before reading the full write-ups.
| Product | Specifications | Action |
|---|---|---|
| Skouphy Creality Ender Tent Enclosure |
|
Check Latest Price |
| DORUNDEA Ventilated Enclosure Tent |
|
Check Latest Price |
 FLASHFORGE Adventurer 5M Enclosure Kit FLASHFORGE Adventurer 5M Enclosure Kit |
|
Check Latest Price |
 FLASHFORGE AD5X Enclosure Kit FLASHFORGE AD5X Enclosure Kit |
|
Check Latest Price |
| FUNGDO Enclosure with 180 CFM Ventilation Kit |
|
Check Latest Price |
 VEVOR Oxford Cloth Enclosure with LED VEVOR Oxford Cloth Enclosure with LED |
|
Check Latest Price |
 YOOPAI Dustproof Constant Temperature Tent YOOPAI Dustproof Constant Temperature Tent |
|
Check Latest Price |
 UniTak3D Enclosure with Ventilation and LED UniTak3D Enclosure with Ventilation and LED |
|
Check Latest Price |
 Skouphy Bambu Lab A1 Enclosure Upgrade Skouphy Bambu Lab A1 Enclosure Upgrade |
|
Check Latest Price |
 Orionix Kobra X Tent with Ventilation Orionix Kobra X Tent with Ventilation |
|
Check Latest Price |
A note on what you will not find here: every option in this list is a bolt-on enclosure. We left out integrated enclosed printers deliberately, because the decision to wrap the printer you own and the decision to buy a different printer are two different purchases, and we cover that trade-off in the buying guide. The single most useful thing you can do before buying any of these is measure your printer’s outer dimensions including the spool holder, because five of these ten are sized for a specific model rather than a category.
1. Skouphy Creality Ender Tent Enclosure – Best Overall ABS Enclosure
Creality 3D Printer Enclosure Fireproof and Dustproof Tent Constant Temperature Protective Cover Room for Creality Ender 3V2/Ender 3V2 Neo/Ender 3S1/Ender 3Pro/Ender 3 3D Printer
Aluminum film interior
Flame-retardant shell
Fiberglass rod frame
480x600x720mm
Pros
- Highest rated and most reviewed in the group
- Aluminum-lined interior passed a flame resistance test
- Holds steady chamber temperature which measurably helps ABS bed adhesion
- Folds flat for storage
Cons
- No built-in fan or filtration so odor control needs a separate exhaust accessory
- Listed under a brand name that does not match the printer compatibility in the title
This is the enclosure we kept coming back to. It has the highest average rating of the ten and the largest review base at 630 ratings, which means the temperature claims have been stress-tested by far more owners than any other tent here. Buyers consistently single out two things: the aluminum film interior and the fact that the chamber holds a steady temperature rather than spiking and collapsing between layers.
That interior lining is the detail that separates it from cheap polyester tents. Pure aluminum film over a flame-retardant outer shell means the surface nearest the hot end melts rather than propagating flame, which is a real consideration in a home with a printer running overnight. The frame is fiberglass rod rather than folding flat metal, so the box keeps its shape across heat cycles instead of sagging over a few months of use.
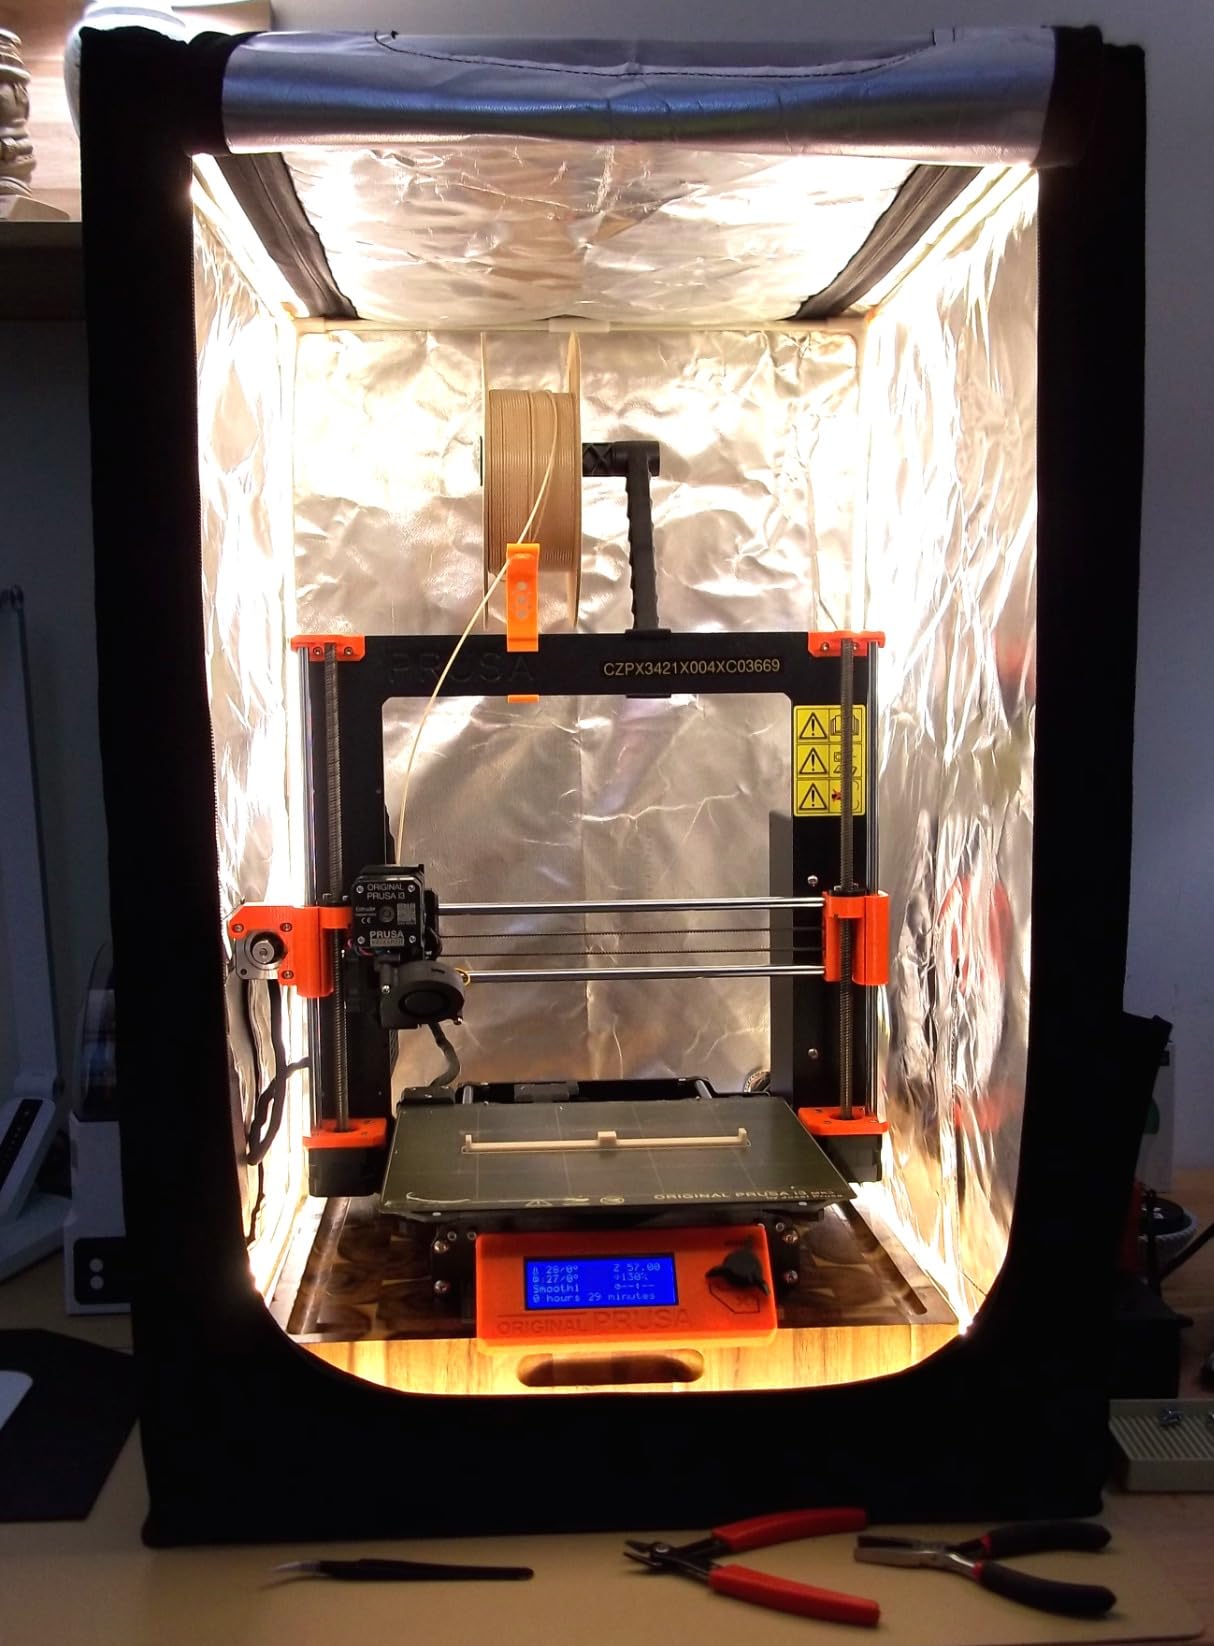
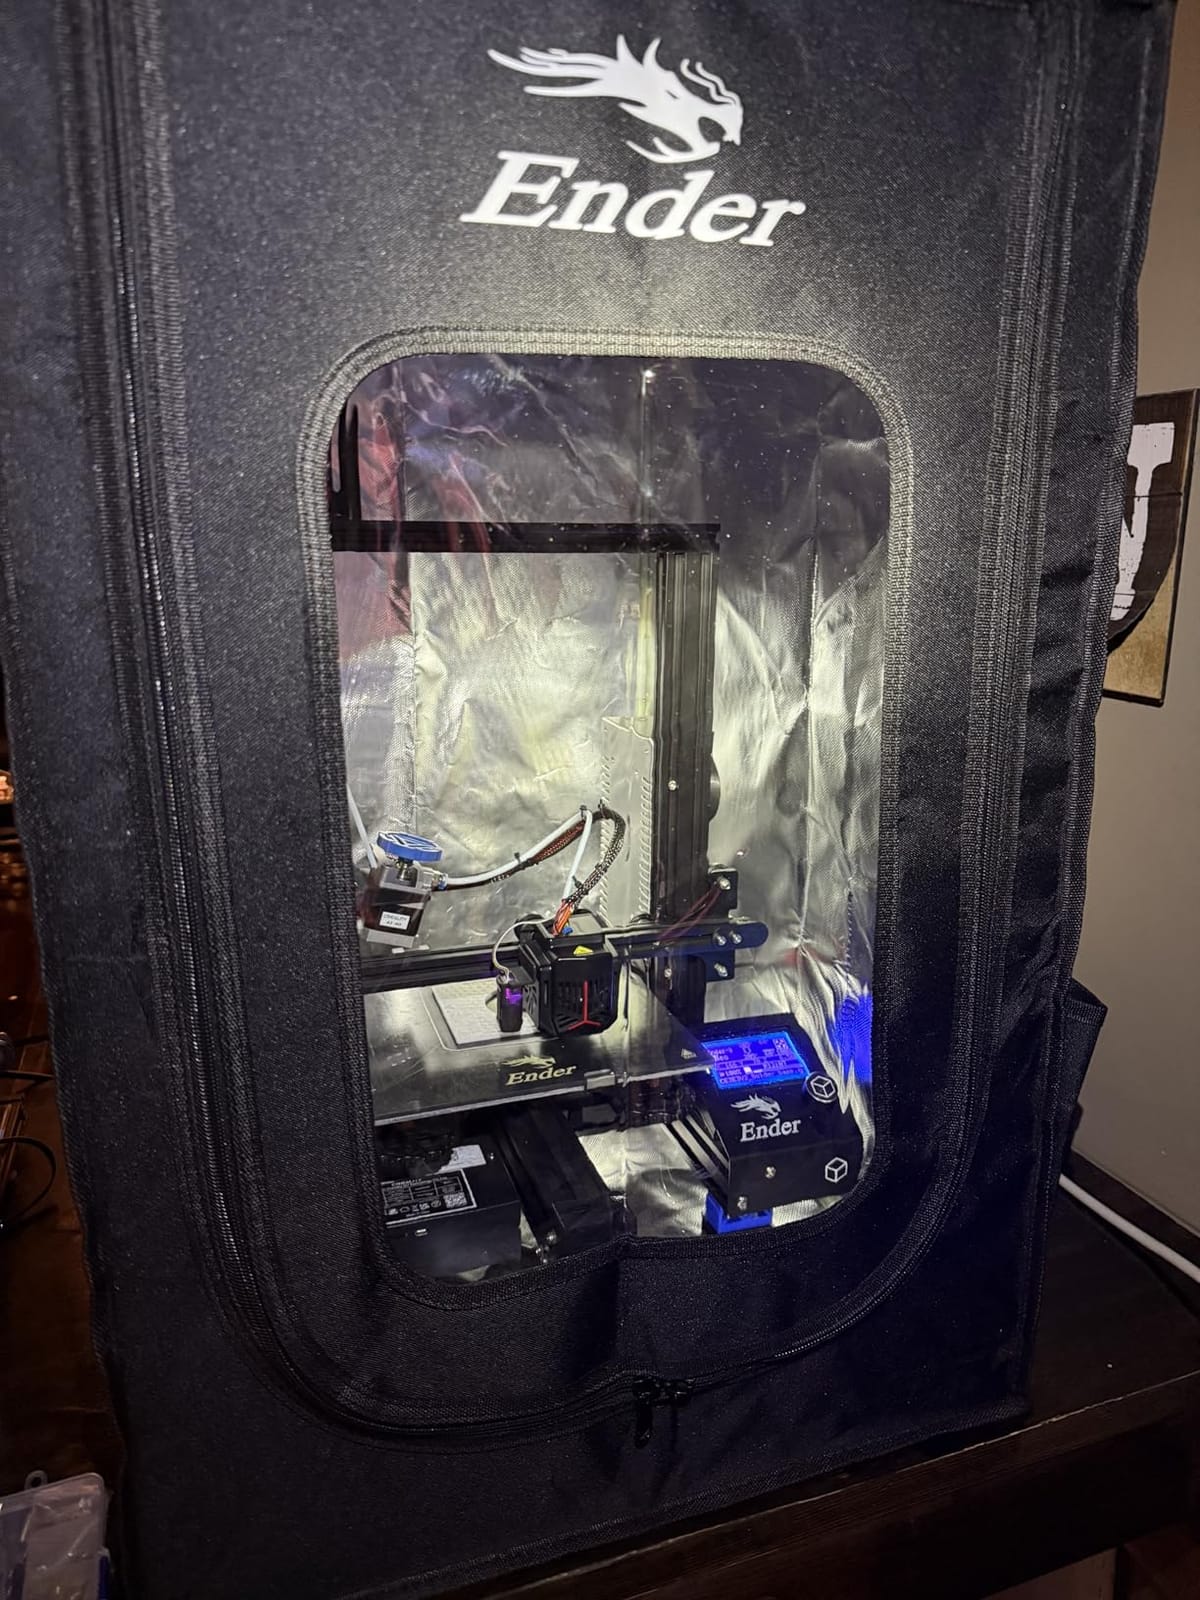
At 480 by 600 by 720mm it covers the Creality Ender 3V2, 3S1, 3 Pro, 3V2 Neo, Ender 5 and 5S1, and also clears an Anycubic Kobra and an ELEGOO Neptune 3. That broader fit is unusual for a tent at this level, and it means you are not locked into one printer model if you upgrade later. The multi-faceted observation panels let you watch a first layer without opening the door and dumping the heat.
The weakness is ventilation. There is no fan and no filter, so the enclosure contains styrene vapour rather than removing it. For a garage or workshop with a window or an extractor that is a workable arrangement, but if you are printing ABS in a room you share with other people you will want to add an exhaust of some kind. If your priority is a hard number on air changes per hour rather than heat retention, the FUNGDO kit further down is the more honest fit.
Who this suits best
This is the pick for an Ender 3 family owner printing ABS regularly in a home office or workshop who wants reliable temperature retention without running a noisy extraction fan all night. It is also the most forgiving option if you are unsure your printer will fit, because the internal dimensions are among the most generous relative to the footprint.
Who should skip it
Skip it if fumes are your main concern. A sealed chamber with no exhaust concentrates styrene rather than clearing it, and the single most common complaint from enclosure owners on the forums is exactly that: the moment the door opens, everything inside comes out at once. Adding a filtration upgrade solves it, but you are buying two products instead of one. If you print at a desk in a small room, choose a kit that moves air instead.
2. DORUNDEA Ventilated Enclosure Tent – Best Filtered Tent for Styrene Control
Multifunctional 3D Printer Enclosure Ventilation Eliminate Odors Tent Cover
Three-layer filter
12V fan with speed control
Stainless steel frame
UV viewing window
Pros
- Only enclosure here with a three-layer filter that absorbs dust and harmful gases
- Adjustable fan speed via a 12V controller
- Stainless steel pipe frame resists corrosion
- Room enough for a Bambu Lab P2S with AMS
Cons
- Fan bracket needs a separately 3D-printed adapter part
- No internal lighting so a USB light gets added
- Shell is very light and can shift unless anchored
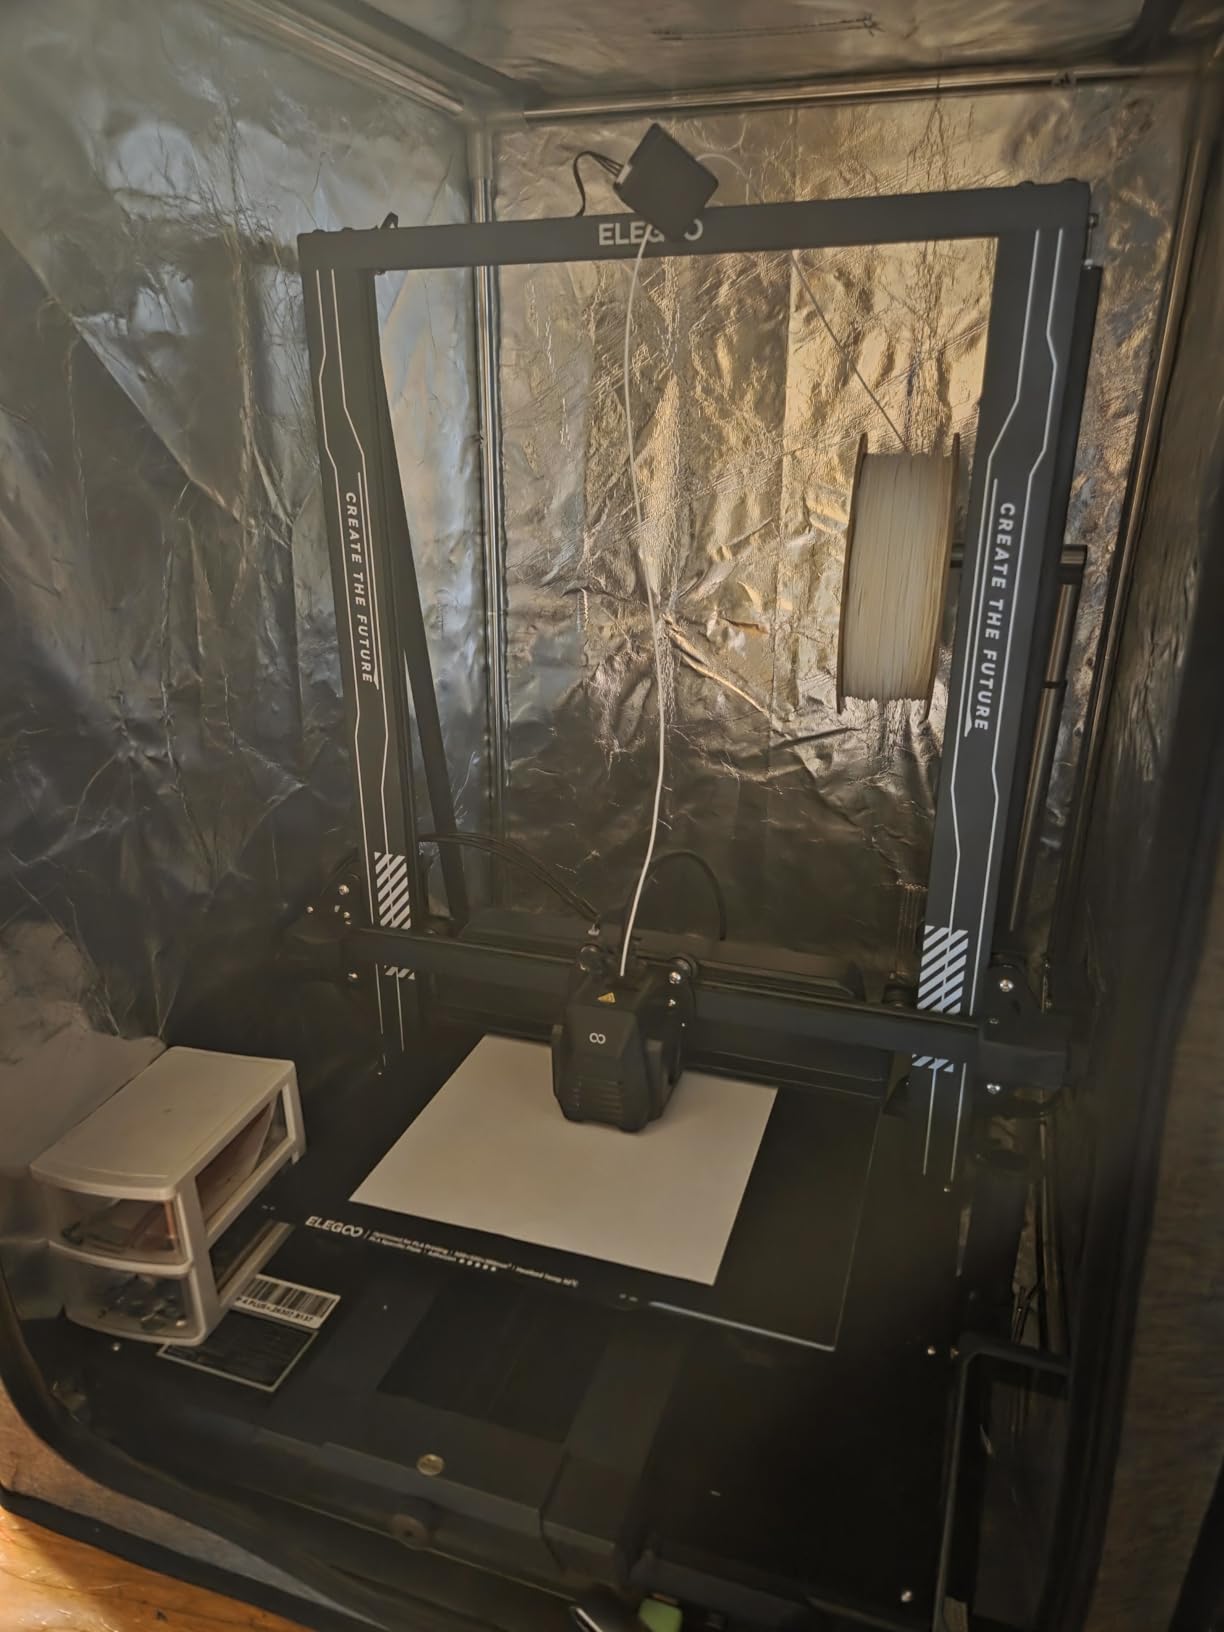
Of the ten, this is the only tent that ships with a genuine air-handling system. The 12V fan runs through a speed control adapter rated for AC 100-240V input and 3-12V 2A output, and the three-layer filter is mounted to the cooling fan to absorb both large dust particles and the gas phase that HEPA alone cannot touch. For ABS that distinction matters, because styrene is a vapour and particulate filters are useless against it.
Reviewers report that when the duct is run out a window, resin and filament odour simply disappears, and the stainless steel pipe frame is an upgrade over the iron frames used in cheaper tents. The internal volume is unusually generous for a tent, enough to house four printers or one with a multi-material unit mounted on top, which makes it a reasonable option for a small print farm.
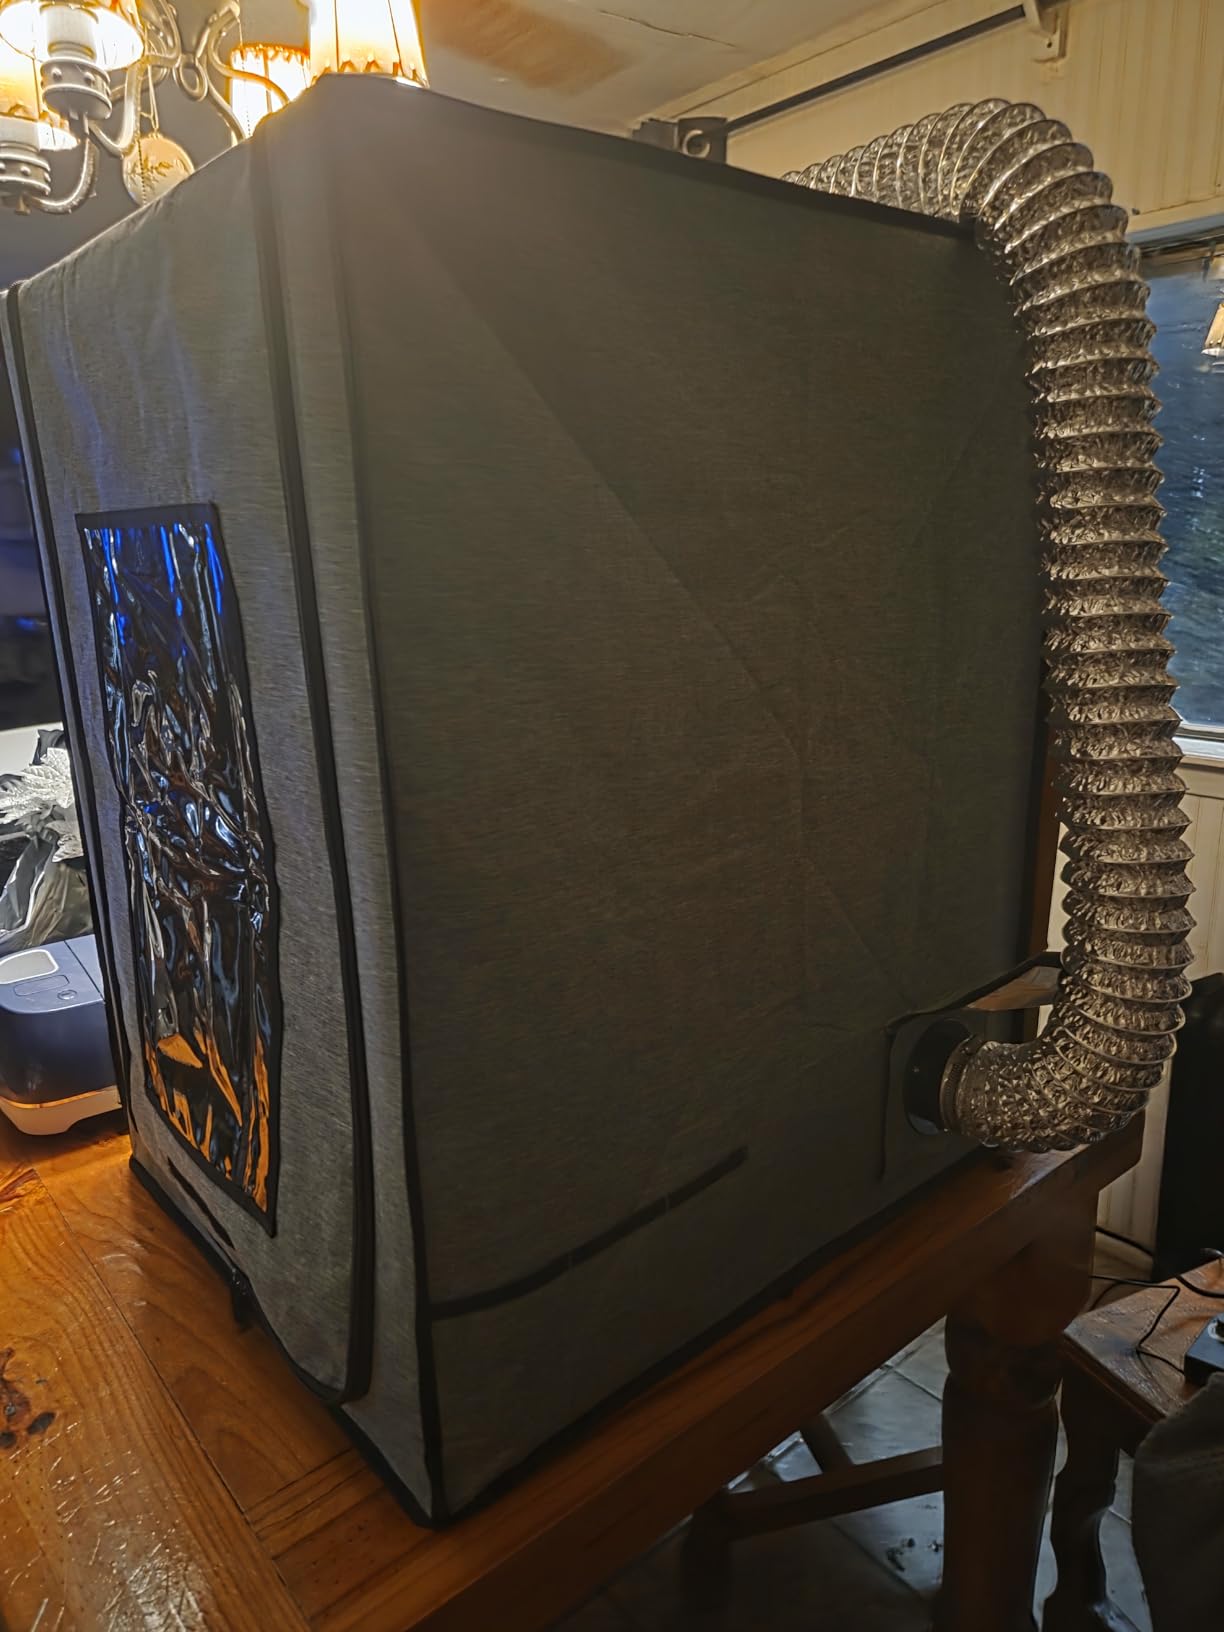
Two practical things to know before you commit. The steel fan bracket is replaced by a plastic adapter that has to be 3D-printed separately, and the listing points to a public design for it, so plan on an evening of printer time or a buy. There is also no internal lighting, and owners end up routing a USB strip inside. The fabric itself is light enough that the whole unit can walk across a desk if you do not anchor it, which is worth doing if you have pets.
There is one more thing to weigh. The filter is a consumable. Owners running heavy ABS schedules report replacing these on a multi-month interval, and a saturated carbon layer will quietly stop removing vapour while the enclosure still looks and sounds like it is working. Mark the replacement interval on the enclosure itself the day you install it.
Who this suits best
This is the pick for anyone printing ABS in a shared space who has ruled out a rigid enclosure but still wants active extraction. The adjustable fan means you can run it low for a long print and high during resin work, and the stainless frame survives the damp that fabric tents collect in a garage.
Who should skip it
Skip it if you are not willing to print one small adapter part, or if you will not commit to replacing the filter on a schedule. A three-layer filter that has gone saturated is a false sense of security, and owners on the forums are clear that a neglected carbon filter does far less than the spec sheet suggests. Also note the light shell: on a smooth bench it will move every time you open the door.
3. FLASHFORGE Adventurer 5M Enclosure Kit – Best for Flashforge Adventurer 5M Owners
FLASHFORGE Adventurer 5M 3D Printer Enclosure kit, DIY Design, Reduce Noise, Increase Safety and Odor Isolation, Supports Printing High Temperature Filaments, Like ASA and PC
DIY enclosure kit
65 dB to 55 dB noise reduction
Odor isolation for ABS and ASA
4.14 pounds
Pros
- Designed by the printer manufacturer for ASA and PC
- Cut printing noise from 65 dB to 55 dB
- Effective ABS and ASA odour containment
- Exterior colour is customisable
Cons
- Kit only so you need a compatible frame and some assembly confidence
- Footprint is wide relative to compact printer beds
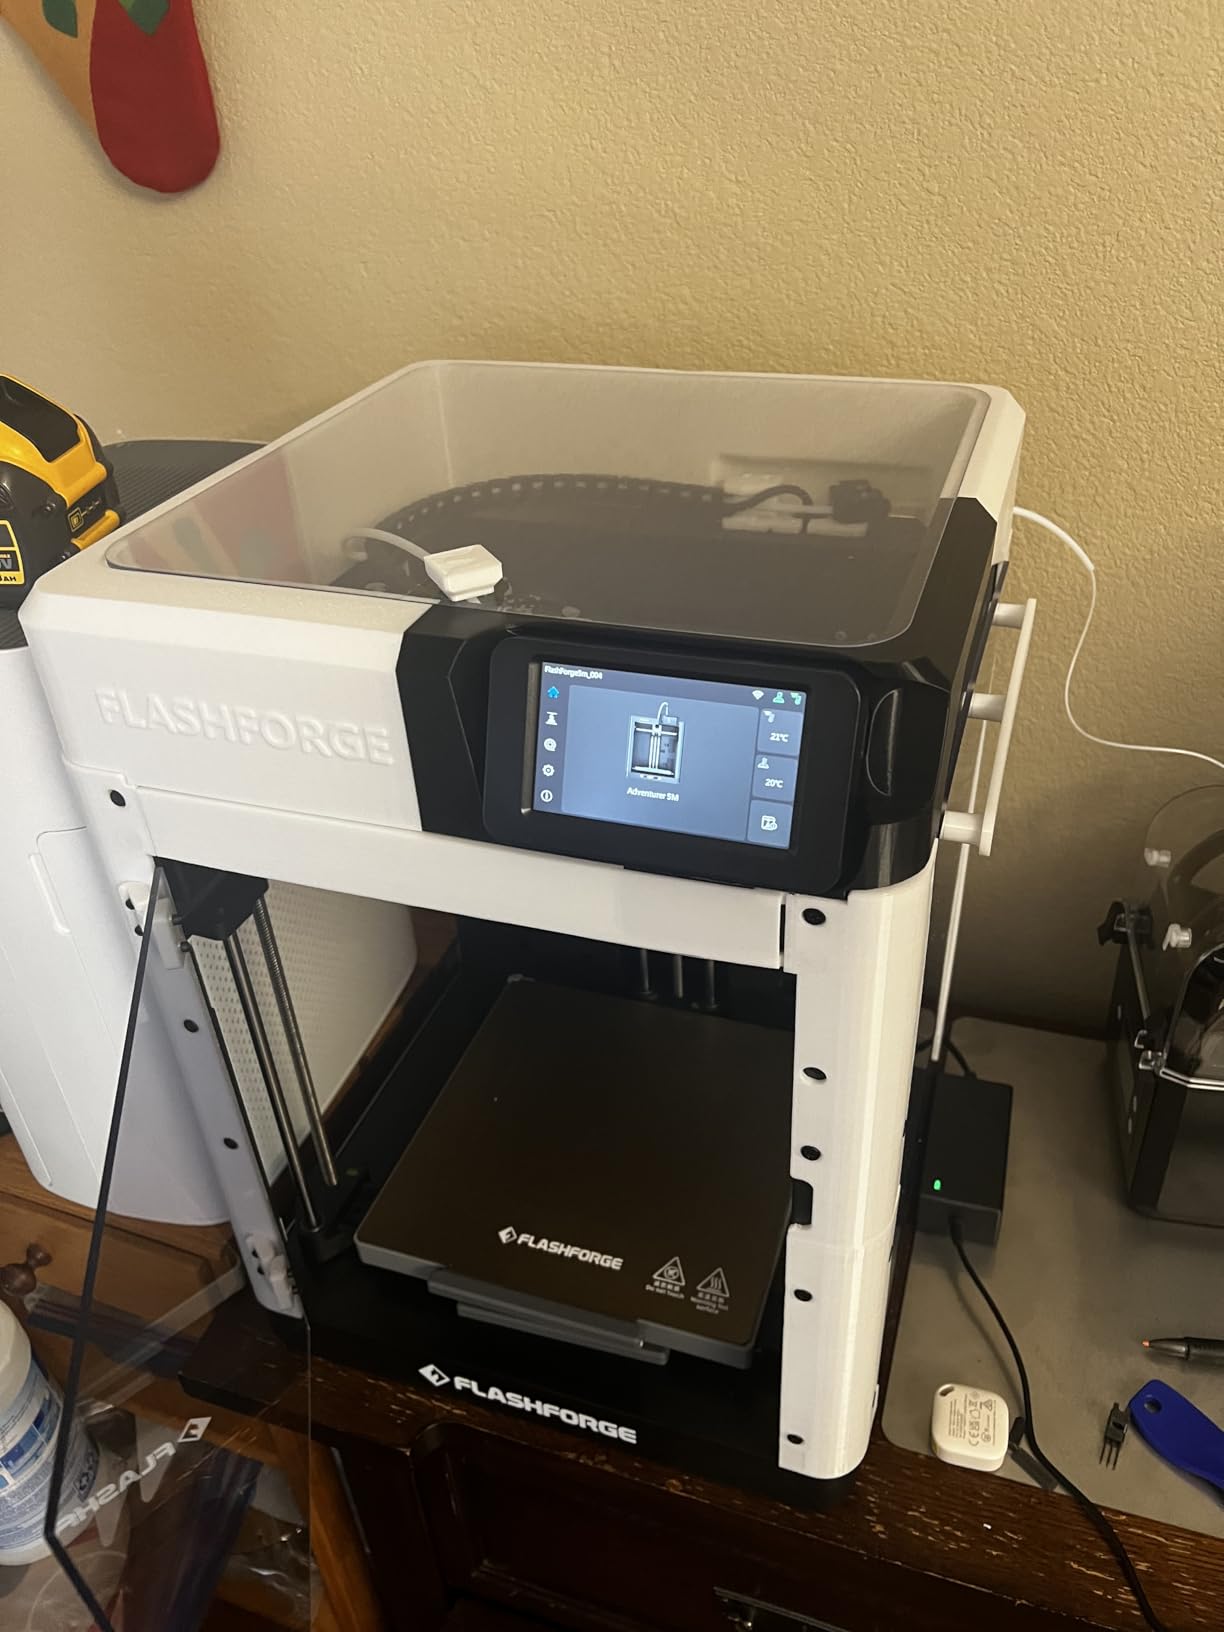
This is the enclosure kit designed by the same company that builds the printer, which is why the fit is predictable and the noise figure is measured rather than guessed. The claimed reduction from 65 dB to 55 dB is a real 10 dB drop, and 10 dB is roughly half as loud subjectively, so a printer that was intrusive in a room becomes tolerable.
For ABS specifically, the selling point is the odour isolation combined with heat dissipation management. The shell is designed to contain the vapour from ABS and ASA rather than let it fill the room, and the enclosure exterior colour is customisable, which sounds cosmetic but means it can blend into a workspace instead of looking like a camping pitch.
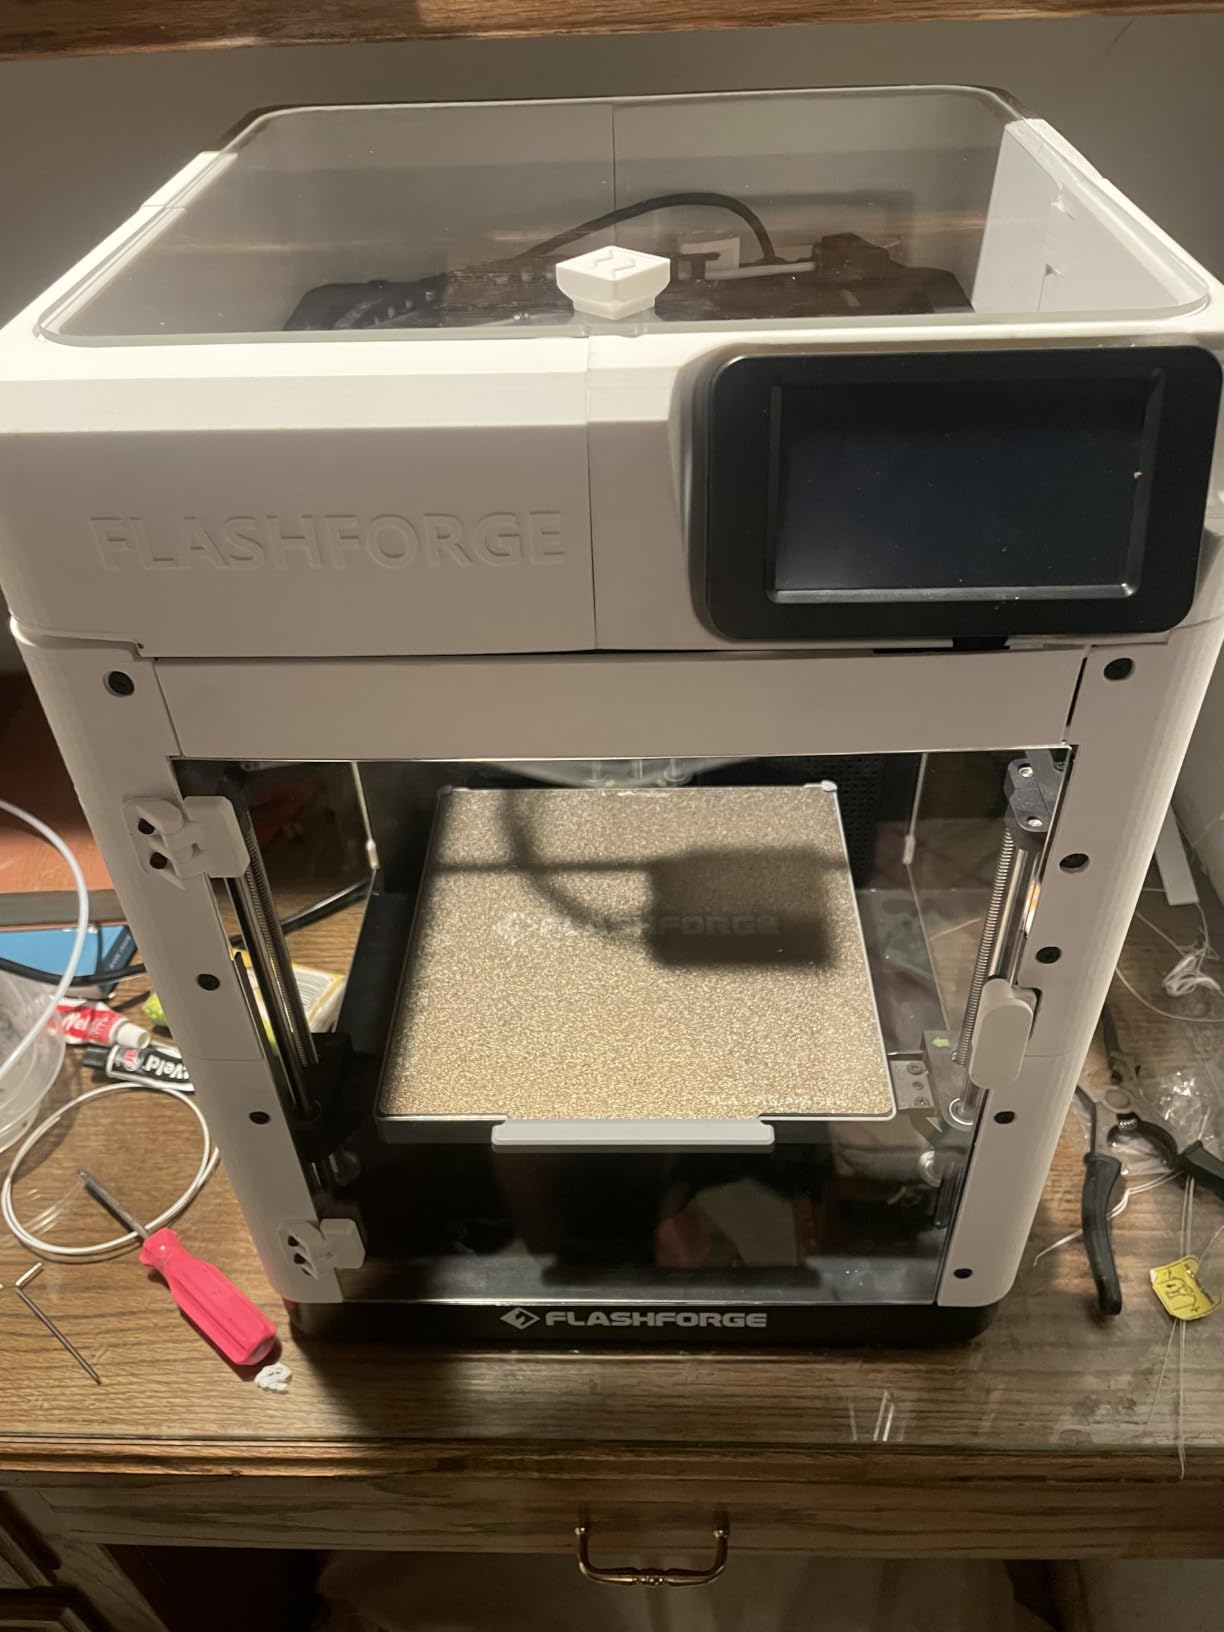
There is an important caveat in the 623 ratings. A notable share of one-star reviews comes down to fit and assembly friction rather than the enclosure failing at its job, so treat this as a kit that rewards careful assembly and punishes rushing it. Read the fitting sequence twice before you start, and confirm the frame on your printer matches the kit before the panels go anywhere near it.
Like the other non-extracting enclosures here, this contains odour rather than clearing it. If you are printing in a room with a window, that is fine. If you are not, plan an extraction add-on. It is a 4.14 pound kit, so it is light to move but also light enough to need anchoring if your printer surface is slick.
Who this suits best
This suits an Adventurer 5M owner who prints ASA and ABS in a shared room and is bothered by fan noise more than by odour. Buying the manufacturer enclosure is the lowest-friction way to get a known-good fit without measuring panels and guessing at clearances.
Who should skip it
Skip it if your printer is not an Adventurer 5M or you want a future upgrade path, because this is a model-specific shell and will not travel. Also skip it if you are determined to move the fumes out of the room rather than contain them, and give the two kits with integrated fans a look instead. The 10 dB noise reduction is real, but it is not a ventilation solution.
4. FLASHFORGE AD5X Enclosure Kit – Best Fit for the AD5X
FLASHFORGE AD5X Enclosure Kit, DIY Colors & Style, Optimized Design, Reduced Noise and Odor, Suitable for High-Temperature Filament Printing
Pre-drilled panels
No screen cable removal
Chamber stability for ABS ASA PC
5.7 pounds
Pros
- Purpose-built for the AD5X so mounting points line up exactly
- Pre-drilled panels mean no drilling cutting or modification
- Screen cable stays connected which removes the most common install failure
- Stabilises chamber temperature for ABS ASA and PC
Cons
- Fits only the AD5X so it is useless as a universal enclosure
- Contains odour rather than venting it and has no integrated exhaust
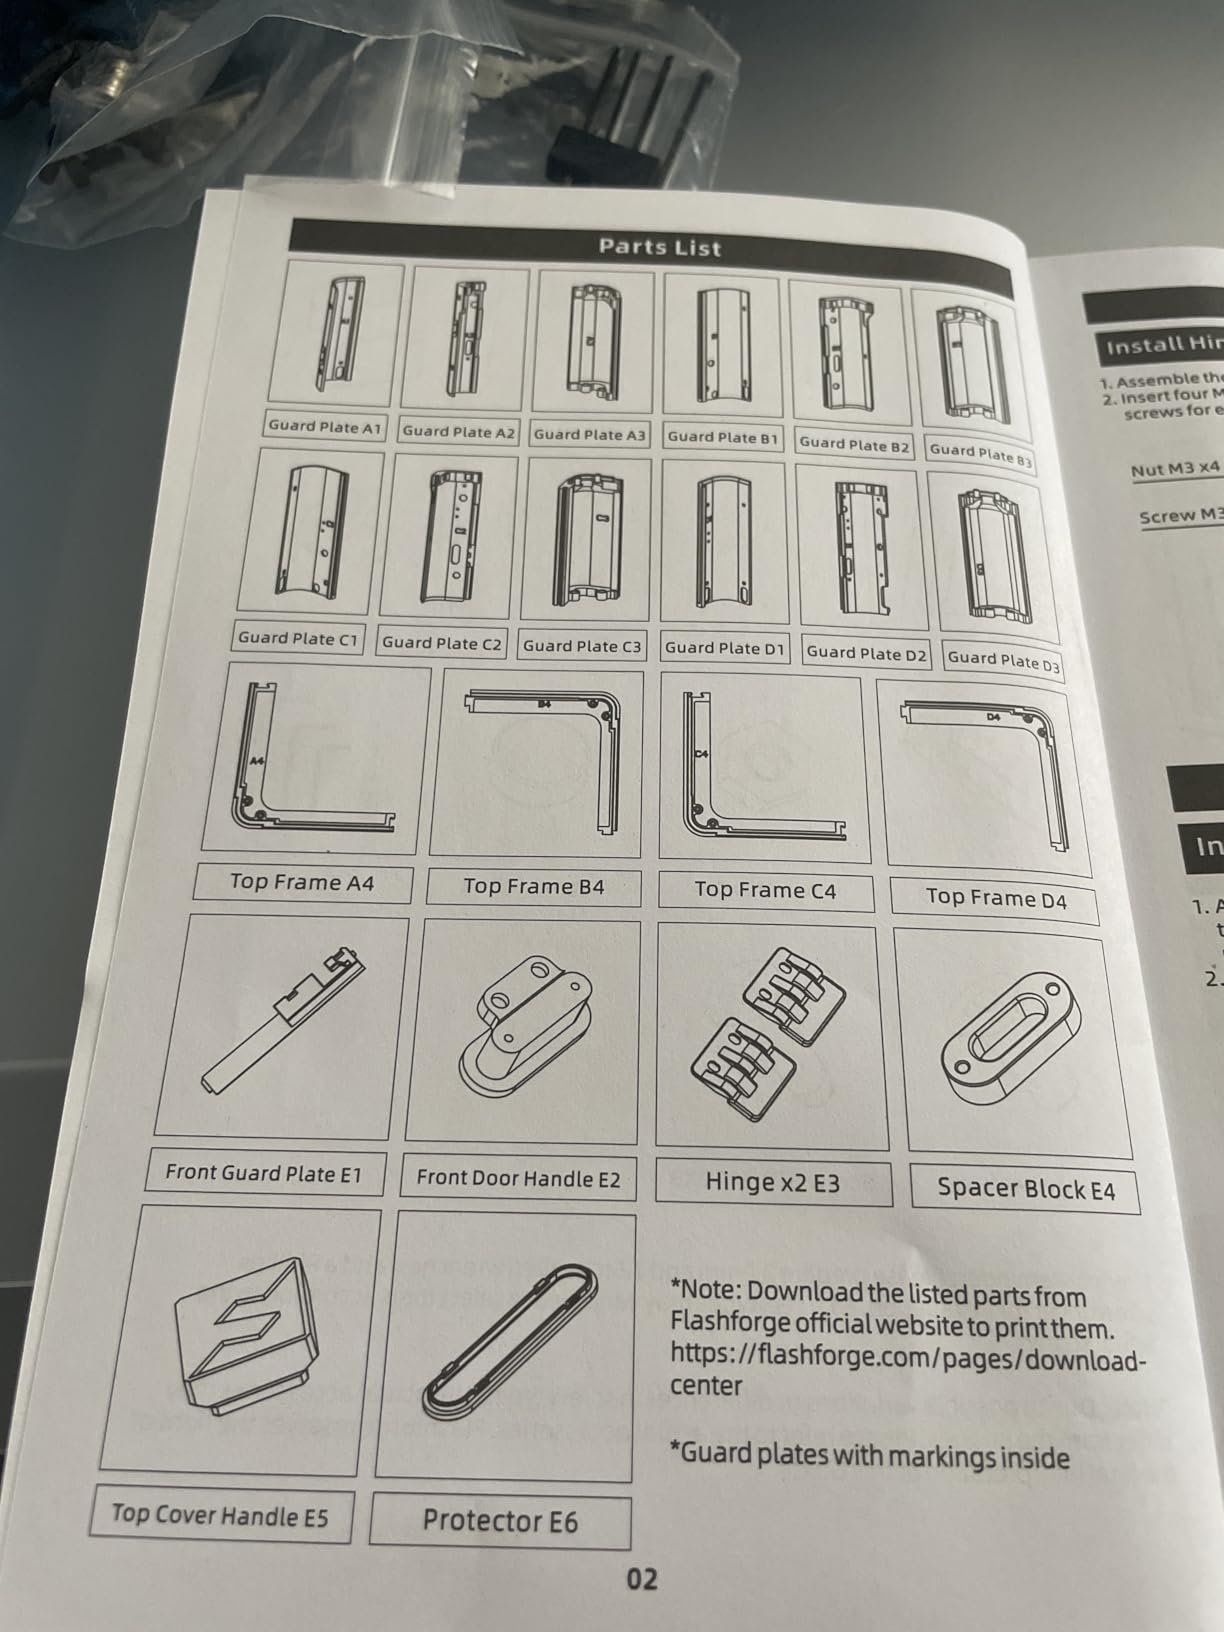
The reason this kit gets better reviews than its rating suggests is the install. Two details stand out: the panels are pre-drilled and aligned so you never touch a drill or a cutter, and the display cable stays connected during fitting. Disconnecting and reconnecting a screen cable is the single most common way people damage one of these, and the redesign specifically routes around that failure point.
For ABS the technical claim is consistent chamber temperature across ABS, ASA and PC, which is exactly the range that needs it. Rated for 233 owner reviews at 4.3, it is a well-liked kit that does one narrow job very cleanly rather than trying to be universal.
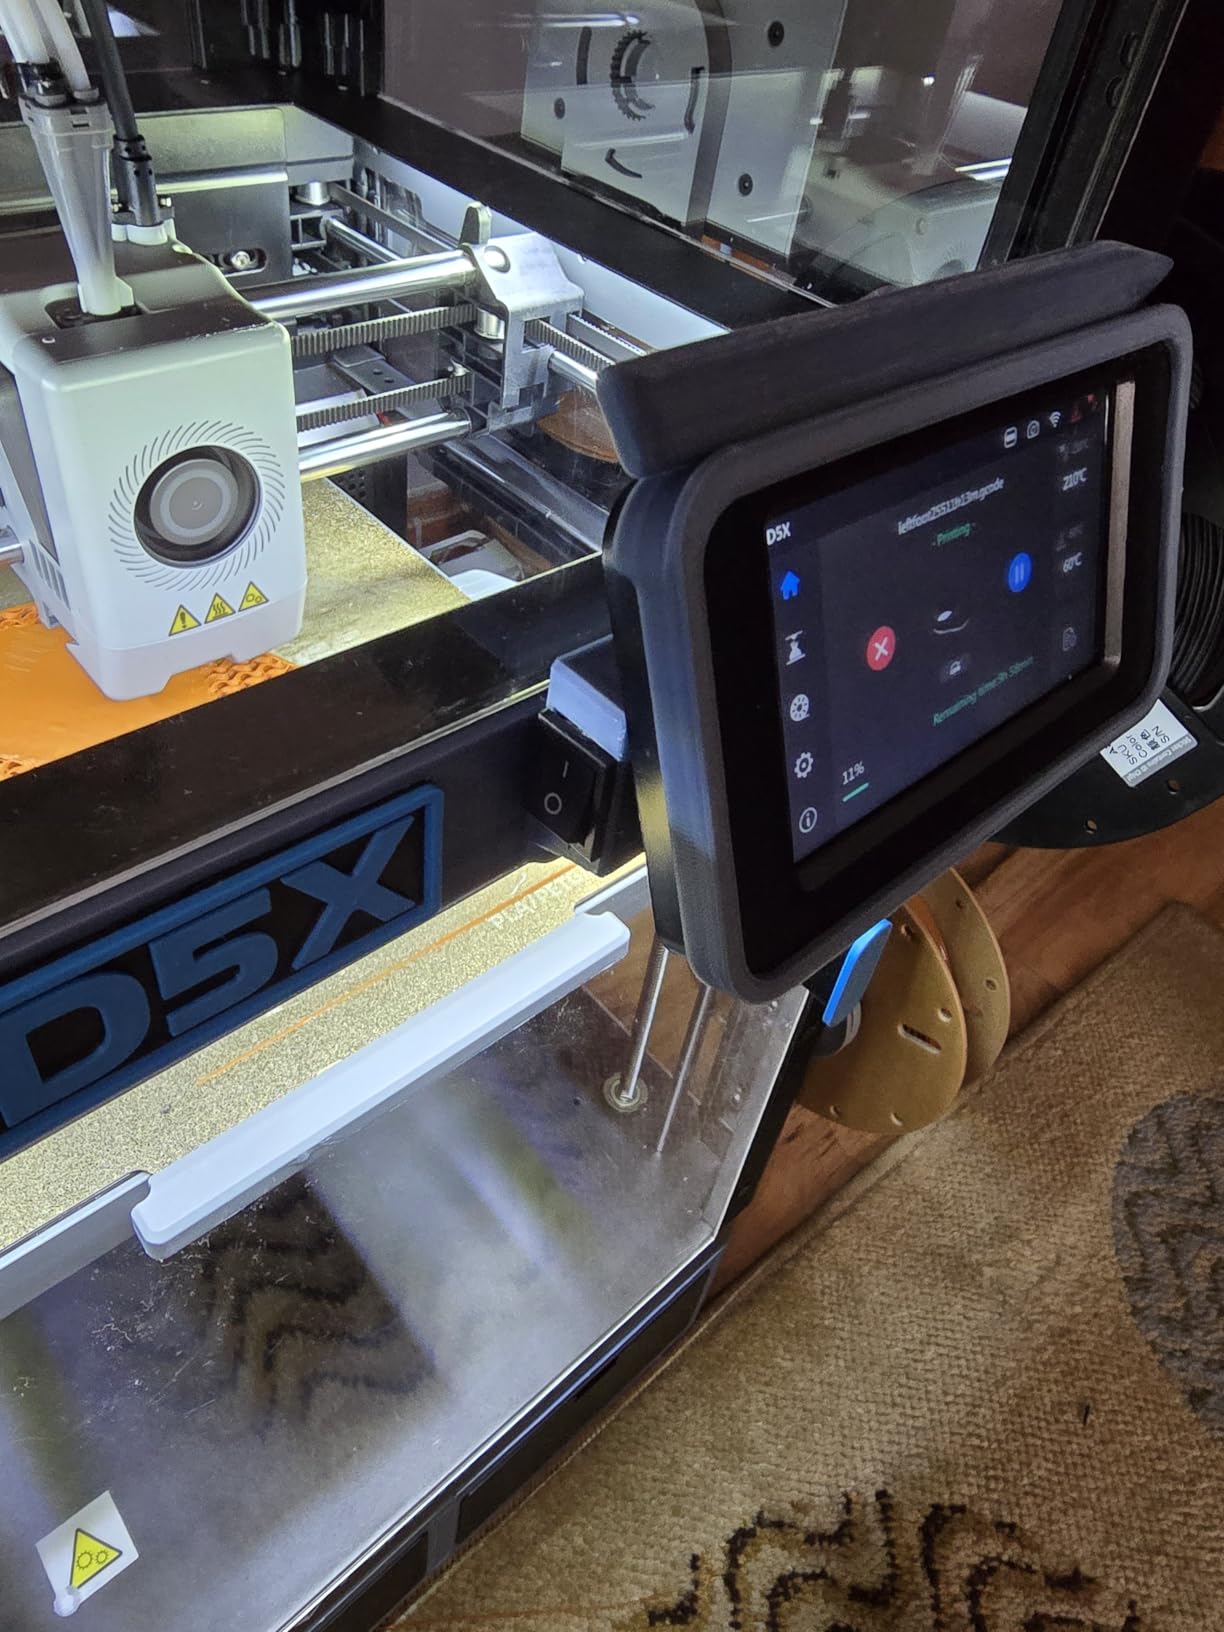
The limitation is obvious and worth stating plainly. This fits the AD5X and nothing else. If you are considering buying the printer specifically to get this enclosure, that works. If you already own an AD5X and later move to a larger machine, the shell is dead weight in a cupboard. It is also an enclosed-only design, so odour is managed rather than expelled.
At 5.7 pounds it is the heaviest of the model-specific kits in this roundup, which adds some reassurance about panel rigidity over repeated heat cycles. If you are weighing it against a generic tent purely on build quality, the pre-drilled fit is the argument in its favour.
Who this suits best
This is the pick for an existing AD5X owner who wants the cleanest possible install and a shell designed to the same tolerances as the printer. The no-disconnect screen cable alone saves the kind of troubleshooting that most generic tents cause.
Who should skip it
Skip it unless you own an AD5X. It has no value as a general enclosure, and if your printer is still undecided, a size-flexible tent like the VEVOR further down will serve you whatever you buy. It also does not solve fumes, so pair it with a window or an extractor if you are printing in a lived-in room.
5. FUNGDO Enclosure with 180 CFM Ventilation Kit – Best for Real Fume Extraction
FUNGDO 3D Printer Enclosure with Ventilation Kit & LED Lighting– Thermal Insulation Cover & Fume Extraction Tent for FDM/DLP/SLA/LCD 3D Printers(Size 700 * 750 * 900mm)
180 CFM exhaust fan
Airtight zippers and EVA gaskets
5-15C temperature rise
Complete kit with LED bar
Pros
- Most capable air movement in the group with 180 CFM refreshing air about 10 times per minute
- Complete kit with fan duct backdraft valve shelf and light bar
- Insulation lining measurably lifts internal temperature 5-15C
- Dual exhaust ports allow hose routing to suit the room
Cons
- Cover can tear at the seams because the frame is a very tight fit
- Bundled fan is reported as loud by some units and is not easy to replace
- Instructions contain errors and some variants arrive with an EU plug LED
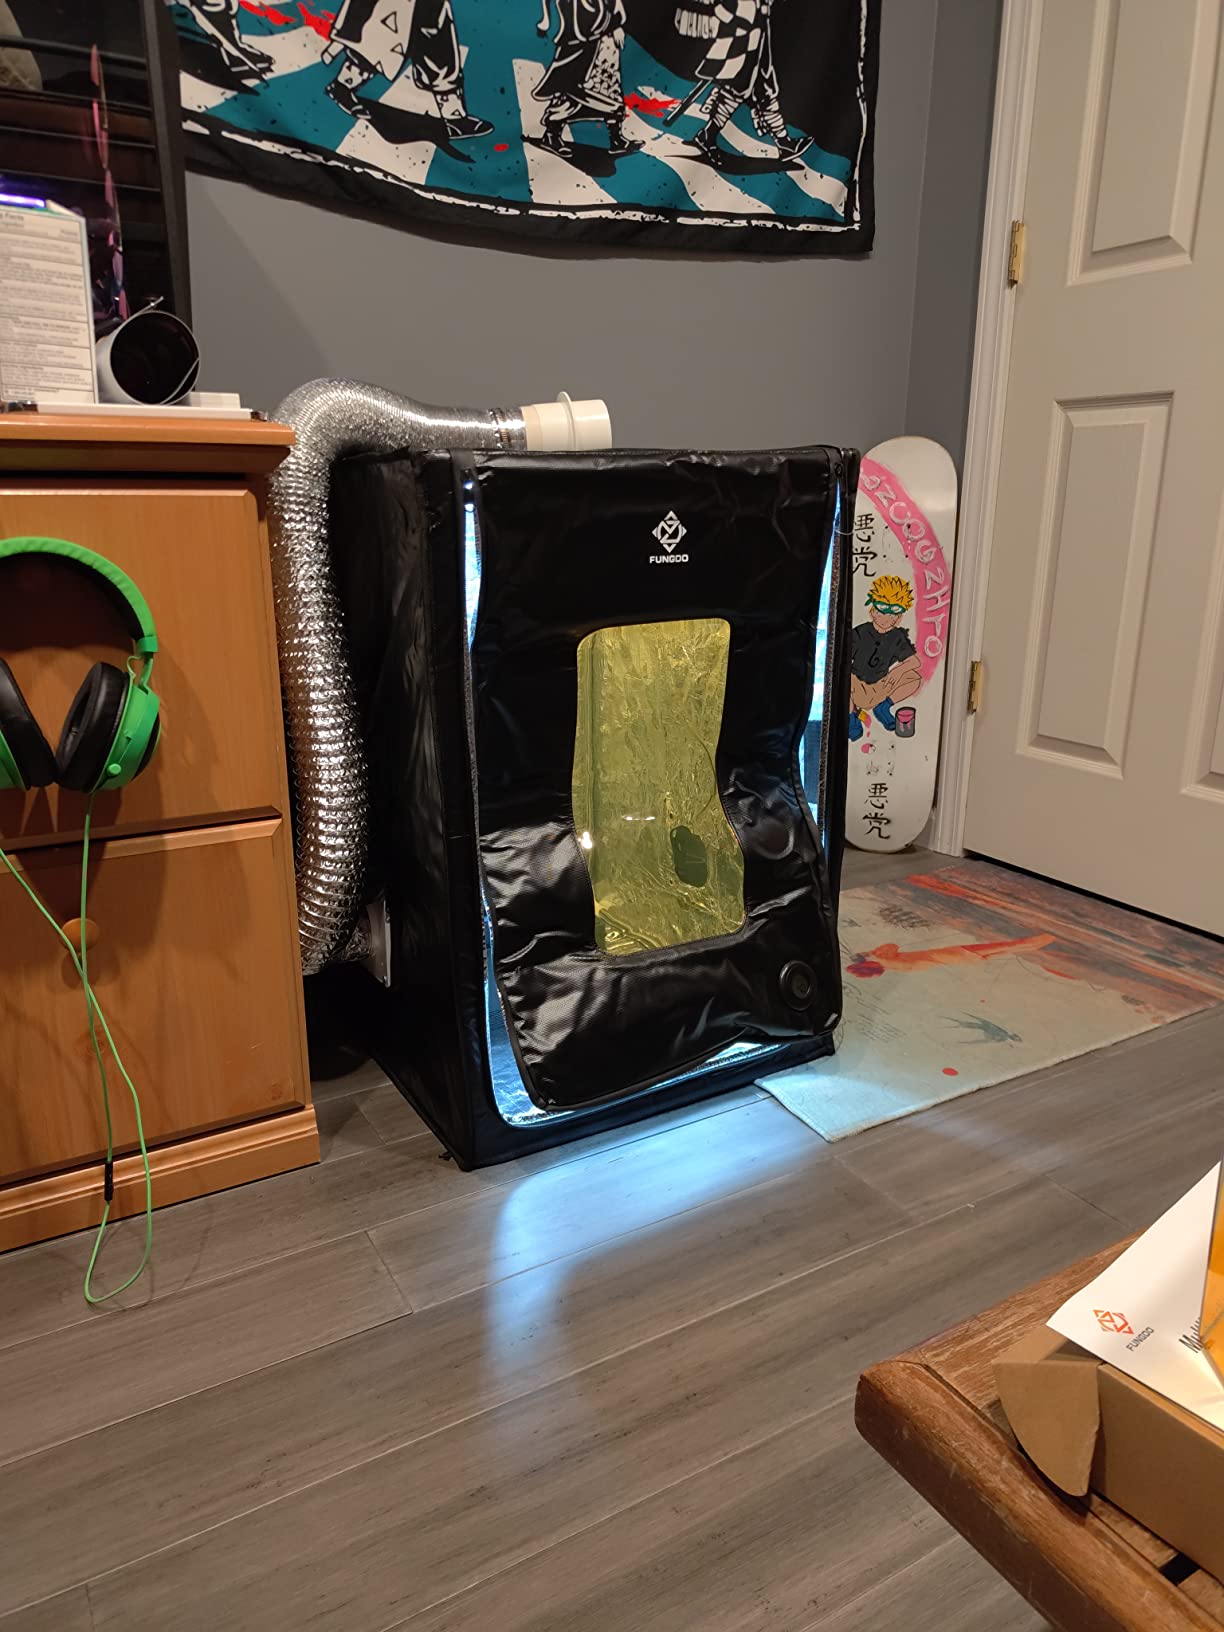
If you take one number from this roundup, make it 180 CFM. That is the only enclosure here with a documented airflow figure, and at roughly 10 air changes per minute in this volume it is the only one that genuinely clears styrene rather than containing it. The airtight zippers and EVA seal gaskets mean the seal survives the fan running, which is where cheaper tents leak.
It also solves the temperature problem directly. The insulation lining is reported to raise internal temperature by 5-15C, and owners using it for ABS, ASA and TPU attribute measurable reductions in warping to that lift. Everything needed is in the box: the enclosure, a stainless steel shelf, the fan, three metres of duct, a backdraft valve and an LED light bar.
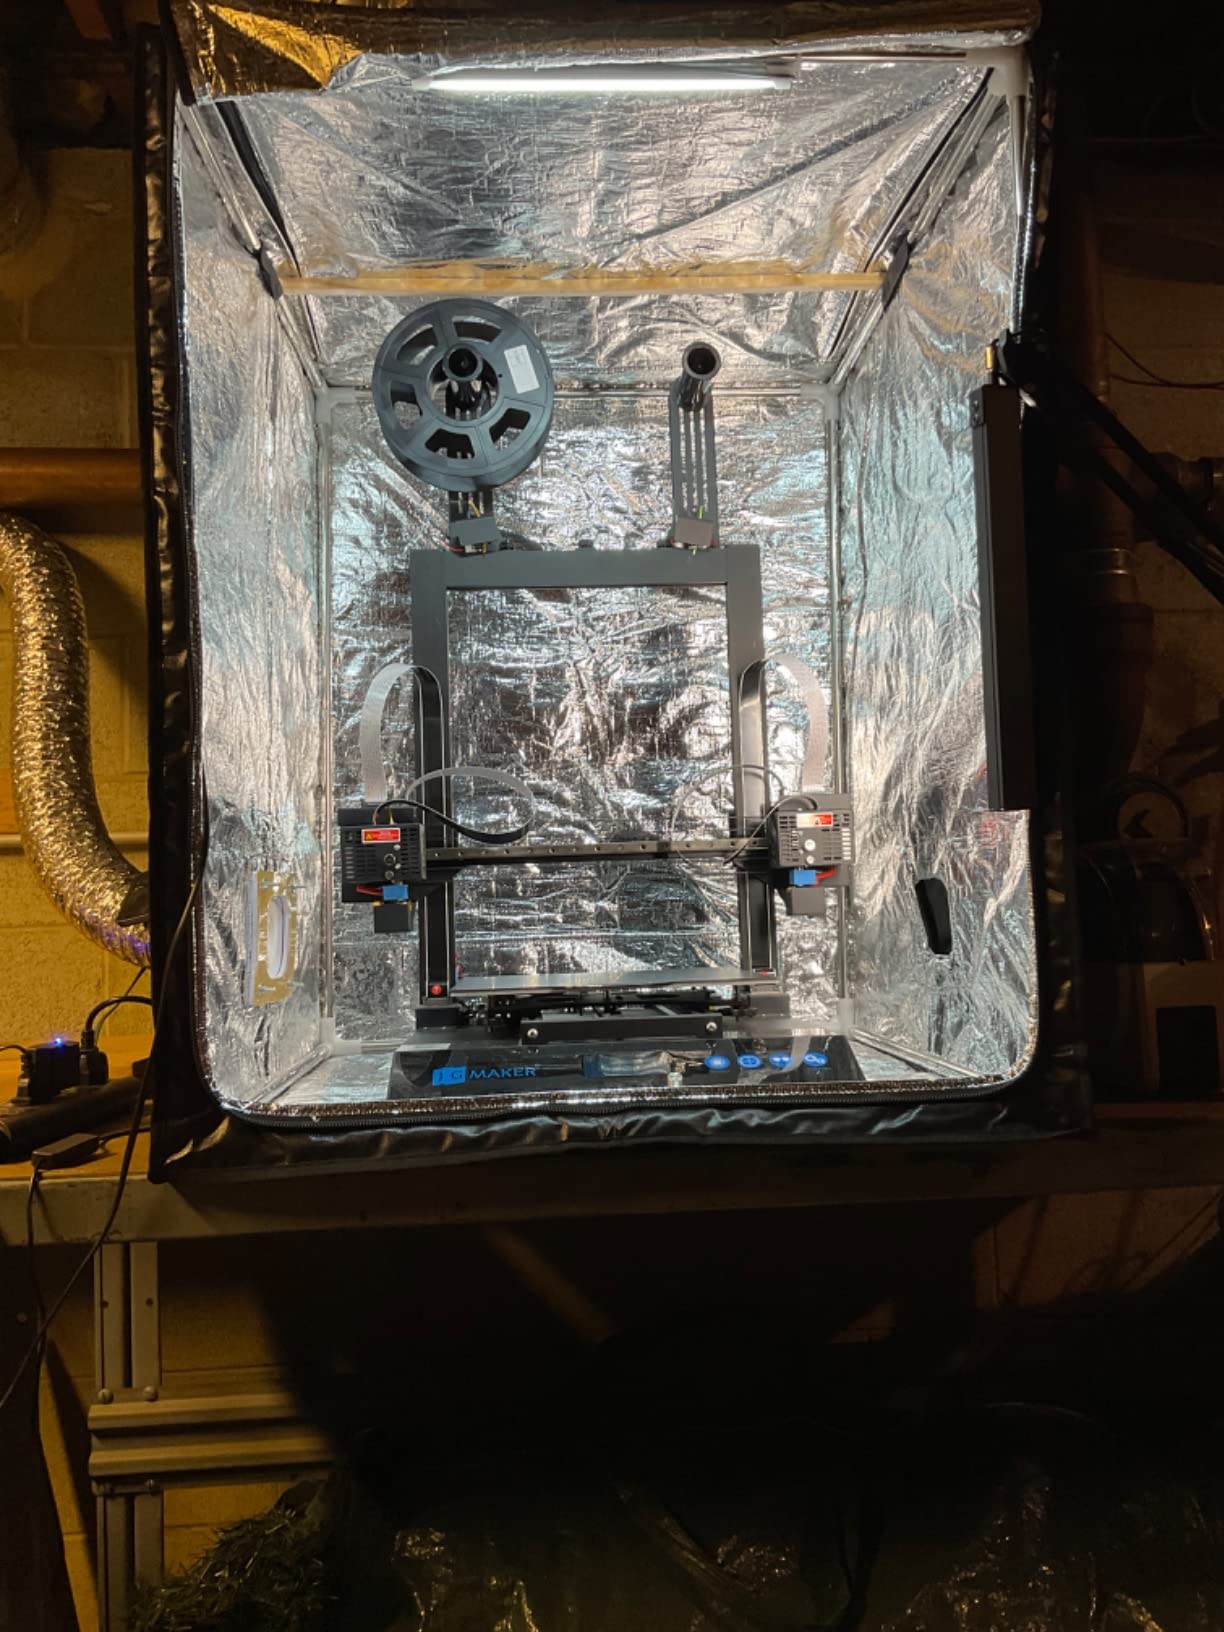
Now the honest part. The frame is a very tight fit for the cover, and a number of owners report tearing seams during assembly, so treat assembly as a two-person job and stretch nothing. The bundled fan is the weak link, with some units reporting grinding or whistling, and it is not straightforward to swap. A few shipments also arrive with an EU plug for the light bar and instructions containing errors.
There is a hard size limit: it is not suitable for printers with Y-axis travel of 370mm or more, or screens larger than 23.8 inches. Check both numbers before you order, because this is a 14 pound unit and moving it after assembly is no fun. The light bar is on and off only, with no brightness control, which is a small irritation rather than a real problem.
Who this suits best
This is the pick for anyone who has a window or a garage wall to duct into and wants a documented extraction rate rather than a vague odour claim. It is also the most complete package, so you are not hunting down a fan, duct and light separately to build a working setup.
Who should skip it
Skip it if your printer has a long Y-axis or a large screen, and skip it if you are printing alone occasionally and cannot justify a 14 pound installation. If the duct has nowhere to go, 180 CFM of extraction achieves very little and you are simply paying for noise. Assembling it badly will tear the cover, so if you are not comfortable with a tight-fit frame this is not the forgiving option.
6. VEVOR Oxford Cloth Enclosure with LED – Best Build Quality Rigid-Frame Tent
VEVOR 3D Printer Enclosure, Dustproof Waterproof Large Oxford Cloth 3D Printer Tent, Constant Temperature Protective Case with LED Lighting, Compatible with Creality/ELEGOO/Anycubic Popular Models
Aluminum film inner lining
Fiberglass tube frame
600D Oxford cloth
27.5 x 29.5 x 35.4 in
Pros
- Best build quality per unit of cost in the group
- Fiberglass tube frame is more rigid than flat metal pipe frames
- Tools-free assembly with a clear window and built-in LED
- Held around 80F inside a 58F basement for one owner
Cons
- No fan included so the ventilation cutouts need your own exhaust
- Fits several Creality and ELEGOO models but runs large overall
- No top cutout so external filament feed-through needs drilling or a bulkhead
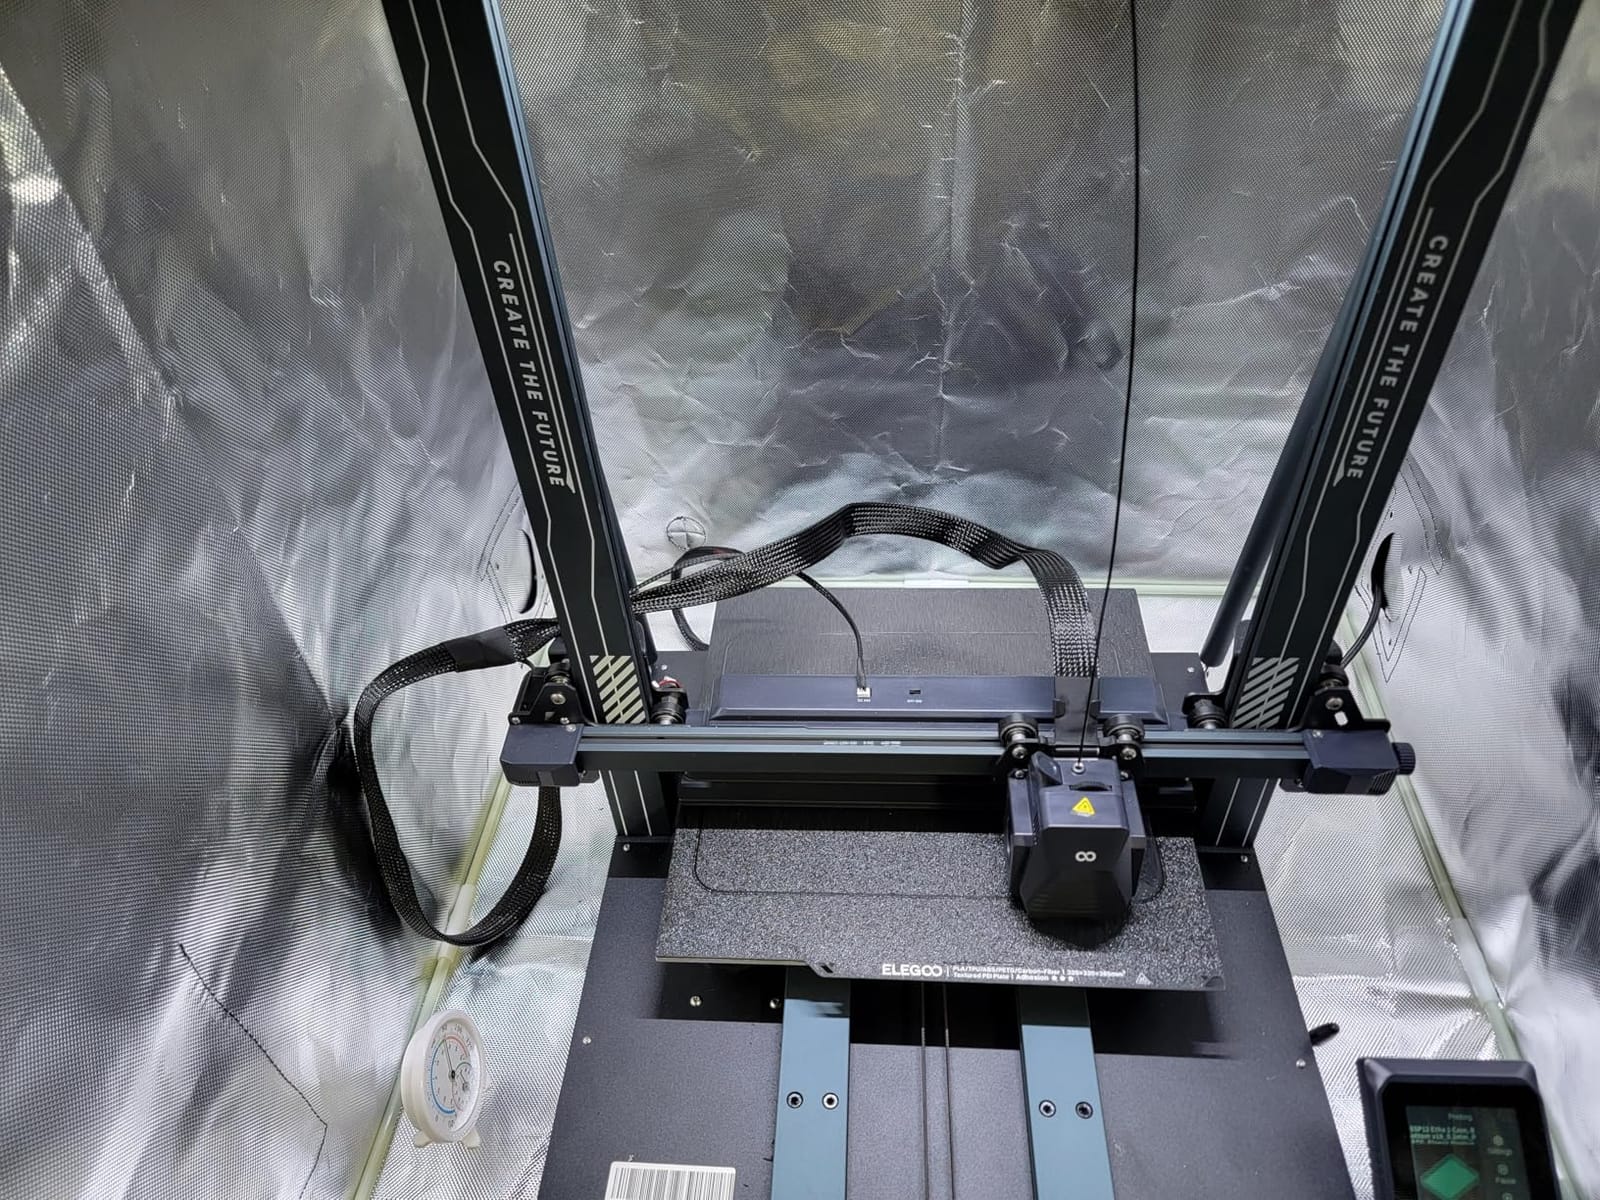
This is the one we recommend when someone asks what to buy without thinking hard. The rating is 4.6 across 58 reviews, and the build quality is visibly a step above generic tents: a fiberglass tube frame instead of flat metal pipes, 600D Oxford cloth on the outside, and a composite aluminum film inner layer that handles sustained high chamber temperatures without degrading.
The temperature result is the part worth believing. One owner reports holding around 80F inside a 58F basement, which is exactly the scenario that ruins ABS on an unheated printer. A lift of that size is usually enough to stop the bottom layer curling, and it happens passively with no fan noise added to the room.
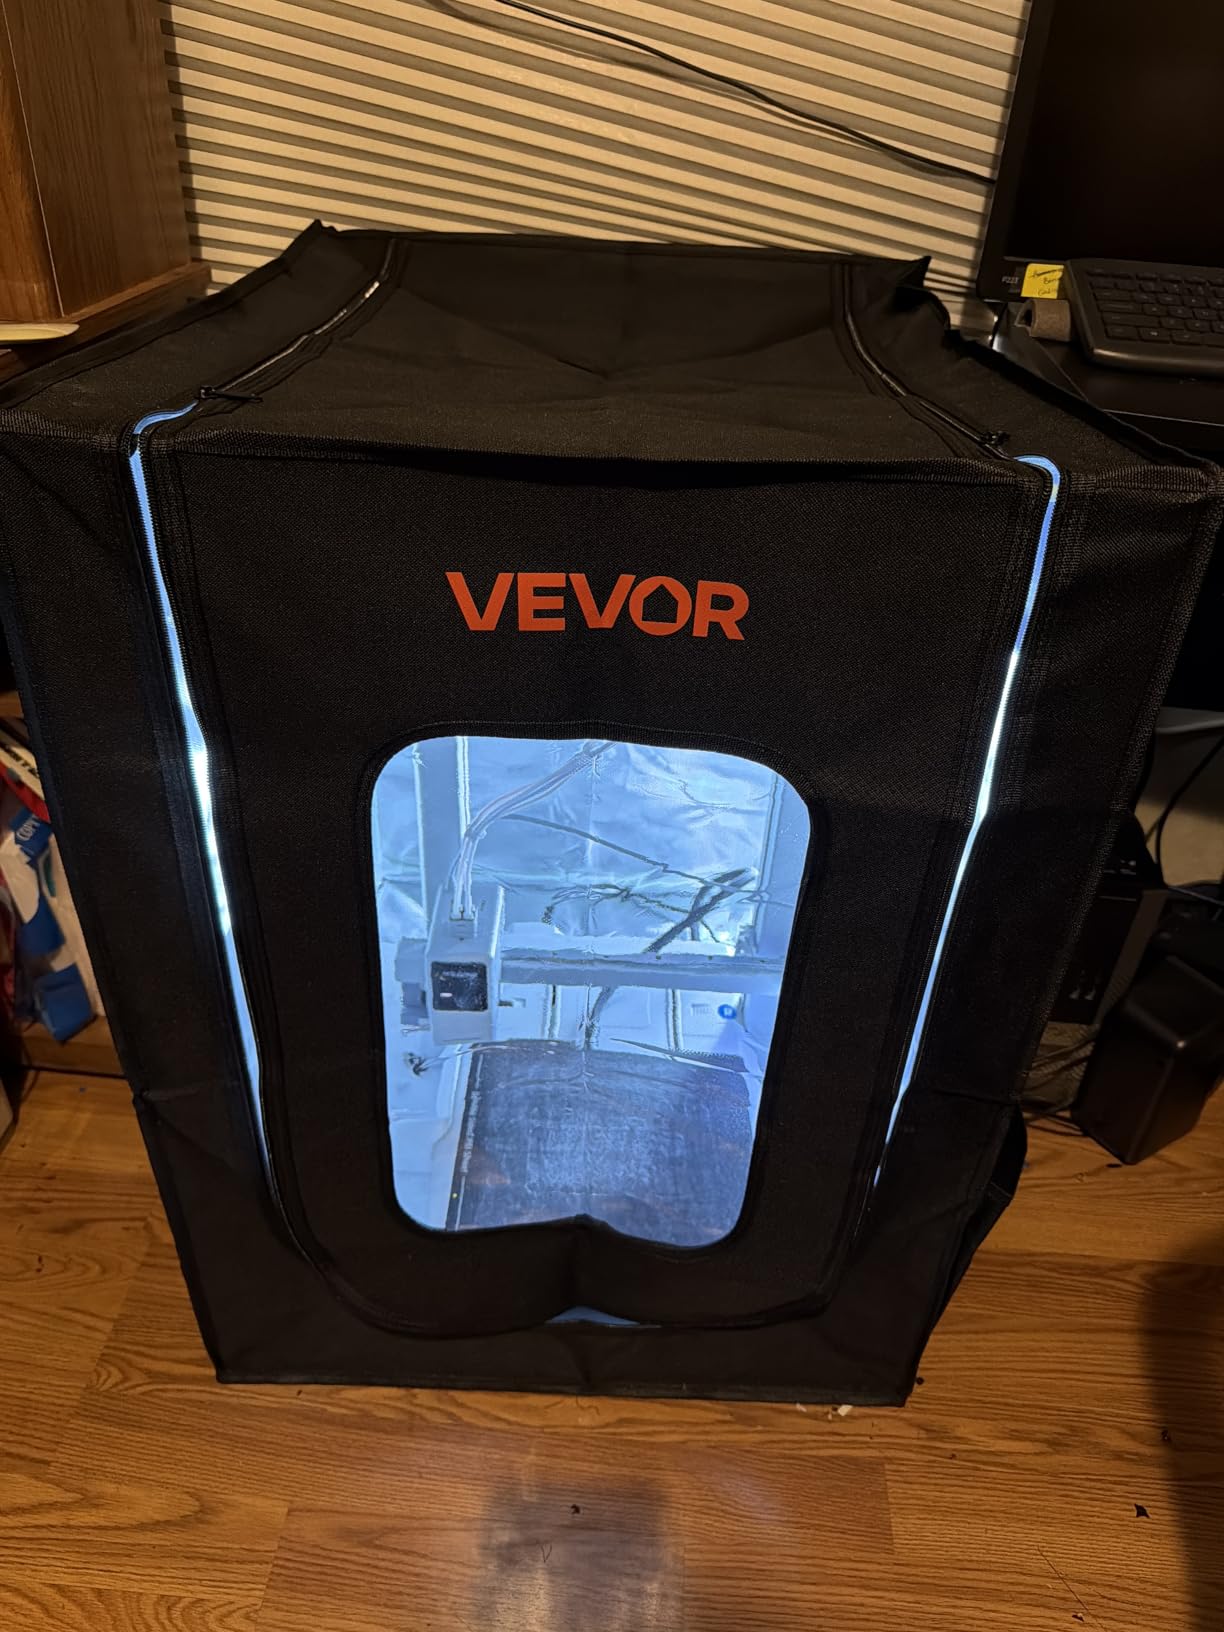
There is no fan. The left, right and rear cutouts are there for one you add, so treat the ventilation as a deliberate next purchase rather than a feature. There is also no top cutout, which means feeding filament in from an external spool needs either a drill hole or a proper bulkhead fitting. Assembly is tool-free, which is a genuine advantage over the FUNGDO frame.
Two sizing notes. It runs large at 27.5 by 29.5 by 35.4 inches, so measure both the space and the printer before ordering, and note the reports that the width runs slightly narrow for some machines despite the large footprint. It fits the Ender 3 Max Neo, Ender 3 S1 Plus, Ender 5 Pro and Plus, Neptune 4 Plus and CR-series machines according to the listing.
Who this suits best
This suits an Ender or Neptune owner in a cold room who wants the best build quality per unit cost and does not want to run a fan. The fiberglass frame and tool-free assembly are where the money went, and both matter more over a year of daily use than a specification line.
Who should skip it
Skip it if fumes are the priority, since you are buying the fan, duct and filter yourself on top of this. It is also the wrong choice for a spool-mounted setup because of the missing top cutout. And with only 58 ratings behind it, it has the smallest evidence base here, so buy it confident in the build but test the temperature in your actual room first.
7. YOOPAI Dustproof Constant Temperature Tent – Best for Humidity and Adhesion
YOOPAI 3D Printer Enclosure, Dustproof Tent Constant Temperature Protective Cover for Creality Ender 3 V3 SE/KE/Ender 3/Ender 3 Pro/Ender 3V2/Ender 3 S1/ For Anycubic Elegoo Printers, 29.5×25.6×21.6″
29.5 x 25.6 x 21.6 inches
Five-minute installation
Right port for exhaust kit
Holds near 95F when zipped
Pros
- Measurable humidity reduction inside the chamber which fixes PETG and ABS adhesion failures
- Ports provided for a DIY exhaust kit and for external filament feeding
- Installs in about five minutes and folds down for moving
- Fire-resistant materials and a six-sided shell dampen noise
Cons
- No extraction fan included which is a real gap for ABS
- Rod fit is tight and some owners reported torn seams or snapped rods
- Clear window sits high so first-layer visibility is poor on some printers
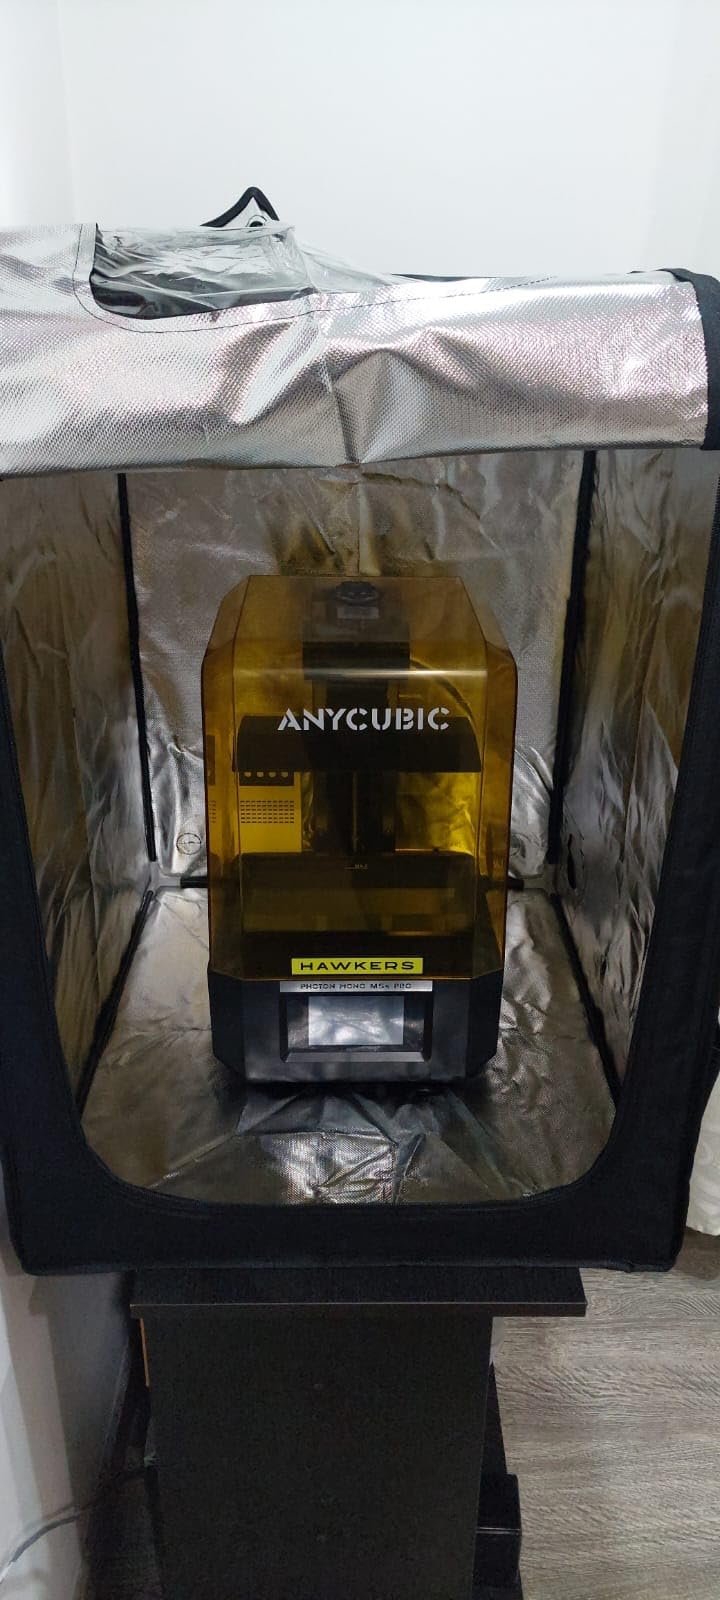
The most useful measured result in this roundup comes from this one. Owners report the chamber holding near 95F, or 35C, when zipped, and one owner logged a 20-25% drop in indoor humidity. That is the mechanism behind most ABS adhesion failures people blame on their bed, and getting the air drier is often cheaper than changing the build plate.
It is also the easiest to set up. Installation takes about five minutes and it disassembles flat for moving, which matters if your printing happens in a spare room on a weekday and the living room at the weekend. The six-sided cover does a genuinely noticeable job on noise, and the fire-resistant fabric is a sensible touch given the temperatures involved.
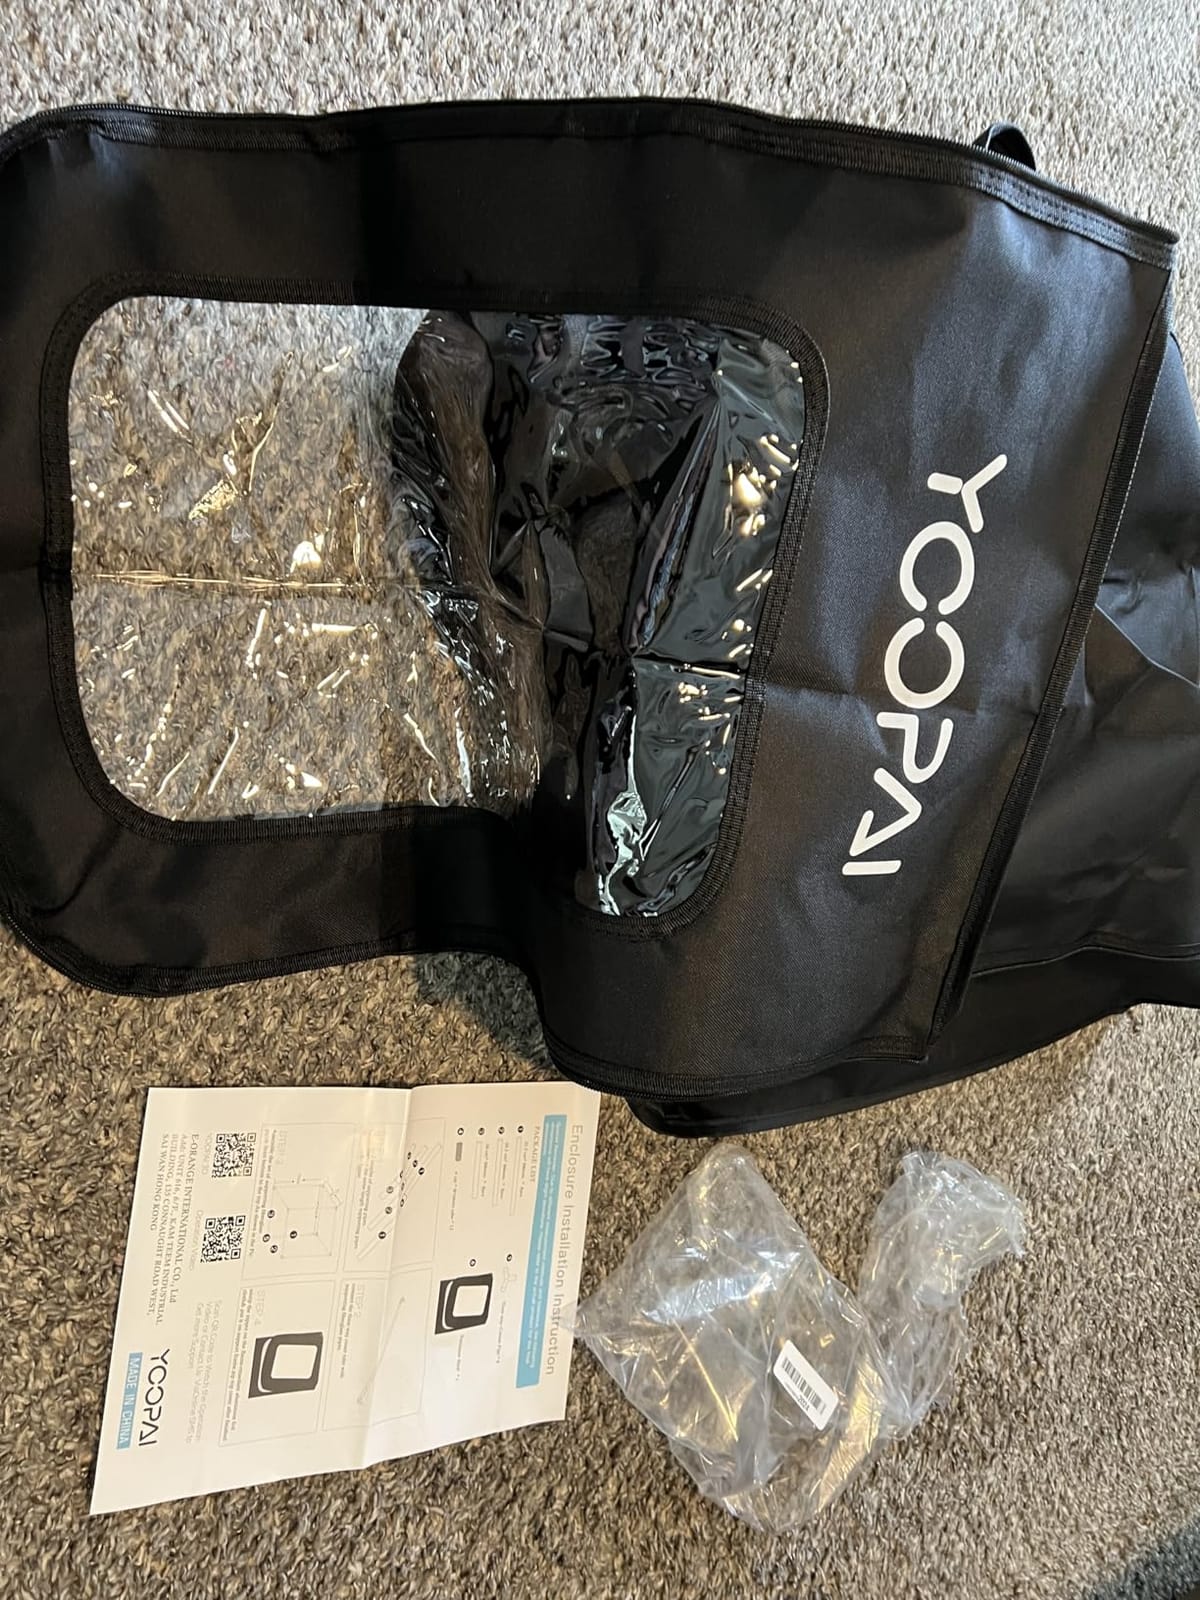
Assembly is also where the complaints live. The fiberglass rods flex during setup and a small number of owners reported the cover seam tearing or a rod snapping under strain. The clear window sits high in the frame, so on printers where the bed is low you are watching the print from an angle rather than straight on, which is a real problem when you are checking a first layer. It also needs roughly a 30 inch deep surface to stand on.
And there is no fan. The right-hand port accepts a fan-based exhaust kit, which you supply, and the other port allows external filament feeding. The compatibility list covers the Creality Ender 3 series, Anycubic Kobra and Mega Pro, and ELEGOO Neptune machines. If you are a serial kit-finisher this is excellent value; if you want the box complete, look at the UniTak3D below.
Who this suits best
This is the pick for anyone whose ABS failures are adhesion failures rather than layer splitting, and for people who want to move their printer between rooms regularly. The measured humidity drop is the standout, and the ports let you build exhaust later without replacing the enclosure.
Who should skip it
Skip it if you need the enclosure complete on arrival, since the fan is not included, and skip it if you are not comfortable re-doing a cover that fights the frame. Assembling in a hurry is how seams tear. It is also a poor choice if you need to watch the first layer of a tall build, because the window is positioned high in the frame.
8. UniTak3D Enclosure with Ventilation and LED – Best All-in-One Kit
3D Printer Enclosure with Ventilation Kit for Anycubic Kobra 3/3 V2 Combo/Flashforge AD5X 3D Printers,Fireproof & Dustproof Noise Reduction 3D Printer Cover with USB LED Lighting System-580*650*650mm
Integrated ventilation kit
Built-in USB LED
Fireproof sealed shell
580 x 650 x 650mm
Pros
- Ventilation lighting and enclosure arrive in one box
- Fully sealed fire-resistant shell doubles as a child and pet barrier
- Built specifically for the Anycubic Kobra 3 and 3 V2 Combo and the Flashforge AD5X
- Thermal cover helps reduce warping and cracking
Cons
- Narrow fit limited to the named printer models so other machines need measuring
- Some listings for extracted models carry almost no written customer review detail
What makes this one convenient is that the three things you normally buy separately are in one box: the enclosure, a ventilation kit for smoke and dust extraction, and a built-in USB LED for print monitoring in low light. At 580 by 650 by 650mm it is aimed squarely at the Anycubic Kobra 3 and 3 V2 Combo and the Flashforge AD5X, and the fire-resistant sealed shell does double duty as a barrier around the hot end.
The thermal cover is described as maintaining a constant internal temperature to reduce warping and cracking, which is the right job description for ABS even though the listing does not publish a figure. With 129 reviews and 65% of those at five stars, the value proposition is the reason it scores where it does: you are not assembling a system, you are unboxing one.
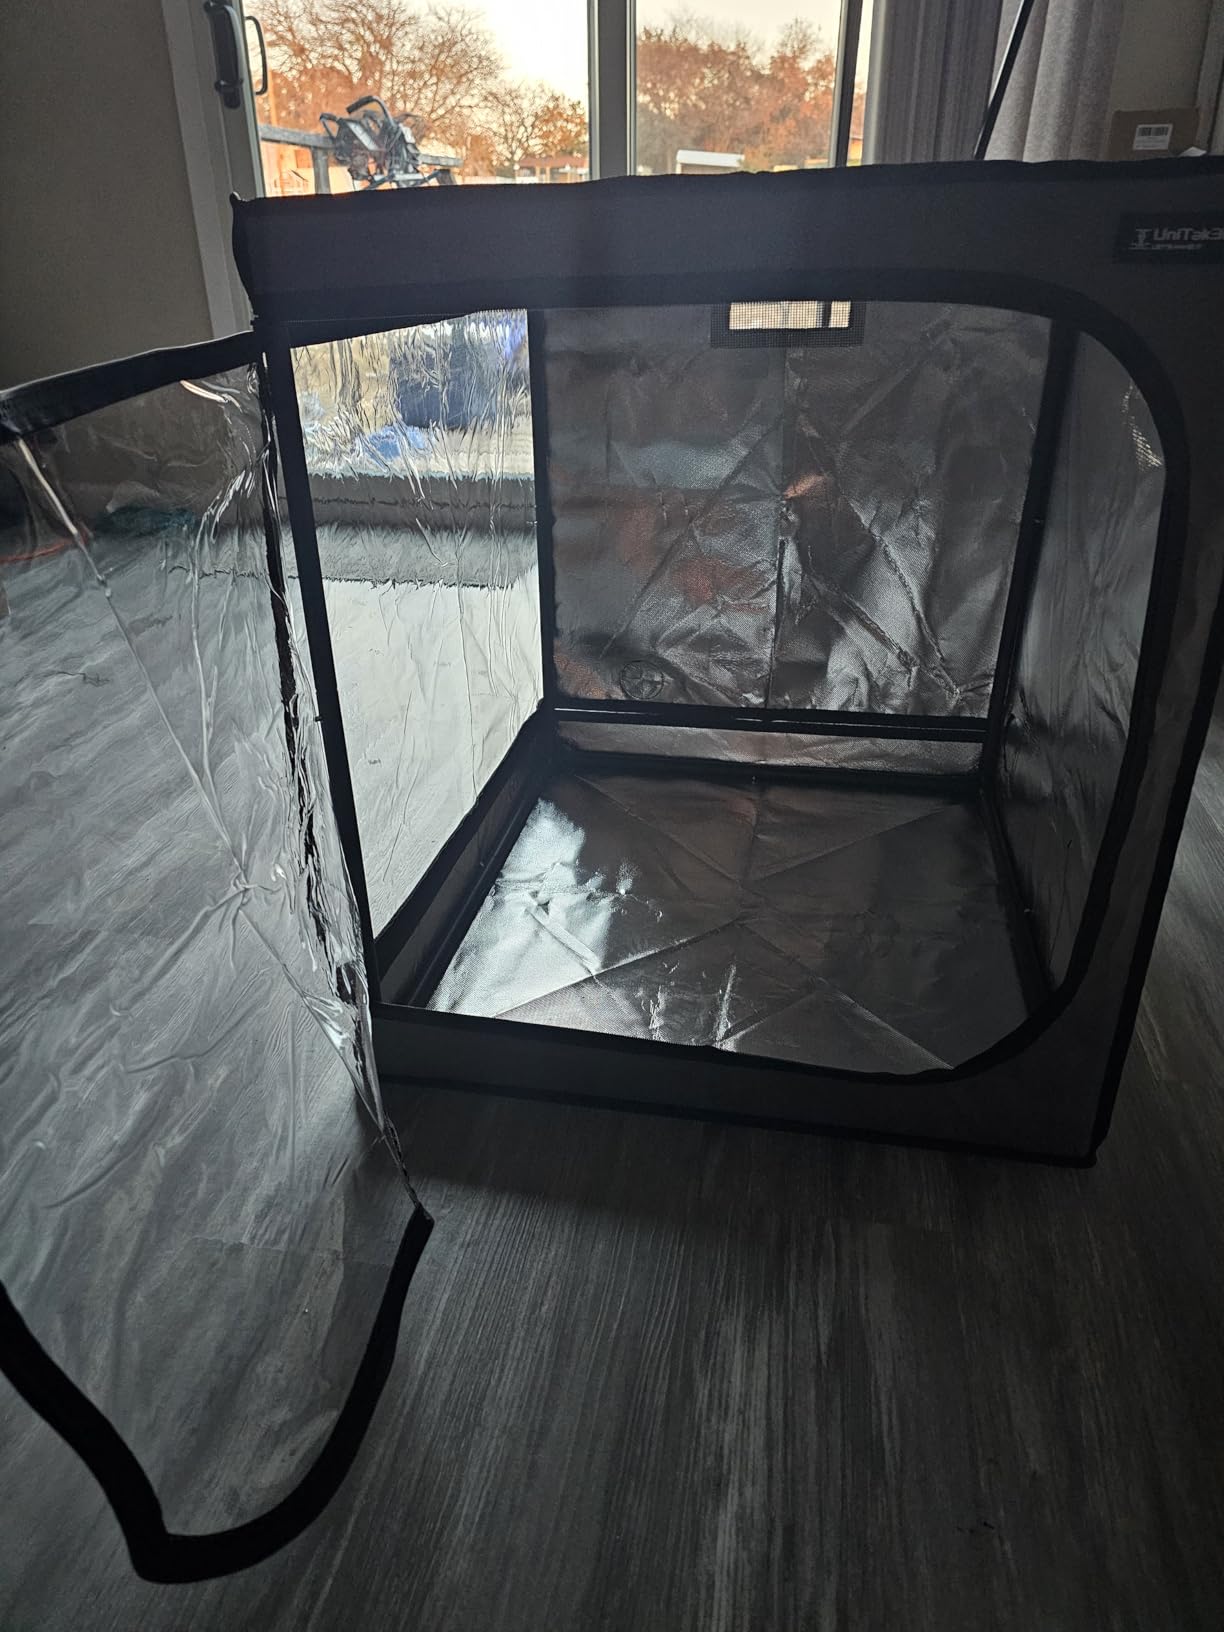
Two things temper that. The footprint is tight and specific, so if your printer is not on the list you need to measure before you commit, and 580mm of width is not generous. The second is a transparency issue worth flagging: listings for extracted models sometimes carry almost no written customer detail, which makes it harder to judge long-term build quality than it is for the heavily reviewed tents above.
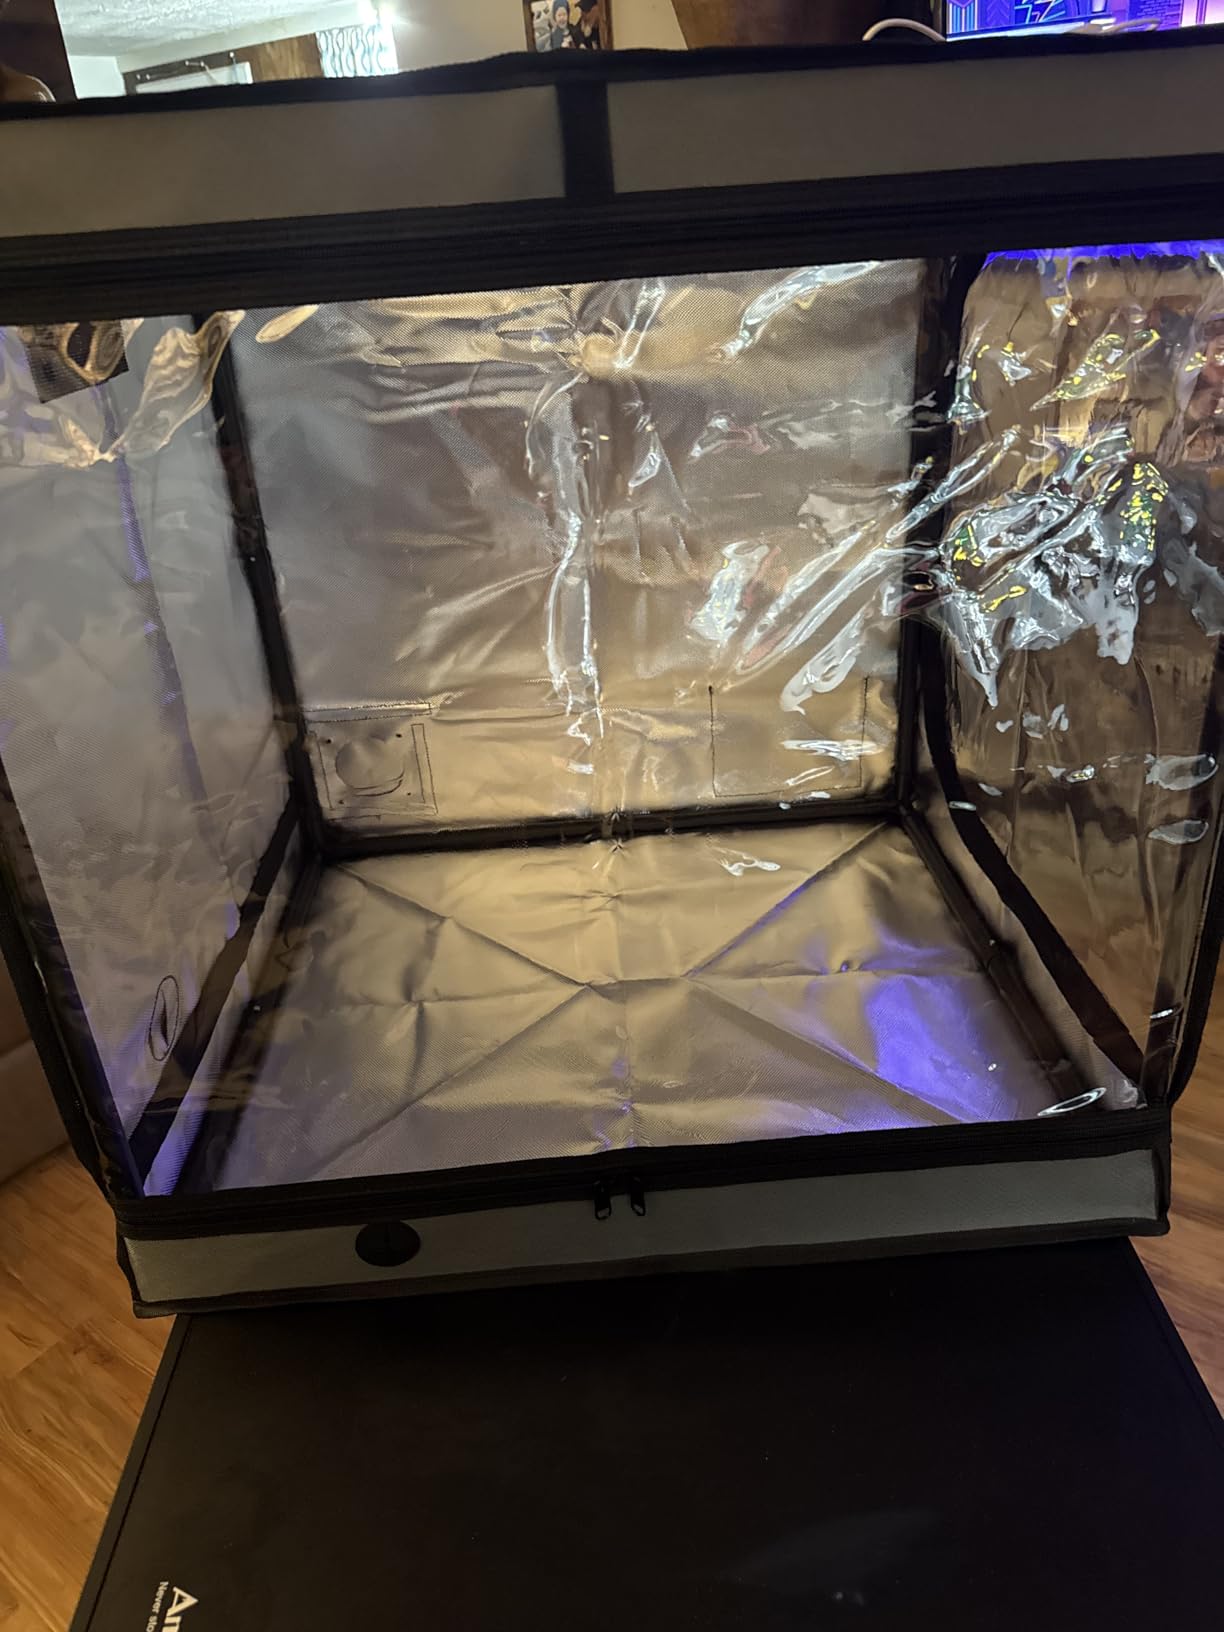
It is also worth being clear about what an integrated ventilation kit does and does not do. A small fan inside the enclosure moves air around and pushes some vapour toward a port, but it is not the same as the documented 180 CFM extraction in the FUNGDO kit. If you have no window to vent into, this is a step up from nothing rather than a solution.
Who this suits best
This suits a Kobra 3 or AD5X owner who wants enclosure, lighting and ventilation in a single purchase and does not want to research a filter and a fan separately. The child and pet barrier is a genuine bonus in a busy room.
Who should skip it
Skip it if your printer is not one of the named models, and skip it if you need a hard extraction rate you can quote. The smaller internal volume also means a bed-size print can sit closer to the panels than you might like, so check your build volume against 580 by 650 by 650mm carefully.
9. Skouphy Bambu Lab A1 Enclosure Upgrade – Best for the Bambu Lab A1
Upgrade 3D Printer Enclosure for Bambu Lab A1,A1 Mini with LED Light,Iron Frame,Fan Extraction Kit,Thermo-Hygrometer, Fireproof Dustproof Tent Constant Temperature Protective Cover,850 * 580 * 580mm
4000 RPM exhaust fan
Iron frame
Front thermo-hygrometer
850 x 580 x 580mm
Pros
- Strong 4000 RPM fan that clears resin fumes and odour when vented outside
- Iron frame is sturdier than the plastic frames used by most competitors
- Built-in thermo-hygrometer makes it easy to tune chamber conditions
- Fits a Bambu Lab A1 with AMS and an A1 Mini with room to spare
Cons
- Sized for the A1 and A1 Mini so it is a tight fit for anything larger
- Front flap door is awkward and the hygrometer sits on the flap rather than the fixed panel
- LED power cord is short and the inline switch ends up inside the enclosure
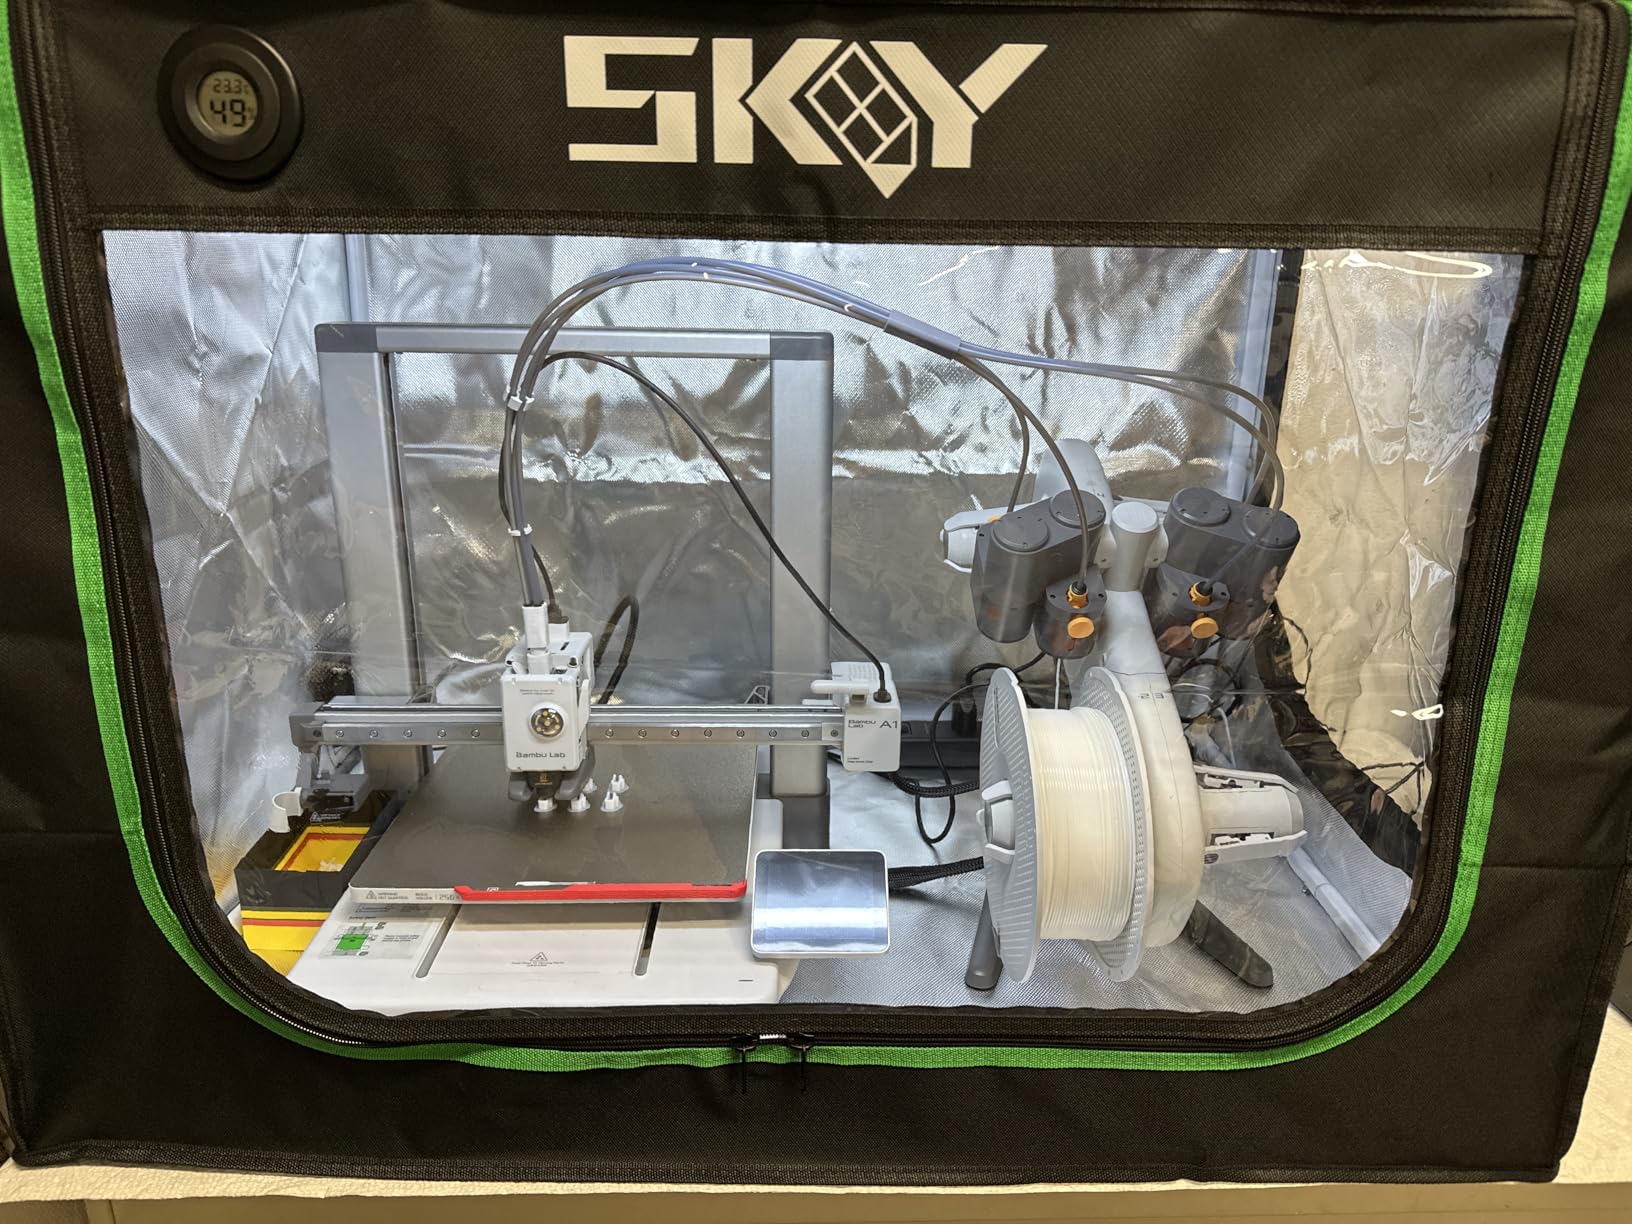
The thermo-hygrometer is the feature that makes this the most instructive enclosure in the roundup. Put a temperature and humidity readout on the front and you stop guessing whether your chamber is working, which is the single most useful habit an ABS printer owner can build. It also makes it trivial to prove the claim by reading the display after a long print rather than trusting a listing.
On airflow, the 4000 RPM fan with a three-layer composite exhaust pipe is the strongest here apart from the Orionix, and owners report it clears resin fumes and odour effectively when vented outside. The frame is iron rather than plastic, which is unusual at this level and is the reason it still feels rigid after months of heat cycling. At 7.28 pounds it is heavy and stable rather than portable.
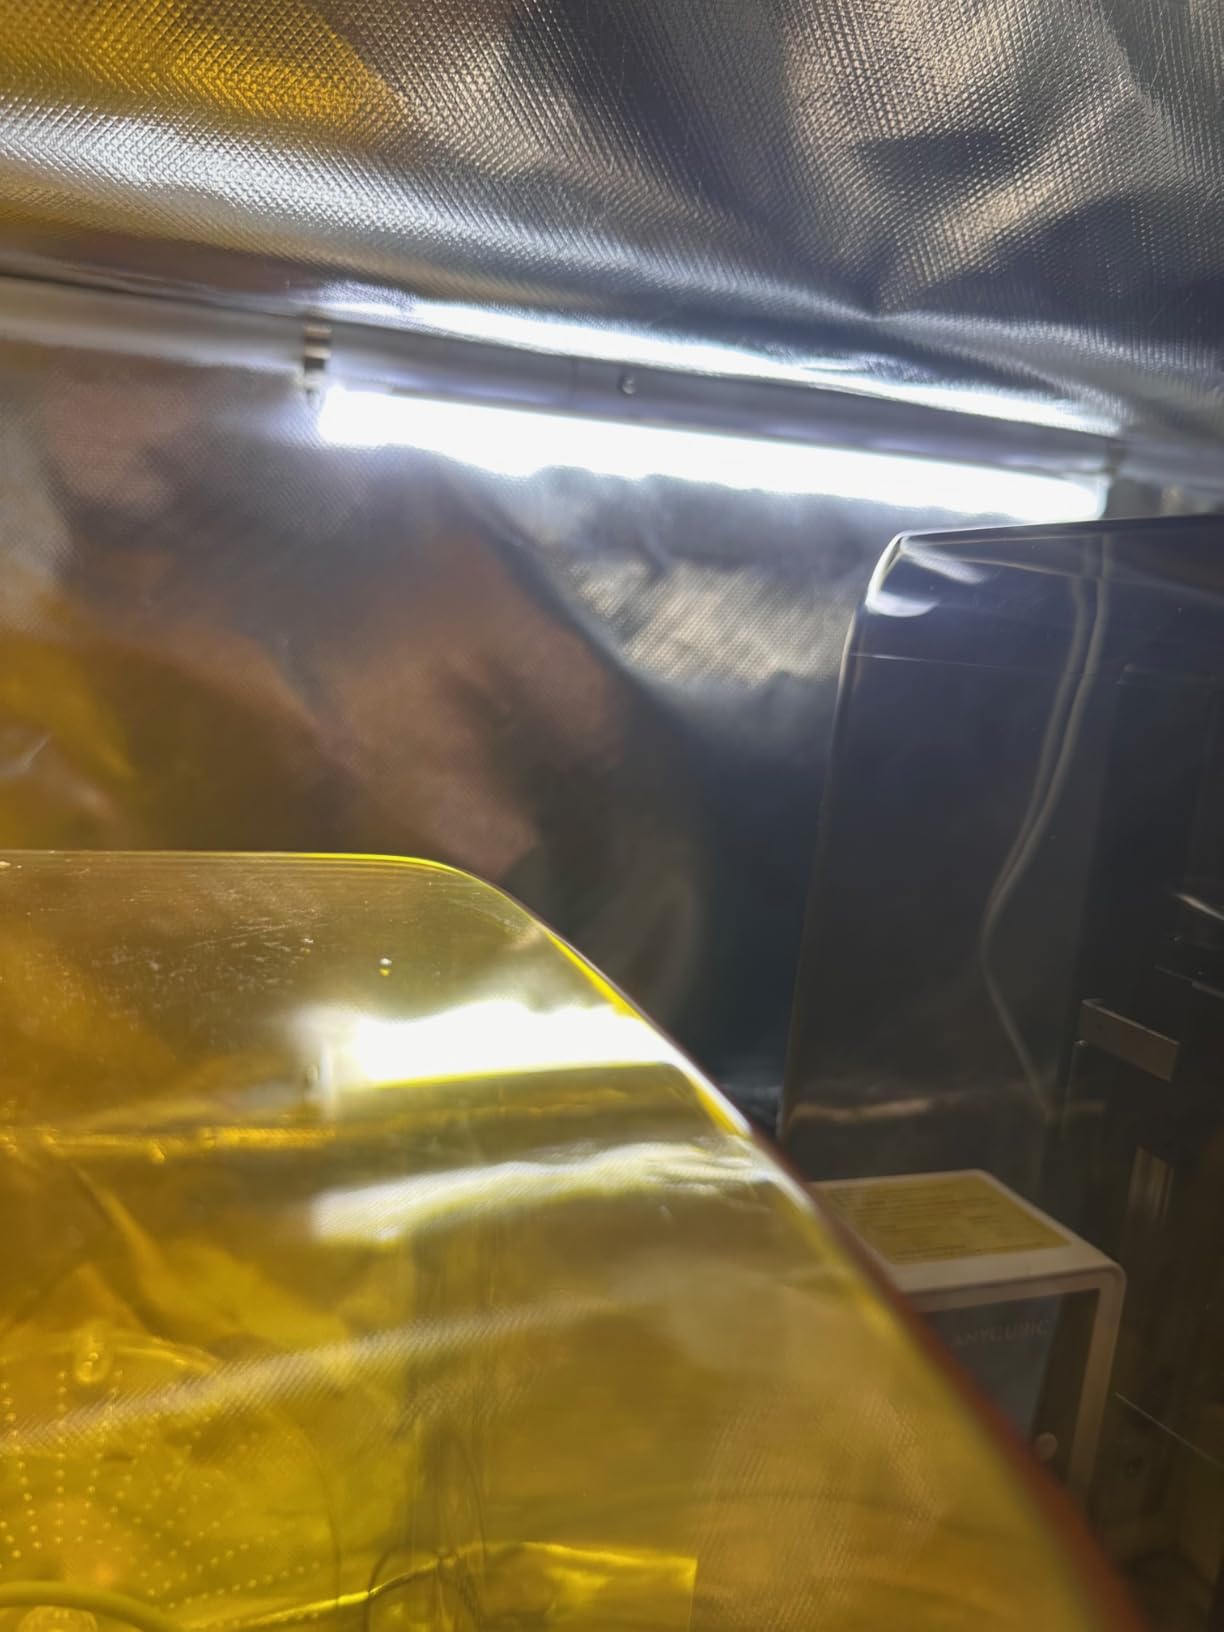
The 850mm height gives real headroom over an A1 with an AMS mounted, which is more than most tents manage. The openable side window on the right, supported by the iron frame, lets you check a print without opening the main door and losing the chamber heat, and the soft white LED helps with camera monitoring.
The criticisms are about layout rather than function. The front flap door design is awkward on some printers, and the hygrometer is mounted on that flap, so you are reading it through or around the door rather than at a fixed panel. The LED cord is short and the inline switch ends up inside where you cannot reach it. One owner also reported missing support pieces and slow seller response, which is a support issue rather than a product defect.
Who this suits best
This is the pick for a Bambu Lab A1 or A1 Mini owner who wants visible proof of chamber conditions and has a window to vent into. The iron frame and the hygrometer together make it the most measurable setup here, which is exactly what ABS rewards.
Who should skip it
Skip it if you print anything larger than an A1, because 850 by 580 by 580mm is tight against the panels. It is also a poor match for anyone who wants to reach the light switch from outside the enclosure, and if you have no way to vent outside, the fan is doing less than you are paying for.
10. Orionix Kobra X Tent with Ventilation – Highest Heat Rating but Tightest Fit
3D Printer Tent Enclosure for Anycubic Kobra X, Upgraded Large Cover with Ventilation & LED Light – Dustproof, Waterproof, Fireproof, Sound Dampening & Temperature Retaining, 19.7×26.8×28.3in
4600 RPM exhaust fan
Fiberglass tubing rated 680-800C
Quick-release top window
19.7 x 26.8 x 28.3 inches
Pros
- Fastest exhaust motor offered in this group at 4600 RPM
- Fiberglass tubing rated to 680-800C and flame-retardant fabric for high-heat work
- Quick-release top window makes cable routing and maintenance far easier
- Installs or removes in about three minutes
Cons
- Frame rods are cut slightly too long so several tubes need trimming before the cover fits
- Straining the seams can rip the fabric and the fit is tight with a top-mounted spool
- Front door may not open for taller printers sitting on a riser
On paper this has the most impressive specifications in the roundup. The 4600 RPM fan is the fastest exhaust motor here, the alkali-free fiberglass tubing is rated to 680-800C, and the thickened 600D Oxford fabric is backed with a sealed aluminum foil layer. It is aimed at printers under 26.8 by 19.7 by 28.3 inches, which is the Anycubic Kobra X and similar machines.
The quick-release top window is the feature we would keep. Most tents force you to unzip, lift and restitch a panel just to route a cable or reach a print, and a top window that pops off changes how you work day to day. The 32cm light tube with a 1.6m USB cable and a large high-transparency PVC window are both more generous than the standard small strip.
That is where the 4.1 average rating and the 12% one-star share come from. The frame rods are cut slightly too long, so several tubes need trimming before the cover will go on, and owners report that straining the seams to force a fit can rip the fabric. With a top-mounted spool installed, the fit is tight, the zippers stick, and the tinted window limits visibility.
There is also a clearance problem worth checking carefully: the front door may not open for a printer sitting on a riser, which is a common way people add height to a Kobra. It is bulky for a tent at 5.17 pounds, the glossy bottom lets the printer slide around, and 48 reviews is the smallest evidence base here. Buy this for the heat rating and the window, not for an easy build.
Who this suits best
This suits a Kobra X owner who runs a hot chamber regularly, needs serious extraction, and will spend ten minutes trimming the rods to get a correct fit. The heat-rated tubing and the quick-release window are worth the setup if you are printing all day.
Who should skip it
Skip it if you want a build that goes together on the first try, or if your printer uses a riser or a top-mounted spool and you need door clearance. It has the lowest average rating and the fewest reviews in the group, and the trim-before-fit issue is consistent enough that you should expect to spend time on it rather than hoping it drops into place.
How to Choose an ABS 3D Printer Enclosure
Size fit and printer compatibility
Measure the printer’s outer dimensions, not its build volume, and include the spool holder in the measurement. Then add at least an inch of clearance on every side so you can thread the zip and reach a cable. Five of the ten enclosures here are model-specific, so a size-flexible tent gives you freedom to change printers later, and a model-specific shell gives you a cleaner install if you are settled.
Also check the Y-axis travel against the enclosure’s stated limit, and check your screen size if the listing gives a maximum. Several units here rule out long-travel or large-screen printers explicitly, and discovering that after a 14 pound assembly is a bad afternoon.
Heat retention and chamber temperature
ABS wants a chamber ambient of 45-60C. Passive insulation gets you part of the way by slowing heat loss, which is why a well-lined tent in a cold room still beats a bare open frame, and why a heater module is the upgrade that closes the gap. A chamber thermometer is not a luxury at this point: an enclosure with a built-in thermo-hygrometer lets you confirm the number rather than assume it.
Check what time you print at. A room that is comfortable in the afternoon can be several degrees colder overnight, and a long ABS print that starts warm and loses heat in hour six fails differently from one that fails in hour one. A printed part sitting at the far end of a large bed feels the gradient more than the nozzle does, which is why the community consensus is that bed adhesion deserves at least as much attention as the enclosure.
Filtration: HEPA, activated carbon, or exhaust to outside
These three do different jobs and are frequently confused. A HEPA filter handles particulate matter, which matters for resin and dusty filaments, but it does essentially nothing for styrene because that is a gas-phase molecule. Activated carbon is the component that adsorbs VOCs, and it is a consumable that stops working as it saturates. Exhaust to outside is dilution, and it is the only approach that removes the vapour rather than trapping it.
Filter placement matters more than most people expect. A filter mounted downstream of the fan, after the air has already been pushed through the chamber, does far less than one sitting in the path where the air is actually moving. And a filter sized smaller than the fan pushes against it, so a high-RPM fan against an undersized filter moves less air than a modest fan with a correctly sized one.
The negative-pressure approach, where the printer enclosure sits inside a larger room tent with a filtered exhaust, is the community’s favourite answer for severe fume concerns. It is more equipment than most people need, but if someone in the house is sensitive to chemicals it is the arrangement that gives the most margin. If you are new to this, our 3D pen roundup covers the low-emission alternative workflow.
Air tightness and door seals
This is the failure point owners complain about most on the forums. A heated enclosure that is not reasonably air-tight simply leaks warm air and styrene into the room at the same rate, so you pay for the heater and gain nothing. Look for a gasket or sealed zipper rather than a bare zip, and check the rating comments specifically for leak complaints rather than reading the star average.
A cheap pre-purchase check is worth doing before the panels go on. Close everything up and hold a tissue or a strip of tissue paper across the seams and door edge; if it moves easily anywhere, that is your leak. Doing it before assembly means you can fix a panel. Doing it after means you are taking the whole thing apart.
Bed surface and first-layer adhesion
Most ABS warping complaints are adhesion problems wearing a disguise. Work down this order: a PEI engineering or spring steel plate first, then a glue stick or hairspray layer, then an ABS-acetone slurry on bare glass, and Garolite as the durable option for high-temperature work. A brim of 5-10mm spreads the clamping force and removes the curled-corner failure. An enclosure makes all of this work; it does not replace it.
Enclosure only, or a printer with an integrated enclosure
Wrap the printer you own if it is good and the gap is modest, and especially if you only print ABS occasionally, because a dedicated heated chamber that sits unused for most of the year is hard to justify. Buy an enclosed printer instead if you are choosing hardware anyway, if you need bed-size ABS routinely, or if you want the chamber, motion system and fume handling engineered as one product rather than assembled from parts.
The honest test is frequency. If ABS is a once-a-month job, any enclosure in this list will improve it. If it is a weekly production material, spend the money on a proper chamber and real extraction rather than a tent. Either way, keep your monitor and lighting in mind too, since a long print job that nobody can see is how problems survive until the last layer; our monitor roundup for 3D artists covers that side of the setup.
ABS Settings Quick Reference
Nozzle 230-250C, heated bed 90-110C, part cooling 0-20%, chamber ambient 45-60C. Start at the low end of the nozzle range and climb only if layers are not fusing. Bed temperature is the number people under-set, and it is usually why the first three layers lift. Cooling above 20% works against you on ABS by pulling heat out of a fresh layer before the next one bonds to it.
One safety note that belongs anywhere ABS is mentioned: do not print ABS in an unventilated living space, and do not treat an enclosure without extraction as ventilation. The vapour is a genuine health concern, and a sealed box that concentrates it is worse than an open frame when the door opens.
Frequently Asked Questions
Does ABS printing require an enclosure?
Yes. ABS needs a chamber ambient of 45-60C to keep the thermal gradient low enough that each layer fuses to a neighbour that has not fully cooled. An enclosure also blocks draughts and contains the styrene vapour released during extrusion. Without one, expect warping, layer delamination and a room that smells of hot plastic.
What temperature should my enclosure be for ABS?
Aim for 45-60C chamber ambient. Below that the part cools faster than the layer above it can bond to it, which is what produces curling corners and layer splits. Bed temperature should sit at 90-110C and the nozzle at 230-250C. A thermometer inside the chamber is the only reliable way to confirm the enclosure is holding.
Can I print ABS without ventilation?
Technically yes, but not safely in a space you live in. A sealed enclosure concentrates styrene vapour rather than removing it, so opening the door releases the whole contents at once. HEPA filters do not capture gas-phase styrene; you need activated carbon or, better, an exhaust fan ducted to an outside window.
Is it safe to 3D print ABS indoors?
Only with active extraction. ABS releases styrene when extruded, and the risk is highest for people with chemical sensitivity, asthma or asthma-prone children. Run an exhaust fan to an outside window, add activated carbon for the VOC load, and never treat an enclosure with no ventilation as a solution. Do not print ABS in an unventilated living space.
What type of 3D printer plate is best for printing ABS?
A PEI engineering or spring steel plate is the best starting point, ideally textured for removal. If adhesion is still marginal, add a glue stick or hairspray layer, then an ABS-acetone slurry on bare glass as a last resort. Pair it with a 5-10mm brim so the clamping force is spread across the footprint.
Will a tent enclosure work for ABS?
Yes, for most printers and most jobs. A well-insulated passive tent with an aluminum-lined interior reliably removes the draught problem and takes a large bite out of the thermal gradient. It will not reach the top of the 45-60C window on its own in a cold room, so if you print large parts overnight you will want a chamber heater or an integrated enclosed printer.
Our Recommendation for ABS Printing in 2026
After working through all ten, the Skouphy Creality Ender Tent takes our Editor’s Choice for one reason above the others: it has the highest average rating in the group and by far the largest review base, and that combination is what tells you the temperature claims hold up over months rather than a week. The aluminum-lined fire-resistant interior, the fiberglass rod frame and a footprint that covers the whole Ender 3 family make it the safest default choice for 2026.
If your constraint is fumes rather than temperature, the FUNGDO kit with its documented 180 CFM fan is the honest answer, and the DORUNDEA tent is the lighter way to get filtered air movement. If you already own a specific machine, the model-specific kits further up install more cleanly than any generic tent. Whatever you choose, verify the chamber temperature inside it before your first long print, and do not print ABS in a room without extraction.