

There is one part of a head unit swap that decides whether the install ends in twenty minutes or the whole weekend. It is not the radio, and it is not the dash kit. It is the car stereo wiring harness adapter, and picking the wrong one is the single most common reason an aftermarket head unit sits dead in the dash with every wire correctly color-matched.
We have been through this exact problem more times than we care to count, mostly on vehicles that needed the plainest possible fix: a dead OEM radio, a base audio system, no premium sound, no OnStar. The wiring is the same story every time. The factory connector unplugs, an adapter fills that socket, and the loose end of the adapter carries the standard aftermarket colors you match to your new head unit’s pigtail.
This roundup covers the 8 car stereo wiring harnesses we trust for installs, sorted by the scenario they actually solve rather than by brand. There is a plain vehicle-specific harness for a Toyota, a premium-audio harness for a Bose-equipped Honda, an amplifier-integration harness for a factory amplified Ford, a data-retention T-harness when steering wheel controls have to survive, and a universal ISO pair for when you are working without a vehicle at all. Fitment on every pick was checked against the manufacturer part number for the vehicle, not against a listing headline.
We also cover the parts that usually get missed, because a harness alone rarely finishes the job. Look at the 8 best stereo receivers expert reviews if you are still choosing the head unit itself, since the connector on the back of that unit is what the harness has to match.
Table of Contents
What a Car Stereo Wiring Harness Adapter Actually Does
A car stereo wiring harness adapter is a vehicle-specific cable that plugs into your factory radio’s connector on one end and terminates in color-coded loose wires on the other, so an aftermarket head unit connects without cutting or splicing the original wiring.
That single sentence covers most of what these parts do, but there are five distinct families and sellers use the same words for all of them. Knowing which family you are holding explains most of the confusion in the forums.
Vehicle-specific plain harness – the OEM connector plus color-coded pigtail wires. Nothing more. This is the right part for a base audio system with no premium amplifier and no steering wheel control retention requirement.
Amplifier integration harness – carries the trigger and speaker lines to the factory amplifier, sometimes with RCA outputs for a subwoofer channel. Needed on amplified Ford, Lincoln, and Mercury builds and on many Hondas with factory Bose.
Data interface or T-harness – a T-shaped adapter that sits between the factory connector and the head unit, usually paired with a small interface module, so steering wheel controls, warning chimes, and vehicle data keep working.
Universal ISO harness – a standard pinout connector pair, power and speaker, for aftermarket units with an ISO socket. No vehicle fitment at all, which is exactly why it needs more care from you.
Stereo bypass harness – the opposite direction of travel. It lets you keep the factory radio and add an aftermarket amplifier downstream instead of replacing the head unit.
What the correct adapter preserves is worth spelling out. A vehicle-specific part with the right feature set can keep your steering wheel volume and track buttons alive, keep the factory amplifier powered, keep OnStar and coded anti-theft systems from complaining, and keep the handsfree microphone working. Get a cheap universal part for a car that has all of that and you will unplug features you were never told you had.
The flip side matters too. On a base-audio truck with no steering wheel controls and no factory amplifier, a plain harness is genuinely all you need, and adding a data interface buys a feature your car does not have. Forum threads about being sold steering wheel control adapters for a car with no steering wheel controls are not rare, and that is wasted money, not just an annoyance.
One more thing the correct part protects you from. A vehicle-specific adapter leaves the factory connector intact, so the original radio can go back in if you sell the car or if something fails. Once you cut into the factory harness, that option is gone, and the connector inside the dash is the part you cannot buy at a retail counter.
How to Find the Exact Harness for Your Car
Four steps get you the right part the first time, and step one prevents the two-plug mistake that ruins the evening. This process works the same whether you are hunting a car stereo wiring harness adapter for a Toyota or for a European import.
Pull the factory radio and photograph the connectors. Look at the OEM plug and note the color, the shape, and how many pins it has. Some head units have a grey 24-pin connector and a separate black 12-pin connector behind them, and that second plug is often a factory amplifier or factory amplifier control plug rather than a second radio plug. Photographing it takes a minute and saves the most expensive mistake in this whole process.
Confirm the exact vehicle spec. Year, make, model, trim level, and whether the car has a factory amplifier. Trim level matters more than most people expect, because the same model year can have a base audio system on one trim and a premium amplified system on another. Confirm the spec against the build sticker on the door jamb, not against the badge on the tailgate.
Decide which family you need. No factory amplifier and no steering wheel controls means a plain vehicle-specific harness. A factory amplifier means an amplifier-integration harness. Steering wheel controls that must survive means a data interface T-harness plus the interface module. A dead giveaway for the last case is a car where the wheel buttons go dead the moment you unplug the OEM radio.
Read the fitment chart on the listing, not just the title. Most manufacturers publish a vehicle fit guide keyed to year, model, and amplifier or non-amplifier configuration. If the listing does not have one, treat that as a warning sign about the seller rather than as a small detail you can skip.
One habit is worth more than all four steps combined: check the manufacturer part number before you buy, then check that the same part number appears on the box when it arrives. The part number is a far more reliable identifier than the listing title, which is where the forum stories about a correctly named harness still not fitting come from.
Top 3 Picks for Best Car Stereo Wiring Harness Installs (October 2026)
These three cover the situations most installs actually hit: a Toyota needing a dependable plain harness, a Ford-family vehicle needing a no-cut plug, and a Honda or Acura owner who wants the highest-rated harness with connectors already attached.

Metra 70-1761 Toyota
- Plugs into car harness at radio
- Powers 4 speakers
- Color-coded wires
- Vehicle fit guide required

Metra 70-5520 Ford
- 24-way plug for power and speakers
- No wire cutting needed
- Color-coded wires
- 7-day tech support
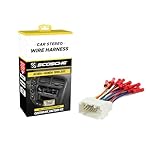
Scosche HA08BCB Honda
- Pre-installed crimp connectors
- Acura and Honda 1998-2011 list
- Industry standard color coding
- Bose needs SLC4 interface
The 8 Best Car Stereo Wiring Harnesses at a Glance
Every pick below, with the fitment and the feature that actually decides whether it works for your build. The full reasoning sits in each individual section.
| Product | Specifications | Action |
|---|---|---|
| Metra 70-1761 Radio Wiring Harness for Select 1987-UP Toyota |
|
Check Latest Price |
| Metra 70-5520 for Select 2003-2019 Ford Lincoln Mercury Hyundai |
|
Check Latest Price |
 Metra 70-1721 for Select 1998-2013 Acura Honda Suzuki Metra 70-1721 for Select 1998-2013 Acura Honda Suzuki |
|
Check Latest Price |
| Scosche HA08BCB for Select 1998-2011 Acura and Honda |
|
Check Latest Price |
 Scosche FDK11B for Factory Amplified 2003-2012 Ford Lincoln Mercury Scosche FDK11B for Factory Amplified 2003-2012 Ford Lincoln Mercury |
|
Check Latest Price |
 Scosche SU03B for Select 1993-2009 Non-Amplified Subaru Scosche SU03B for Select 1993-2009 Non-Amplified Subaru |
|
Check Latest Price |
 Maestro HRN-RR-FO1 T-Harness for FO1 Ford Vehicles Maestro HRN-RR-FO1 T-Harness for FO1 Ford Vehicles |
|
Check Latest Price |
 DKMUS Universal ISO Wire Harness Pair DKMUS Universal ISO Wire Harness Pair |
|
Check Latest Price |
1. Metra 70-1761 Radio Wiring Harness for Select 1987-UP Toyota – Best Overall Toyota Pick
Metra 70-1761 Radio Wiring Harness Fits Select 1987-UP Toyota Vehicles Power + 4 Speaker (Packaging May Vary)
Copper core with PVC insulation
Plugs in at the radio location
Powers 4 speakers
4 x 0.5 x 3 inches
Pros
- Plug-and-play with no factory wire cutting
- Color-coded wires match aftermarket pigtails
- Compact 4 x 0.5 x 3 inch body
- Copper core conductors with PVC insulation
Cons
- No subwoofer or fifth speaker wire
- Packaging varies between production runs
This is the harness we reach for first on a Toyota, and it is the one we have fitted more often than any other part in this roundup. The factory connector plugs straight into the car harness at the radio location, and the loose end gives you the standard color-coded set to match to your head unit pigtail. There is no cutting into factory wiring and no adapter-to-adapter guessing.
What separates it from the other Toyota-compatible options is the volume of real installs behind it. It carries 12k+ reviews at a 4.5 rating, and the pattern in that feedback is remarkably consistent: people open the box, match yellow to yellow, red to red, black to black, and the radio powers up. The build is copper core with PVC and PE insulation rather than all-aluminum conductor, which is the single most useful spec on the datasheet.

Two details decide whether it is right for you. First, it powers four speakers, so if your Toyota has a factory subwoofer on a fifth channel you will need a separate speaker harness for that sub and an amp turn-on wire to drive it. Second, Toyota spans a very long production window here, from 1987 up, and fitment is keyed to the vehicle fit guide rather than to the year alone.
The physical size is 4 by 0.5 by 3 inches, which matters more than it sounds. It tucks behind the head unit inside the dash cavity without fighting the factory bracket, which is a real constraint in a Toyota dash where space behind the radio is tight.

Check the amplifier configuration before you order
This is a plain vehicle-specific harness. It does not include a data interface, an amplifier trigger, or an RCA output, so if your Toyota has a factory amplified system the speakers will come alive but the amplifier will not. Confirm from the build sticker whether the car has a factory amp, because Toyota fitment varies by trim and this part does not cover the amplified case.
If you also plan to add external amplification later, look at the 8 best stereo amplifiers tested and reviewed so you know what the RCA and remote wiring will need to look like before the dash goes back together.
When a different pick fits the job better
On a Ford-family vehicle this is the wrong connector entirely, and on a Honda or Acura you will find a dedicated harness with a longer model coverage. For an amplified Ford there is a purpose-built amplifier integration harness that this one cannot substitute for.
The packaging note is worth mentioning only because it surprises people. The listing states packaging may vary, so do not treat the box artwork as part of the specification. The harness itself is what carries the part number, and that is the number to match against your fit guide.
2. Metra 70-5520 Radio Replacement Harness for Select 2003-2019 Ford, Lincoln and Mercury – Best Value No-Cut Pick
Metra Electronics Radio Replacement Harness – Fits Select Ford/Hyundai/Land Rover/Lincoln/Mercury/VPG 2003-2019
24-way plug for power and speakers
Plugs into original radio connectors
No wire cutting needed
1 year manufacturer warranty
Pros
- No wire cutting on factory connectors
- Color-coded wires simplify matching
- 24-way plug handles power and speakers
- Tech support 7 days a week
- One year manufacturer warranty
Cons
- May need 70-5520AV for factory AV and DVD retention
- No factory amplifier trigger or data bus handling
The 24-way plug is the whole story with this one. It carries both the power connections and the speaker connections back to the factory radio socket in a single connector, so the install is genuinely plug-and-play at the vehicle end and match-to-match at the head unit end. It fits a wide swath of Ford, Lincoln, and Mercury vehicles from 2003 through 2019, plus Hyundai, Land Rover, and VPG.
With 5.6k+ reviews at a 4.5 rating and a best sellers rank of 21 in the category, this is one of the most widely installed harnesses in the aftermarket world. Buyers consistently describe the same thing: no wire cutting on the factory connectors, color-coded wires on the other side, radio in and working. Tech support is listed as available 7 days a week, which matters more than it sounds when you are mid-install.
Specifications are unremarkable in the best possible way. Weight is 9.07 g, dimensions are 4 by 0.5 by 3 inches, conductor is copper core with PVC insulation and jacketing, and the warranty is one year manufacturer. There is one item in the box, and it is the harness.
The thing to watch is what this harness is not built to do. It has no amplifier trigger line and no data interface, so a factory amplified vehicle with premium sound will power the head unit but leave the speakers quiet. That is a feature gap, not a fault, and it is what an amplifier integration harness exists to solve.
What to verify on a 2003-2019 Ford before you install
Check whether the vehicle has a factory amplifier. On non-amplified Ford trucks and sedans this harness is the correct and complete part, and reviews confirm it works without any additional interface. On amplified trims you want the dedicated amplified-system harness instead, listed further down.
If the car has a factory AV or DVD unit behind the dash, note that reviewers mention a separate harness, part number 70-5520AV, may be needed to retain that system. Losing the screen while gaining better audio is a legitimate trade, but it is better to know before the dash is apart.
How to terminate the wires on the head unit end
Do not twist and tape. The color-coded pigtail is designed to be joined to the head unit’s matching pigtail with a proper butt connector, and the r/CarAV consensus is that crimping is the gold standard for this joint. Our termination method is written up in full later in this guide.
Keep the ground connection short and clean. A loose or corroded black wire is the second most common cause of a head unit that powers on and then shuts off after a few seconds, and it has nothing to do with the harness quality.
3. Metra 70-1721 Wiring Harness for Select 1998-2013 Acura, Honda and Suzuki – Best for Honda and Acura Swaps
Metra 70-1721 Wiring Harness Fits Select 1998-2013 Acura/Suzuki/Honda Vehicles
20 pin plug for power and speakers
Fits select 1998-2013 Acura Honda Suzuki
Four speaker connection
1 year limited warranty
Pros
- Plugs into the original radio connectors
- Color-coded wires match aftermarket radios
- Four speaker power connection
- One year limited warranty
Cons
- No fifth speaker wire for a factory subwoofer
- Steering wheel control wire absent on some models
A 20-pin plug and a fifteen-year model window is an unusual combination of coverage, and it is why this is our default Honda and Acura recommendation. It plugs into the original radio connectors, the color-coded wires connect to the aftermarket radio, and no factory connector needs to be cut. Tech support from the manufacturer is listed as available 7 days a week.
The volume behind it is substantial, with 5.4k+ reviews at a 4.5 rating and a category rank of 12. The recurring review theme is a perfect fit for 1998 to 2013 models and an easy install without touching factory wiring, with several buyers noting the savings against a professional install. That last comment is the honest one: this is a part you can install yourself in an afternoon.
Build details are solid. Materials are listed as copper, aluminum, plastic, and rubber, wire diameter is 0.81 millimeters, dimensions are 8 by 5 by 1 inches, and weight is 9.07 g. The warranty is one year limited. The larger package dimensions reflect the wire length, not a bulky connector.
Two limitations come up repeatedly. There is no fifth speaker wire, so a factory subwoofer is not fed by this harness. On some models there is also no steering wheel control wire, which means the wheel buttons go dead the moment the OEM radio comes out.
Deciding between this and the crimp-connector alternative
The honest comparison is between bare wires and pre-terminated connectors. This harness gives you bare color-coded wires and lets you choose your own termination method, which is what most experienced installers prefer because they can control the crimp quality. If you want the fastest install and the fewest decisions, the Scosche alternative below ships with crimp connectors already attached.
For premium audio, neither of these is the right part. A Honda or Acura with factory Bose needs an interface that talks to the amplified system, and the plain harness will power the head unit while the speakers stay silent.
How to read the 20-pin plug on your own car
Twenty pins is the older Honda and Acura factory pattern and it looks nothing like a standard aftermarket ISO socket. If the plug behind your OEM radio is a single wide block connector of that shape, this is very likely the correct family, but the vehicle fit guide is still the authority.
Watch for the dual-connector case. Some OEM head units carry a grey 24-pin plug and a separate black 12-pin plug, and a harness that mates only the first one will leave the radio completely dead with no obvious symptom. Photograph both before ordering.
4. Scosche HA08BCB Aftermarket Radio Wiring Harness for Select 1998-2011 Acura and Honda – Top Rated Pick
Scosche HA08BCB Aftermarket Radio Wiring Harness with Crimp Connectors for Select 1998-11 Acura and Honda – Aftermarket Radio Wire Harness for Car Stereo – Check Vehicle List Below for Your Model
Pre-installed crimp connectors
Acura and Honda 1998-2011 list
Industry standard color coding
Bose needs a separate SLC4 interface
Pros
- Crimp connectors pre-installed to save time
- Extensive Acura and Honda model coverage
- Industry standard color-coded wires
- Limited lifetime warranty and tech support
Cons
- Bose systems need a separate SLC4 interface
- Crimp connectors may not suit every wire gauge
- Power wire occasionally needs reseating
This is one of the two highest-rated harnesses in the roundup, at 4.6 across 2.5k+ reviews, and the reason is not subtle. The crimp connectors come pre-installed on the pigtail, so the install stops being a termination exercise and becomes a plug-and-match exercise. For a first-time installer, that difference decides whether the job feels like wiring or like assembly.
Coverage is extensive across Acura and Honda models from 1998 to 2011, and the listing drives home the point that it asks you to check the vehicle list for your model. That is the correct instruction, and it is where the fitment guarantee actually lives. The wires use industry standard color coding, so they match the head unit pigtail without a translation table.

Physical details are practical for a cramped dash. Dimensions are 1 by 4.5 by 7.5 inches with an automotive stereo connector type and PVC construction, and the compact profile is designed to fit behind the stereo. Tech support and a limited lifetime warranty are both listed, which is longer coverage than most of the plain harnesses in this roundup offer.
The three limitations come straight from install feedback. On Bose-equipped vehicles it needs the Scosche SLC4 interface as a separate part, the pre-installed crimps may not suit every wire gauge you might otherwise reach for, and a small number of buyers report having to reseat the power wire in its connector.

Pre-installed crimps versus rolling your own
Factory crimps save time and remove one variable from the install. The trade is flexibility: if you need to change a termination or add a tap, you are working around a connector that is already on the wire. Reviewers generally consider that a fair trade, and the low complaint volume on this point supports that.
The gauge point is real enough to check before you start. If your plan involves splicing extra speaker wire or an amplifier remote into a pigtail wire, bare-wire harnesses give you more room to do it cleanly than pre-terminated ones.
What changes if your Honda has factory Bose
Premium audio changes the part entirely. The SLC4 interface is the piece that lets the head unit talk to the factory amplified system, and without it the radio installs and powers up but the speakers produce nothing. Identify the amplifier before you order rather than after the dash is closed back up.
That single check is the highest-value five minutes in this whole process, and it applies to every brand in this roundup. Fitment first, wiring second, always in that order.
5. Scosche FDK11B Aftermarket Radio Wiring Harness for Factory Amplified 2003-2012 Ford, Lincoln and Mercury – Best for Factory Amplifier Retain
Scosche FDK11B Aftermarket Radio Wiring Harness for Select Factory Amplified 2003-12 Ford, Lincoln and Mercury Vehicles – Car Stereo Wire Harness – Check Vehicle List Notes in Images for Your Model
Factory amplified Ford Lincoln Mercury 2003-2012
RCA subwoofer amp input
Individually labeled wires
Limited lifetime warranty
Pros
- Built for factory amplified systems
- RCA output for the subwoofer amp
- Each wire individually labeled
- No factory wiring cutting required
Cons
- Only for factory amplified trims and not base audio
- Fitment varies by trim level so verify first
Most harnesses fail the amplified test in the same way: the head unit powers up, you turn the volume up, and nothing comes out because the factory amplifier has no trigger. This one is built for exactly that situation on 2003 through 2012 factory amplified Ford, Lincoln, and Mercury vehicles, and it comes in at 1.8k+ reviews with a 4.4 rating.
The RCA connectors for the subwoofer amplifier input are the feature that separates it from a plain harness. On a factory amplified Ford the sub is fed through its own channel, and having the RCA output already on the harness saves you from building that path yourself with an extra interface and a bundle of cable.

Every wire is individually labeled and the colors follow the EIA industry standard, which is worth more in an amplified install because there are simply more wires to sort. The construction is plastic with an RCA connector type, weight is 1.92 ounces, and dimensions are 6 by 4 by 0.5 inches. No factory wiring cutting is required.
Coverage is backed by a limited lifetime warranty and lifetime tech support, both listed on the product. For a harness that has to sit in a hot dash cavity next to an amplifier for a decade, that coverage is a reasonable signal about the connector and wire quality.

Confirm the amplifier is factory before buying
This harness supports factory amplified systems only. On a base audio Ford it is the wrong part, because base audio trucks and sedans do not need the amplifier trigger and you would carry a feature the car cannot use. Reviewers flag this repeatedly as the number one thing to check.
Trim level is the second thing to check. The same model year can ship with base audio on one trim and a premium amplified system on another, and the listing explicitly asks you to check the vehicle list notes. Verify against the build sticker rather than the trim badge.
How this changes the rest of your parts list
An amplified Ford install usually needs a dash kit sized for the opening, an antenna adapter, and possibly a trim ring to fill the gap left by a factory screen. If you are adding your own subwoofer later, the RCA output here is the starting point, and our 8 best stereo amplifiers for bookshelf speakers covers the amp side of that build.
Budget your time as a full dashboard job rather than a wire job. On a 2003 to 2012 Ford, removing the factory screen and trim to get to the radio connector is most of the work, and the harness is the easy part.
6. Scosche SU03B Car Radio Wiring Harness for Select 1993-2009 Non-Amplified Subaru – Best for Older Non-Amplified Subaru
Scosche SU03B Car Radio Wiring Harness Compatible with Select 1993-2009 Non-Amplified Subaru Vehicles – Aftermarket Stereo Receiver Wire Adapter Kit – See Fit Guide in Images to Verify Your Vehicle
Non-amplified Subaru 1993-2009
Quick-disconnect terminal
Copper core with PVC insulation
6 x 4 x 0.5 inches
Pros
- Highest rated harness in this roundup
- Copper core wire with PVC insulation
- No special tools required
- Factory quality automotive grade wires
Cons
- Not compatible with factory amplified Subarus
- Limited to 1993-2009 non-amplified models
At 4.7 across 1.7k+ reviews, this is the highest-rated product in the roundup, and for a narrow use case that rating is earned rather than accidental. It is purpose-built for 1993 through 2009 Subaru vehicles that do not have a factory amplified system, which is a large share of the Subarus on the road today.
The quick-disconnect terminal type is what makes repeated installs painless. The factory connector releases and re-seats without tools, so if you ever need to pull the radio again you are not fighting a locked plastic housing in a cramped footwell. Buyers call out the copper core wire with PVC insulation as a step up from what they were using before.

No special tools are required, and the wires are described as factory quality automotive grade, which matters in a car where the harness sits through a full season cycle of heat and cold. Dimensions are 6 by 4 by 0.5 inches, and the warranty coverage includes lifetime tech support with a limited lifetime warranty.
The limitation is stated plainly on the product itself: not compatible with factory amplified systems. If your Subaru has the factory amplifier, a plain harness will power the head unit and leave you with silence, and no amount of correct wire matching will change that.

How to tell if your Subaru is amplified
Trim level and model year both matter, and the cleanest check is a door jamb build sticker. If your Subaru lists a factory amplifier, this harness is the wrong part and you need one built for the amplified system. If it does not, this is the correct and complete answer.
Older base-audio Subarus are exactly the vehicles most likely to need this part, because the OEM head units in that era tend to fail rather than degrade. A working factory radio in a 2004 Subaru is a genuine rarity, which is why the demand for this harness is what it is.
What to pair it with on a double DIN opening
The harness only handles power and speakers. A double DIN touchscreen needs a dash kit to fill the factory opening, and many Subaru dashboards also need an antenna adapter to move the factory antenna signal to a threaded coaxial input on the new head unit.
On some of these vehicles the factory screen also carries the climate control panel, which changes the job substantially. Confirm whether the screen is a standalone audio unit or a shared unit before you plan the teardown.
7. Maestro HRN-RR-FO1 Plug and Play T-Harness for FO1 Ford Vehicles – Best for Steering Wheel Control Retention
Maestro HRN-RR-FO1 Plug and Play T-Harness for FO1 Ford Vehicles
Ford T-harness for 2006-up vehicles
Retains steering wheel audio controls
Retains the factory amplifier
Needs a Maestro ADS-MRR module
Pros
- Keeps steering wheel audio controls working
- Retains the factory amplifier
- Shows engine data on compatible head units
- Works with select Alpine JVC Kenwood and Pioneer
Cons
- Requires a separate Maestro ADS-MRR module
- FO1 platform vehicles only
- Higher cost than a plain vehicle harness
This is the only pick in the roundup built around a data interface rather than a plain wire adapter, and that is the entire point. The T-shaped design keeps the factory connector and the aftermarket head unit connected simultaneously, which is what allows the steering wheel audio buttons, the factory amplifier, and vehicle data to keep working after the swap.
It covers select 2006-up Ford, Lincoln, Mercury, and Mazda vehicles on the FO1 platform, and it is compatible with select Alpine, JVC, Kenwood, and Pioneer receivers. Reviewers confirm that it works as advertised when paired with the module it depends on, and that the higher cost is justified by the retained factory features.
The module requirement is the detail to plan around. This harness requires a Maestro ADS-MRR module, which is a separate purchase, so the total for the wiring side of the install is the harness plus the module. The 4.4 rating sits across 277 reviews, a much smaller pool than the plain harnesses, which is expected for a platform-specific data product.
Construction is copper core with PVC insulation on a flat ribbon cable with Ford-specific connectors, weight is 8 ounces, and dimensions are 4.7 by 7.8 by 1.3 inches. On a compatible touchscreen receiver it can also display engine performance data, which is a genuine bonus rather than a gimmick.
Decide whether you actually need a data interface
If your steering wheel has volume and track buttons and you want them to keep working, you need a data interface harness like this one. If your car has no steering wheel audio controls, or you do not mind losing them, a plain vehicle-specific harness does the same job for a fraction of the cost.
The diagnostic is simple. Sit in the car with the ignition on and press the volume buttons. If the OEM radio responds, those buttons run through a data connection and a plain harness will kill them. That single test saves a lot of money on cars that do not need this part.
What the module does and why it is not optional
The Maestro ADS-MRR module is the piece that translates the vehicle data bus into the button signals the aftermarket head unit understands. The T-harness carries the wires, the module does the translating, and without the module you have an expensive Y-shaped cable.
Check receiver compatibility before ordering. This harness is listed for select Alpine, JVC, Kenwood, and Pioneer units, and pairing it with a receiver outside that list can mean the steering wheel buttons never pair at all, which is a harder problem to debug than a dead radio.
8. DKMUS Universal ISO Car Radio Wire Cable Harness Pair – Most Versatile for Bench and Universal Fits
DKMUS Universal ISO Car Radio Wire Cable Wiring Harness Stereo Adapter Connector Adaptor Plug Power and Loudspeaker Female
Universal ISO power and speaker pair
Standard ISO pinout
Copper conductors
Sold as a 2 pack
Pros
- Universal ISO fit for most aftermarket radios
- Copper wires rather than aluminum
- Power and speaker connectors in one pack
- Low cost way to test a head unit swap
Cons
- No wire chart or labeling included
- Connector fit can sit looser than OEM
- Power wire positions may need verification
This is the one to buy when the head unit has an ISO socket and you are not installing into a specific car, or when you are bench-testing a radio before committing to a vehicle. You get a pair of universal ISO connectors, one for power and one for speakers, on a standard pinout with copper conductors rather than the aluminum you often find at this level.
The 4.4 rating across 695 reviews reflects a simple, honest part. The universal compatibility is real, the pair packaging means you get both connectors in one order, and the copper wire conductivity is called out as a genuine improvement over cheaper alternatives. The dimensions are compact at 0.39 inches cubed, so it is easy to work with in a small space.
The three limitations are worth taking seriously. There is no wire chart or labeling included, so you are relying on standard colors to tell you what each pin does. The connector fit may sit looser than an OEM connector, which can produce an intermittent power connection if it is not seated fully.
Most importantly, the power wire positions may need verification against your specific head unit. This is the reason universal harnesses get returned, and it is also the reason the vehicle-specific harnesses above exist at all.
When a universal ISO pair is the right call
Three situations make this the correct pick. Bench-testing a head unit on a bench with a 12V supply and a pair of speakers, working on a car where the factory connector has already been removed, or pairing with a vehicle-specific harness as the head unit side of the connection.
It is also a reasonable low-risk first purchase for a first-time installer. If you buy the wrong thing, the loss is small, and you learn the wire colors and the termination method on a part that is easy to swap.
When to buy a vehicle-specific harness instead
Any time you are installing into an actual vehicle, a vehicle-specific harness is better. It matches the connector physically, it is keyed to the vehicle so it cannot be installed backwards, and its wire labels are laid out for that car’s factory connector rather than for a generic ISO socket.
Universal ISO harnesses also do nothing for factory amplifiers, steering wheel controls, or data retention. If your car has any of those, the vehicle-specific or data interface route is the only one that ends with a working system.
Vehicle-Specific vs Universal ISO Harnesses: Which One You Need
No, car stereo wiring harnesses are not all the same, and the difference is whether the part mates to your car or to your head unit. A vehicle-specific harness solves the car side of the problem. A universal ISO harness solves the head unit side, and leaves the car side to you.
That division is worth sitting with, because it explains almost every purchasing mistake in this category. When someone buys a universal ISO adapter expecting it to plug into their Toyota, it does not plug into anything, because a Toyota factory connector is a proprietary block, not an ISO socket.
Vehicle-specific harnesses win on fit. The connector is keyed so it physically cannot go in backwards, the wire labels correspond to that car’s factory connector, and the manufacturer publishes a fitment guide. They lose on price, which is the reason the universal option exists.
Universal ISO harnesses win on flexibility and cost. They let you bench-test a head unit, they are the standard for DIY projects, and they work with most aftermarket units built to the ISO standard. They lose on fit certainty, and they give you no help with a factory amplifier or a data bus.
The practical rule we use: if the harness is going into a car, buy vehicle-specific. If it is going onto a bench, buy universal ISO. The only situation that mixes the two is a project where the vehicle-specific harness terminates into an ISO socket at the head unit end, which is a normal arrangement on a properly designed adapter.
Decoding Metra and Scosche Part Numbers
Metra part numbers are not random, and once you know the prefixes you can tell in two seconds whether a listing is selling you a wiring harness or a dash kit. This is the single most useful thing to learn before you start shopping, and no competitor guide covers it.
70-xxxx
Radio wiring harness. This is the adapter that plugs into the factory radio connector and gives you color-coded wires. The four digits after the prefix encode the vehicle application, so a 70-1761 and a 70-1721 are different vehicles entirely.
95-xxxx
Double DIN dash kit or radio install kit. This is the plastic bracket assembly that holds a double DIN head unit in the factory opening. It is not a wiring harness, even though the listings sit next to each other.
99-xxxx
Single DIN dash kit. Same idea for a single DIN head unit in a factory double DIN opening. Again, not wiring.
82-xxxx
Speaker wiring harness adapter. This handles a specific speaker, most often a factory subwoofer, rather than the whole radio harness. It is the part that solves the missing fifth speaker wire.
Scosche uses a different convention that is easier to read. Model numbers beginning with HA are general wiring harnesses, FDK is a Ford-specific family, SU is Subaru-specific, and SLC is an interface for factory amplified systems such as factory Bose. The letters tell you the family before you read a single word of the listing.
The practical version of all of this: before you compare prices, compare part numbers. Two harnesses with the same brand and a similar-looking number can be for entirely different vehicles, and a part number match is the only check that reliably tells you the connector is the right shape.
How to Terminate the Wires: Crimp, Solder, or Solderless
Crimp your connections and leave the factory harness intact. That is the method consensus in the install communities and it is what we use, with solder and heat shrink as a defensible alternative for anyone more comfortable with an iron.
Strip and match. Strip a short length of each wire, match the harness color to the head unit pigtail color, and confirm your match before you crimp anything. Yellow to yellow, red to red, black to black, orange to orange.
Crimp with a proper ratchet crimper. Use a ratcheting crimp tool and the correct butt connector for the wire gauge. Strip only enough insulation to fill the connector barrel with no exposed copper poking out the far end.
Heat shrink over the joint. Slide heat shrink tubing over the crimp before you crimp, or use adhesive-lined tubing afterward. This is what stops a vibration-damaged connection from opening up months later in a car.
Pull test every joint. Tug each wire firmly. A good crimp will not move at all. Anything that slides needs redoing before the head unit goes in the dash.
Keep ground short and clean. Scrape the paint off the ground point, clean the metal, and keep that wire as short as possible. Ground faults cause the head unit that powers on and immediately shuts down.
Never cut the factory harness. The adapter exists so the original wiring stays intact and the car can go back together. Cutting into factory wiring is what turns a one-afternoon job into a rewiring job.
If you prefer solder, the reasoning in the forums is worth understanding. A clean solder joint with heat shrink over it is electrically excellent, and the objection most experienced installers raise is workmanship rather than physics: a cold solder joint inside a vibrating dash fails later, and crimping is far more forgiving of a mediocre joint. If you are new to this, our 10 best soldering stations for guitar wiring guide is a reasonable way to build the skills properly.
Solderless butt connectors fall somewhere in the middle. They are the fastest option and they avoid an iron entirely, which matters in a cramped dash, but the connection quality depends more on tool quality than crimping does. Whichever method you pick, the pull test in step four is the one that tells you the truth.
The Complete Parts List for a Head Unit Swap
Beyond the head unit itself, a complete install needs a wiring harness, a dash kit, and usually an antenna adapter. Most first-time installers discover the antenna adapter partway through the job, and it is the item that most often gets set aside on the bench.
Radio wiring harness – vehicle-specific, chosen for amplifier configuration and steering wheel control retention. Not optional in any car we have worked on.
Dash kit or radio install kit – sized to your opening. A double DIN head unit needs a 95-series style double DIN kit, a single DIN head unit in a double DIN opening needs the single DIN equivalent plus a filler trim ring.
Antenna adapter – a short coaxial pigtail with a factory snap-on connector on one end and a threaded female input on the other. Cheap, and the single most commonly forgotten item.
Antenna amplifier (power injector) – needed when the vehicle uses a powered antenna or a power antenna lead rather than a passive signal wire. Check whether the antenna lead in your car is powered.
Trim ring or collar – fills the gap left around a smaller head unit in a larger factory opening and stops the unit rattling.
Data interface module – only if your car needs one. Required on a Ford T-harness install for steering wheel controls, and required on many factory Bose and premium audio systems to speak to the amplifier.
Speaker harness adapter – for a factory subwoofer, or where the factory speakers use a connector the head unit does not have.
Fasteners and a trim removal kit – the plastic clips that hold factory trim panels break if you pry them. A trim kit and a set of spare clips save an hour.
Butt connectors and heat shrink – plus a ratcheting crimper. This is the one part of the list people already have and people forget to count.
Single DIN versus double DIN is the branch point in that list. A single DIN head unit is the narrow one-slot format and typically drops into a double DIN opening with a bracket and a trim ring. A double DIN head unit is the wide touchscreen format and needs a full double DIN kit, which is a larger plastic assembly and often the reason a screen install takes a whole day.
Troubleshooting: Why Your Aftermarket Radio Will Not Turn On
If the head unit is completely dead, the cause is almost always one of five things, and you can check all of them before you buy another part. Work through them in order, because the first two account for most of the failures we see.
The dual-connector OEM head unit. Some factory head units have two plugs behind them, typically a grey 24-pin connector and a separate black 12-pin connector. An adapter that mates only the 24-pin leaves the radio dead with no obvious symptom, and it is the single most reported confusion in owner forums. The 12-pin is often a factory amplifier control plug rather than a second radio plug, which means the correct part for that vehicle includes both. This is exactly why step one of the fitment process is to photograph both connectors.
No accessory power. The red wire is the accessory or ignition-switched lead, and it only has power when the key is on. If you tested it and saw nothing, you are on the wrong pin or the wrong connector. Check at the head unit end rather than at the vehicle end, because a half-seated connector will read as no power.
No ground. The black wire needs a clean metal connection, not a connection through paint. Scrape, clean, and tighten. A weak ground produces a head unit that lights up for a second and shuts down, which people frequently misdiagnose as a bad radio.
The data bus is blocking power. On many modern vehicles the head unit does not receive power until it completes a handshake on the data bus. Installing a plain harness on a car that requires an interface produces a radio that never turns on at all, with every wire correctly matched. The symptom is identical to a missing accessory wire, which is why the check order matters.
A seized or bent pin. A connector that was forced can have a terminal pushed back inside the housing where you cannot see it. Look at the plug face under a light, compare pin positions side by side with a known good connector, and replace the harness if a pin is out of line.
One more, non-electrical failure mode worth naming: coded anti-theft and telematics. On vehicles with OnStar or a coded ignition, removing the factory radio can disable features permanently if the module is not put into service mode first. Check the vehicle-specific instructions before you pull anything, because that damage is not reversible with a new harness.
What a Wiring Harness Is Not
A stereo wiring harness adapter is not a power kit, and it is not an amplifier kit, and it is not a bag of speaker wire. These get bundled together in search results and marketing language, and conflating them is a fast way to buy the wrong part twice.
Not a power kit. A power kit is the big cable set with a fuse, a distribution block, and heavy gauge wire that feeds an aftermarket amplifier directly off the battery. Your harness is the opposite: a small adapter that carries whatever the factory radio connector already provides.
Not an amplifier kit. An amp kit supplies the wiring, terminals, and fuse block for a new amplifier and its subwoofer. Your harness may include one RCA pair for a factory amp, but it will not run power to an aftermarket amp you add later.
Not speaker wire or an interconnect. Speaker wire is the raw copper run from an amp to a speaker, and RCA interconnects are the signal cables between a head unit and an amp or processor. A harness adapter is a short, keyed, vehicle-specific connector with color-coded leads.
Not a dash kit. This is the mix-up that catches people who search by brand. The dash kit is the plastic bracket assembly that holds the head unit in the opening. A 95-series or 99-series part number is a kit, not a harness.
Not a decoder box. A CAN bus decoder box is a separate module that fakes a data handshake on vehicles that gate power and steering wheel functions behind the bus. If your car needs one, you need the module in addition to the harness, not instead of it.
That last point is the one worth restating. A plain harness does not decode anything. On a vehicle where the head unit must complete a data handshake before power is released, the harness gets you a physical connection and the decoder or interface module is what actually gets you a working radio.
The Install Order That Works
Run the job in this sequence and you will not have the head unit sitting finished in the dash with a problem you cannot reach. The order matters because the later steps are much harder once the dash is closed.
Confirm fitment and gather the parts. Verify the part number against the vehicle fit guide, and confirm the amplifier configuration before the dash is apart. This is the step that prevents a second teardown.
Battery first, always. Disconnect the negative battery terminal before touching the factory radio connector. On vehicles with coded anti-theft, also put the module into service mode so the radio releases properly instead of locking the system out.
Remove the dash trim and the factory radio. Pull the fascia and the head unit to expose the connector. Photograph the connectors here, before anything is unplugged, while you can still see the whole arrangement.
Fit the harness to the vehicle end. Plug the adapter into the factory connector and confirm it is fully seated. Do not connect the head unit end yet; leaving it disconnected means there is no load on the factory circuit while you work.
Terminate the head unit end. Match colors, crimp or solder, heat shrink, and pull test every joint. Connect the antenna adapter and any factory amplifier or interface connections at this stage while there is still open access.
Test before you reassemble. Reconnect the battery, turn the key on, and confirm the head unit powers, that the speakers play on all channels, and that any steering wheel buttons or retained features respond. Only then push the radio back into the dash and refit the trim.
Step six is the one that gets skipped. It is entirely possible to build a beautiful installation, push the radio in, clip the fascia back on, and then discover a loose ground wire that means pulling the whole thing apart again.
Where to Buy and How to Verify Fitment First
Where you buy matters less than what you verify before you buy, and the verification step is the same everywhere. Check the part number against the manufacturer fitment guide for your exact year, model, and amplifier configuration, then save the listing in case you need to return it.
General marketplaces give you the largest selection and the fastest comparison, and their weakness is fitment accuracy on the listing text. Fitment claims on marketplace listings are often copied from the part number rather than verified against a real vehicle, so treat them as a starting point and confirm independently.
Specialist car audio retailers carry better-documented parts and usually publish the manufacturer fitment chart alongside the product. Their support teams can confirm a vehicle-specific part number for you, which is genuinely useful on older vehicles where fitment is ambiguous.
For an older vehicle, ask two questions before you commit. Can this part be returned if the fitment turns out to be wrong, and can I speak to someone about the fitment before ordering. Harnesses for older cars are harder to source than modern ones, so a return window matters more than usual on a vehicle you cannot easily test.
Frequently Asked Questions
Do I need a new wiring harness for an aftermarket radio?
Yes, in almost every vehicle-specific install. An aftermarket head unit has a standard color-coded pigtail, and your car has a proprietary connector, so something must bridge the two. That bridge is the harness adapter. Skipping it means cutting and splicing your factory wiring, which risks damaged connectors, a dead battery from a constant 12V miswire, and features like steering wheel controls and the factory amplifier that stop working.
How do I figure out which wiring harness adapter fits my car?
Pull the factory radio and photograph the connector, then match the year, make, model, and trim level against the manufacturer vehicle fit guide. Also confirm whether the car has a factory amplifier, because that decides between a plain harness and an amplifier integration harness. If your head unit has two plugs behind it, note both, since some adapters mate only one of them and leave the radio completely dead.
Are all car stereo wiring harnesses the same?
No. A vehicle-specific harness mates to your car factory connector and gives you color-coded wires. A universal ISO harness mates to a head unit ISO socket and leaves the car side to you. An amplifier integration harness adds the factory amplifier trigger and sometimes RCA outputs. A data interface T-harness keeps steering wheel controls and vehicle data alive. They are not interchangeable even when the color coding looks identical.
Which color is the accessory wire on an aftermarket radio wiring harness?
The accessory wire is red, and it is the ignition-switched 12V lead that tells the head unit the ignition is on. Yellow is constant 12V, which stays live with the key off and feeds memory. Black is ground, orange or orange and white is the illumination or dimmer wire, and blue or blue and white is the remote or amplifier turn-on lead. Speaker wires come in matched positive and negative pairs.
What all do I need to install an aftermarket radio?
At minimum you need a vehicle-specific wiring harness, a dash kit matched to the opening, and an antenna adapter. Frequently also needed: a trim ring for smaller head units, an antenna amplifier injector if the vehicle uses a powered antenna lead, a data interface module when steering wheel controls or factory premium audio must keep working, and a speaker harness adapter for a factory subwoofer. Add butt connectors, heat shrink, and a ratcheting crimper.
Why will my new aftermarket radio not turn on after install?
Five causes account for nearly all of it. A dual-connector OEM head unit where the adapter mates only one plug. No accessory power on the red wire, or a bad connection. A weak ground on the black wire. A data bus that requires an interface module to release power. And a bent or pushed-back pin inside a connector. Check the red wire with the key on and the ground to clean bare metal before you replace any part.
What are the different types of stereo connectors?
The common ones are the 16-pin ISO and 20-pin ISO aftermarket power and speaker sockets, the Euro ISO standard used on European imports, the grey 24-pin and black 12-pin proprietary blocks found on many GM, Ford, and Chrysler head units, and the 2-pin amplifier connector used on factory amplified systems. A vehicle-specific adapter ends in whichever connector your car uses, and a universal ISO adapter ends in the standard aftermarket socket.
The Best Car Stereo Wiring Harness for Your Install in 2026
After working through all of these, the pick logic comes down to two questions. Does your car have a factory amplifier, and do your steering wheel audio buttons have to keep working. Everything else is fitment and price.
For a non-amplified Toyota, the Metra 70-1761 is our first choice. It is the most-installed plain harness in this roundup at over 12k reviews, the copper conductor build is right, and it disappears behind the head unit without a fight. For a non-amplified Ford, Lincoln, or Mercury between 2003 and 2019, the Metra 70-5520 does the same job with a 24-way plug that carries power and speakers together.
For a Honda or Acura, the choice is between bare wires and pre-crimped connectors rather than between brands. Take the Scosche HA08BCB if you want the fastest install and the highest rating in this list, and the Metra 70-1721 if you want control over your own terminations and a wider model window. For an amplified Ford between 2003 and 2012, only the Scosche FDK11B is built for the job, with the amplifier trigger and the RCA subwoofer output already there.
For a non-amplified Subaru from 1993 to 2009, the Scosche SU03B is the right part and the 4.7 rating backs that up. When steering wheel controls must survive on a 2006-up Ford platform vehicle, the Maestro HRN-RR-FO1 T-harness plus its required module is the only approach in this roundup that keeps them alive, and it also retains the factory amplifier.
Before you order anything, do the one verification step that prevents every mistake described in this guide: pull the factory radio, photograph every connector, confirm the amplifier configuration from the door jamb build sticker, and match the result to the manufacturer fitment chart for the part number. Ten minutes there saves an entire weekend, and it is the reason the best car stereo wiring harnesses for installs are the ones chosen by part number rather than by listing title.